Accept Payment — connect a card terminal
Take card payments right at the front desk using a nadapayments card terminal.
Once a terminal is connected, staff can charge a patient's invoice on the device — the
amount is sent to the terminal, the customer taps/dips/swipes, and the invoice is paid.
This page is the one-time setup (usually done by a manager). To learn how to take a
payment day-to-day, see Accept Payment — take a card payment.
Before you start
- A nadapayments card terminal.
- Access to the nadapayments / iPOSpays portal (
portal.ipospays.com) for that
device — this is where you copy the terminal's numbers from. - A SightHub account that can manage integrations.
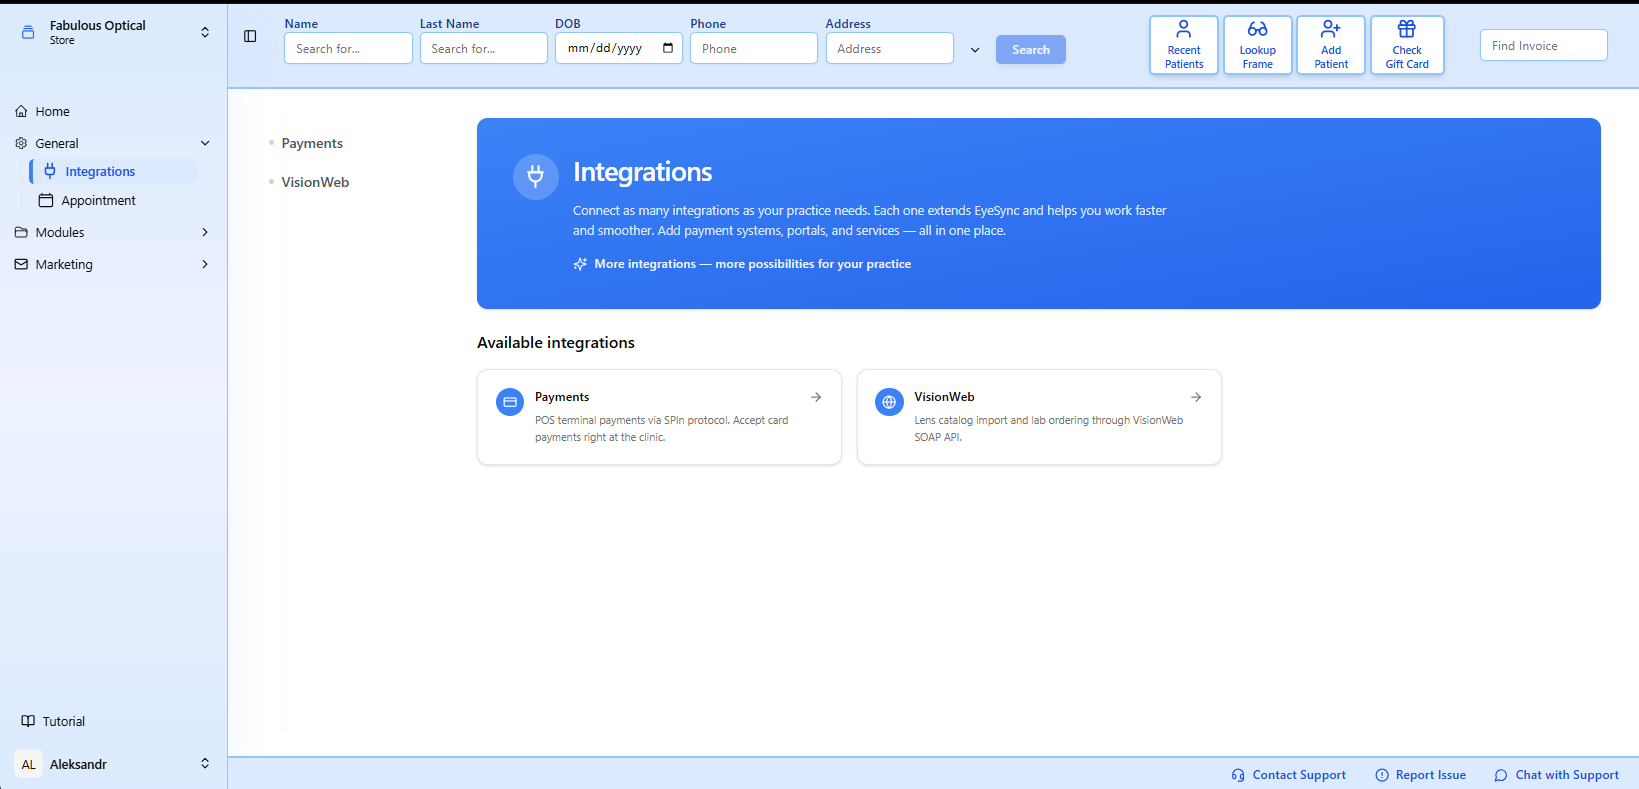
1. Open Payments
Go to General → Integrations and open the Payments card.
2. Your terminals
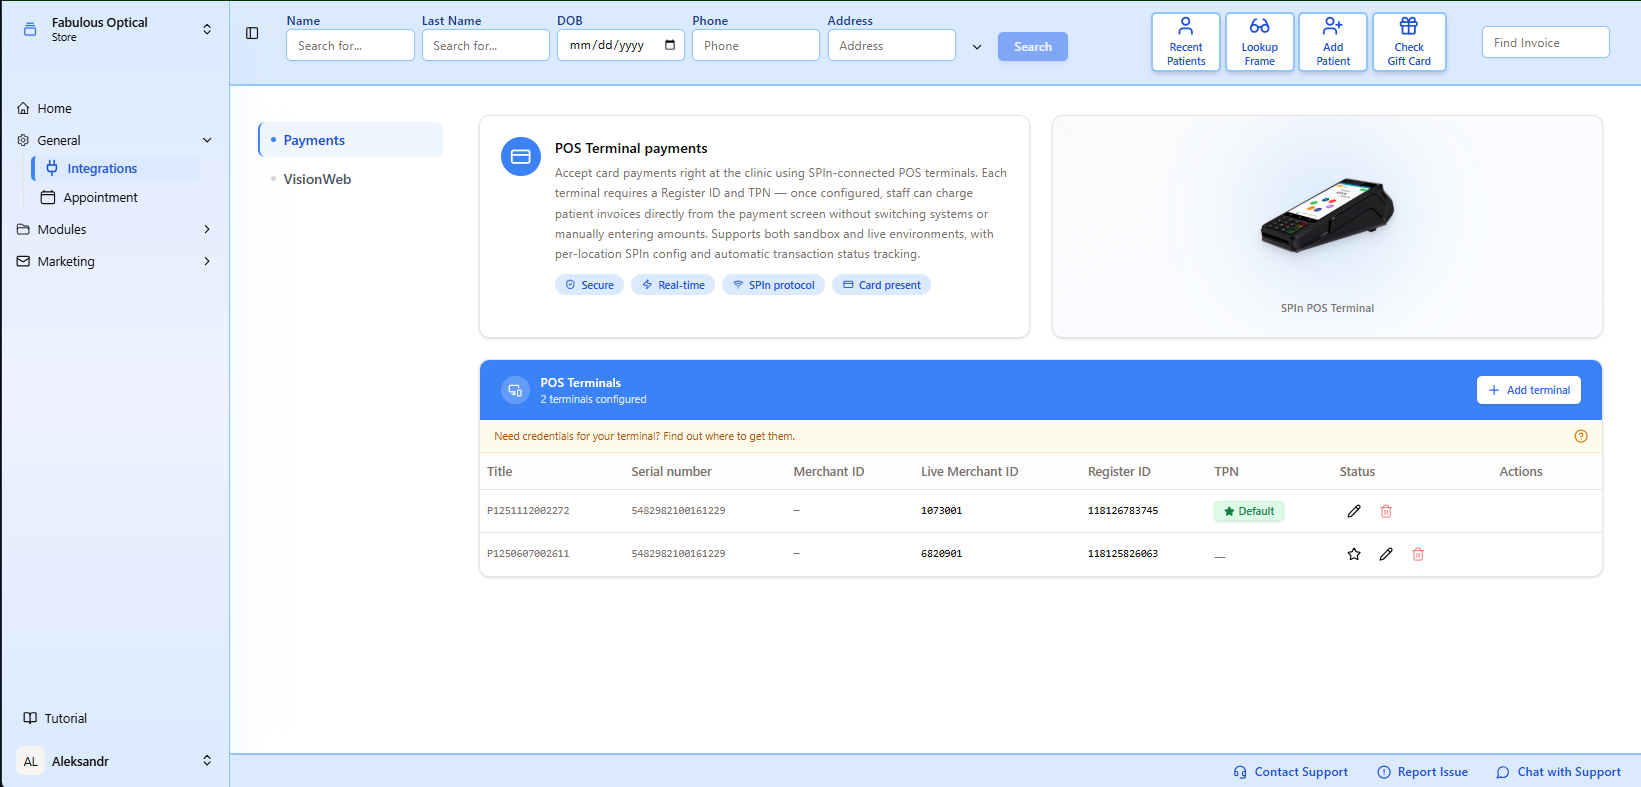
You'll see POS Terminals with any devices already connected. From here you can:
- + Add terminal — connect a new device
- ✏️ pencil — edit a device
- ⭐ star — make a device the default (the one preselected at payment time)
- 🗑️ trash — remove a device
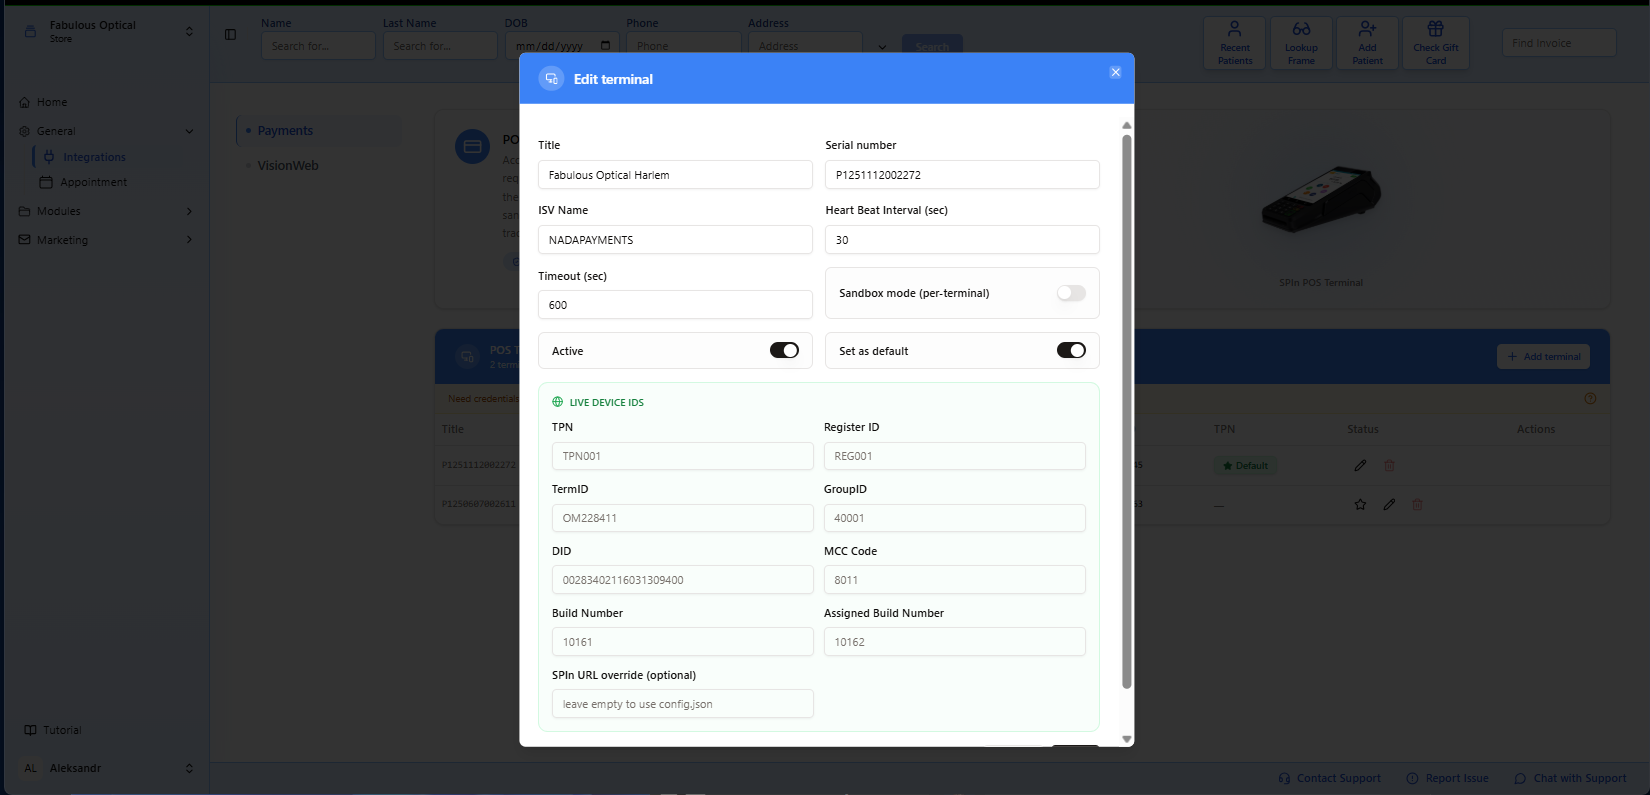
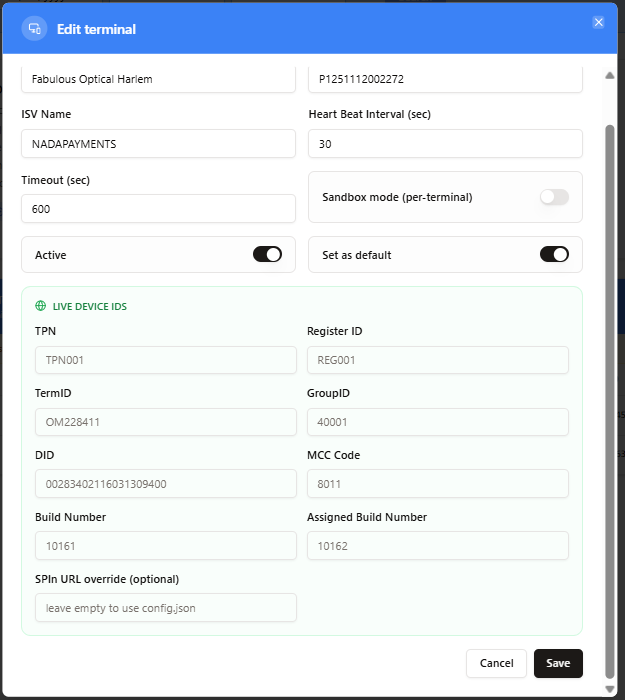
3. Fill in the terminal
Click Add terminal (or the pencil to edit) and fill in the form.
The three things that make it work
Open your device in the iPOSpays portal → About Device and copy these across. With
just these three (and the terminal switched Active) the terminal can take payments:
- TPN — shown at the top of About Device (
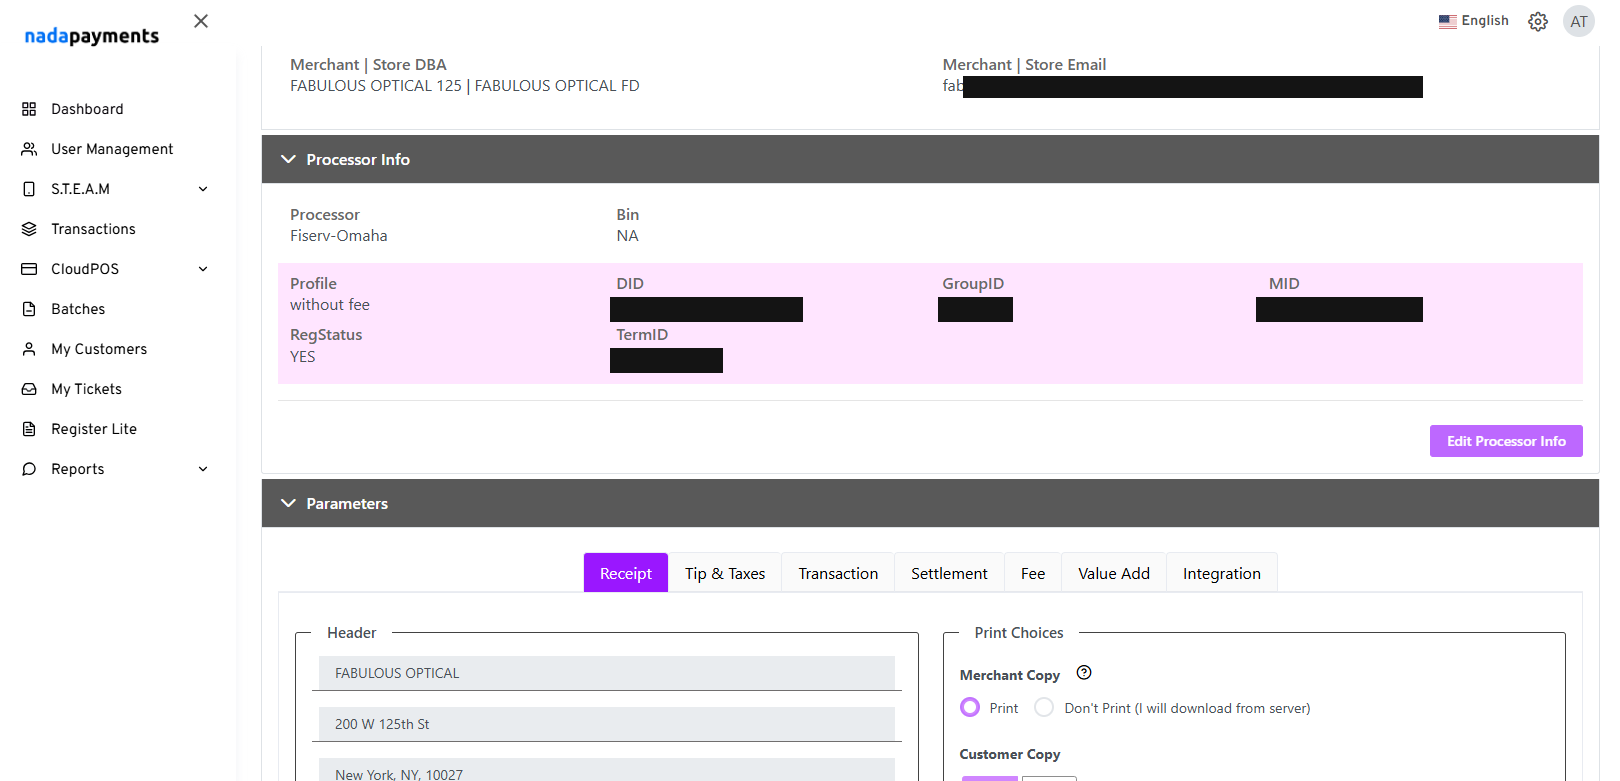
About Device (TPN: …)). - Merchant ID (MID) — under Processor Info.
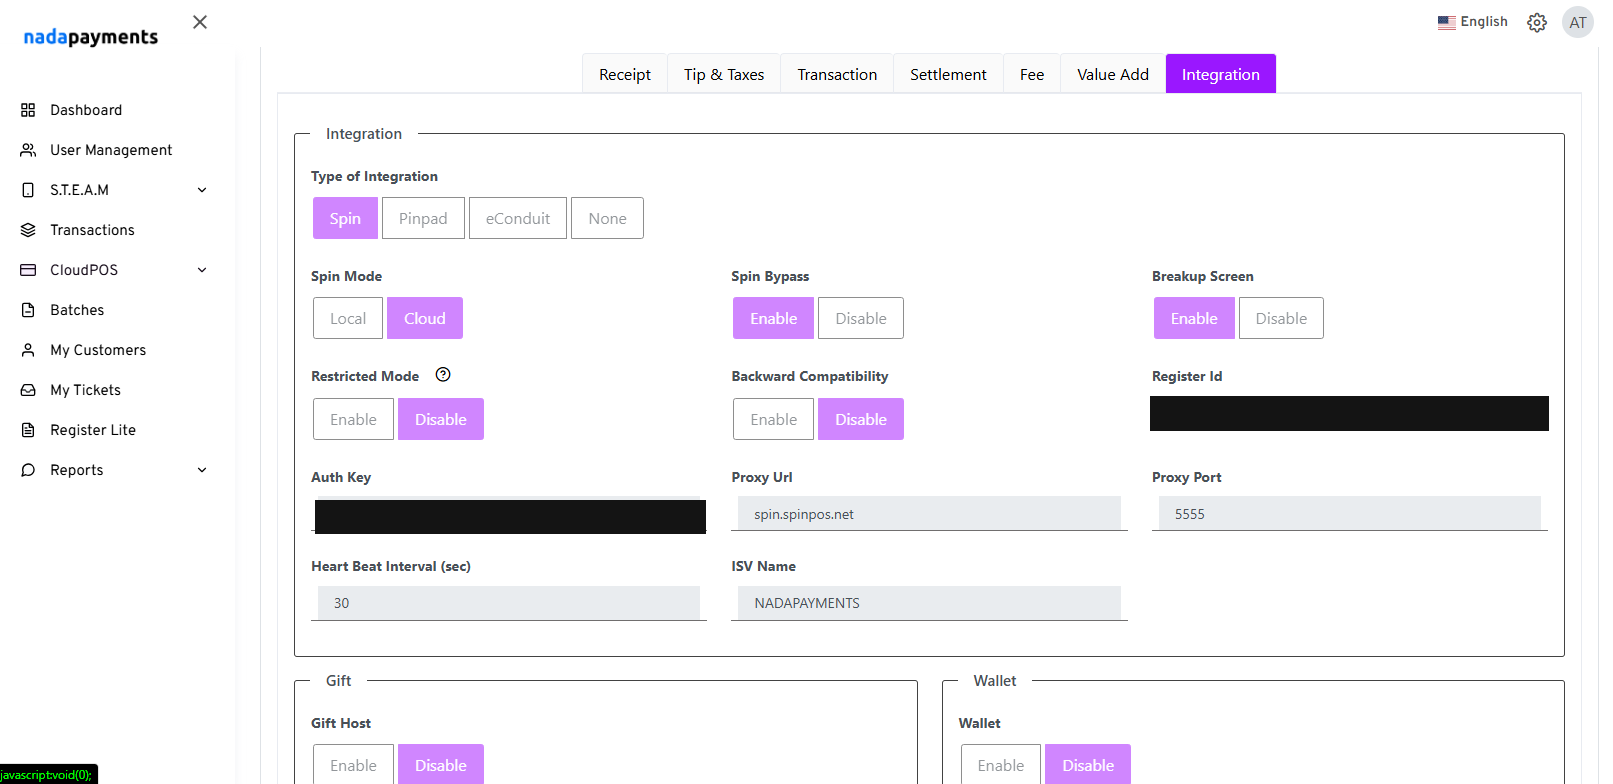
- Auth Key or Auth Token — under Integration. Copy either one
(the short Auth Key, or the long Auth Token).
Where to find these in the iPOSpays portal
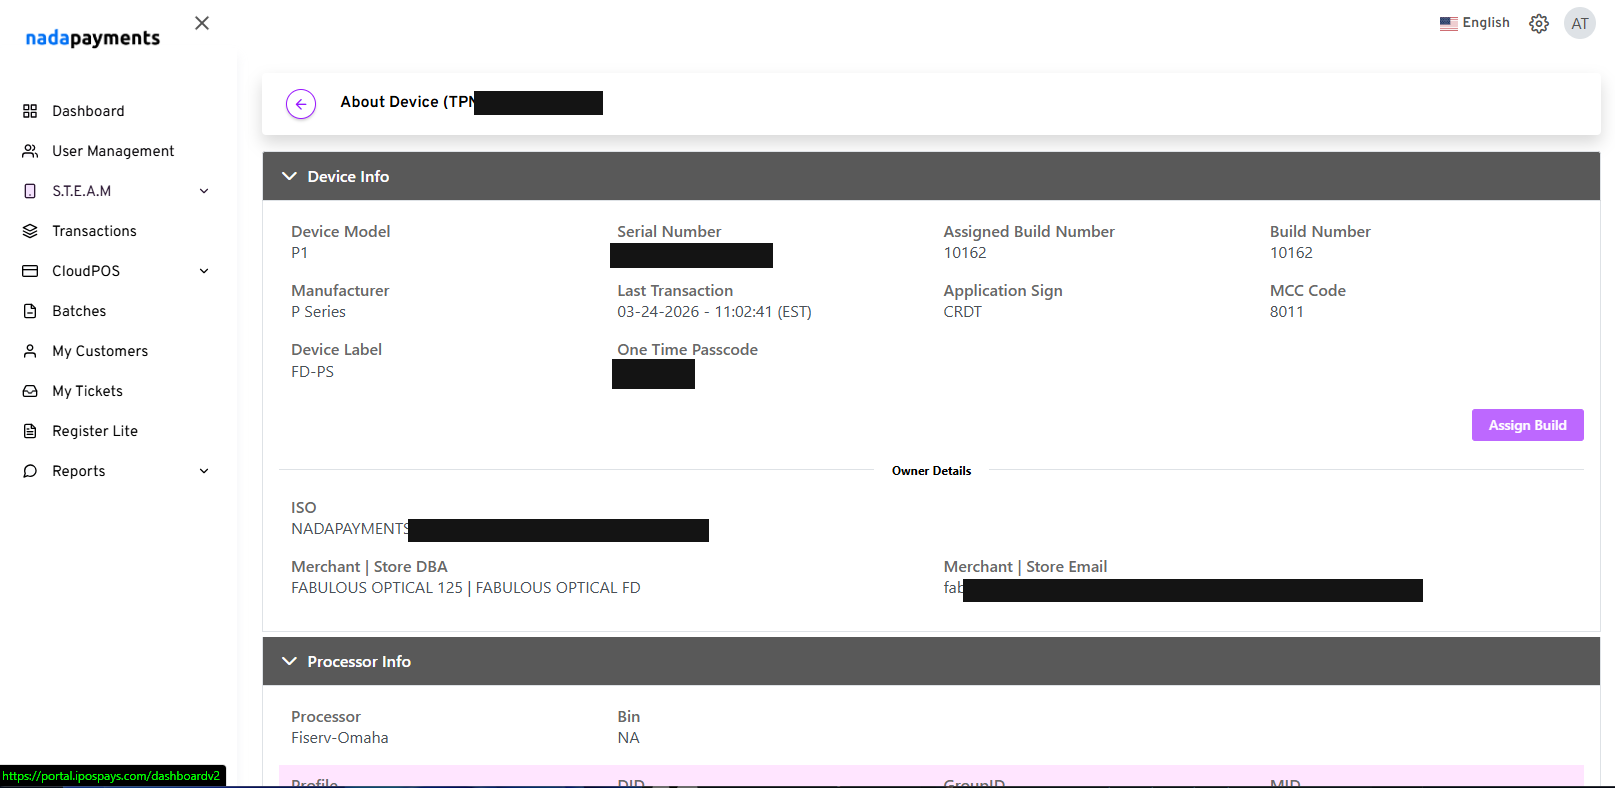
In the iPOSpays portal open your device's About Device page. The screenshots below
show where each value lives — on your own device the real values will be shown (they
are hidden here for security).
Device Info — the TPN is in the page title (About Device (TPN: …)); Serial
number, MCC Code and Build number are here too.
Processor Info — your Merchant ID (MID) is here, along with DID, TermID and GroupID.
Integration — your Auth Key and Register Id are here (and the ISV Name).
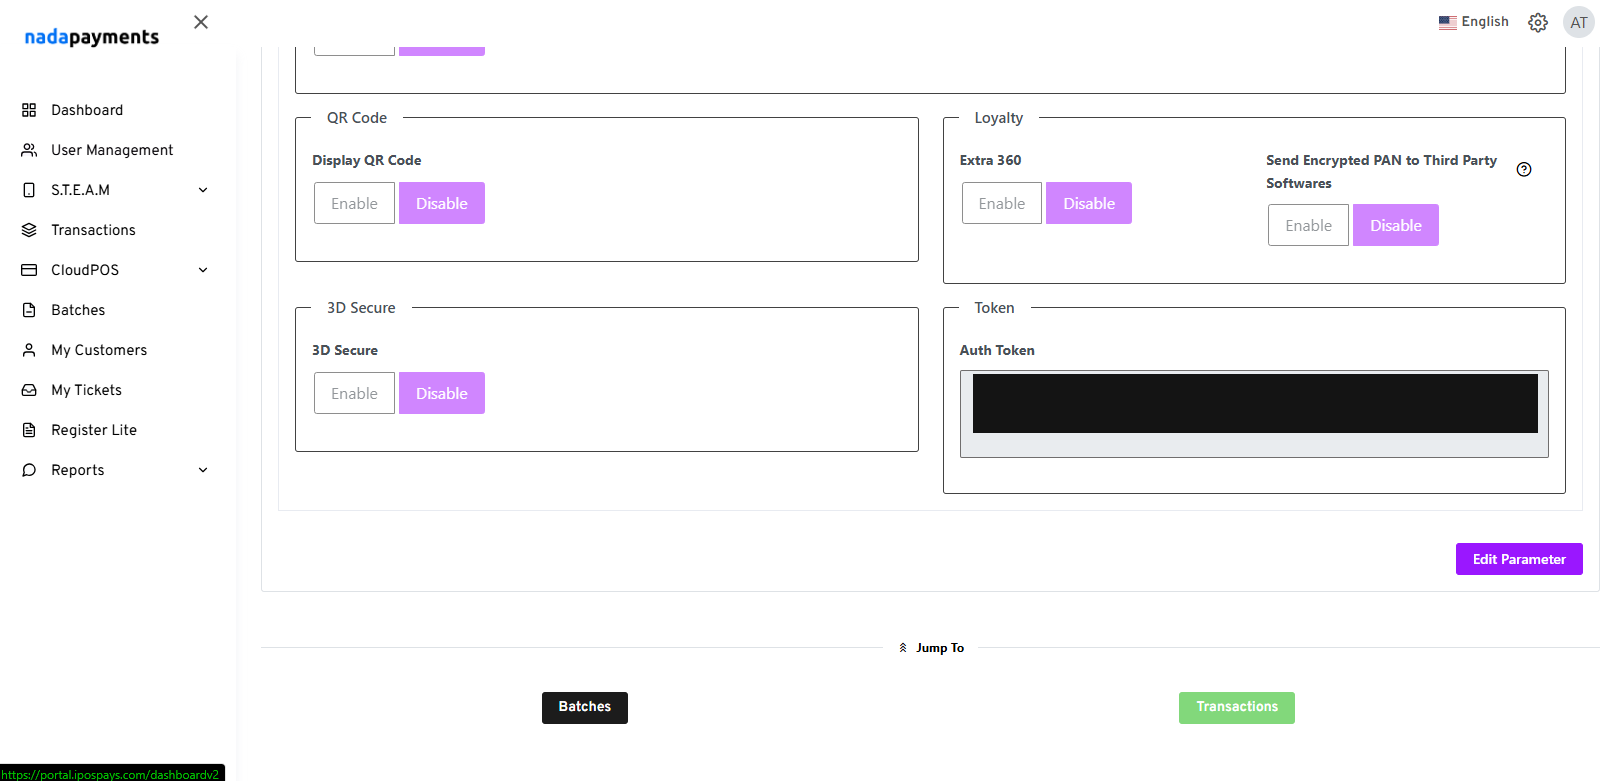
Integration → Token — if you'd rather use the Auth Token than the Auth Key, it's
at the bottom of the same Integration tab.
The rest of the fields (optional — for your records)
Copy these too if you like; they aren't required to take a payment:
| Field in SightHub | Where to find it in the iPOSpays portal |
|---|---|
| Title | Any name you choose (e.g. "Front desk") |
| Serial number | About Device → Device Info → Serial Number |
| Register ID | About Device → Integration → Register Id |
| TermID | About Device → Processor Info → TermID |
| GroupID | About Device → Processor Info → GroupID |
| DID | About Device → Processor Info → DID |
| MCC Code | About Device → Device Info → MCC Code |
| Build Number / Assigned Build Number | About Device → Device Info |
| ISV Name | About Device → Integration → ISV Name (usually NADAPAYMENTS) |
| Heart Beat Interval | About Device → Integration → Heart Beat Interval |
| Device Model / Manufacturer / Device Label | About Device → Device Info |
| Store DBA | About Device → Owner Details → Store DBA |
Finish
- Turn Active on.
- Turn Set as default on for the terminal your front desk uses most.
- Press Save.
You can connect several terminals (e.g. two lanes). The Default star can be moved to
any active terminal at any time.
If something's not right
- "Gateway not set" / nothing happens when you try to pay — your store's payment
gateway hasn't been switched on yet. Ask your SightHub admin to set it up once for the
location. - Payment won't start — re-open the terminal and make sure TPN, Merchant ID,
and an Auth Key or Auth Token are filled in from the iPOSpays portal, and that the
terminal is Active. - Terminal offline — check the device is powered on and connected, then try again.