Edit basic information & set recalls
The Basic Information widget on the patient card holds the patient's contact details and address. Two small icons next to the patient's name do two very different things:
- ✏️ Pencil — open the Update Patient Info dialog to edit.
- 📞 Phone — open the Recalls dialog to schedule a follow-up.
Edit contact details
Click the pencil. The Update Patient Info dialog opens.
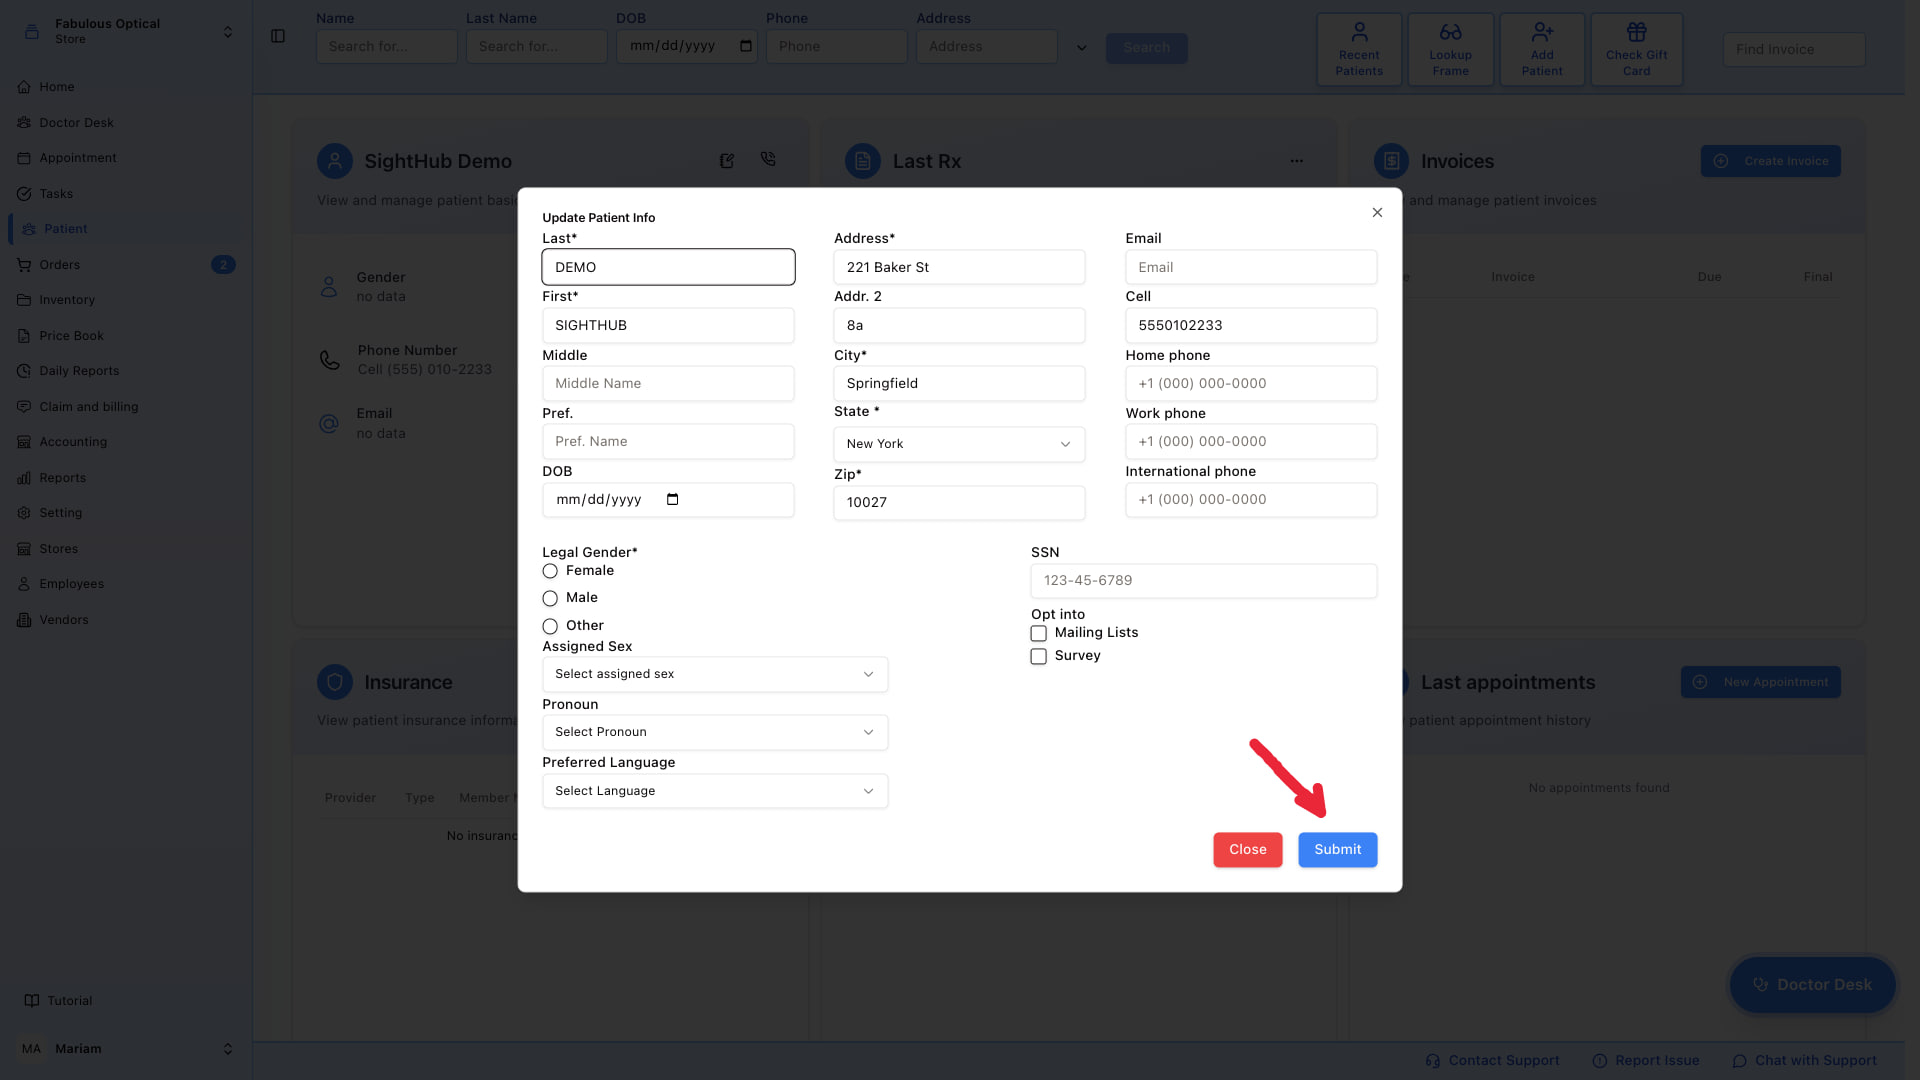
Required fields (marked *)
- Last name / First name
- Address (Address line 1, City, State, Zip)
- Legal Gender (Female / Male / Other)
Fill in what you can
- Middle / Pref. Name — middle name; a nickname to use at the front desk.
- DOB — date of birth.
- Address / Addr. 2 / City / State / Zip — physical address. Address 1 has autocomplete — pick a suggestion, it fills City/State/Zip in one go.
- Email / Cell / Home / Work / International phone — how to reach them.
- Assigned Sex / Pronoun / Preferred Language — for the doctor and correspondence.
- SSN — Social Security Number.
- Opt into Mailing Lists / Survey — marketing consent.
Click Submit to save. Close to cancel.
Recalls
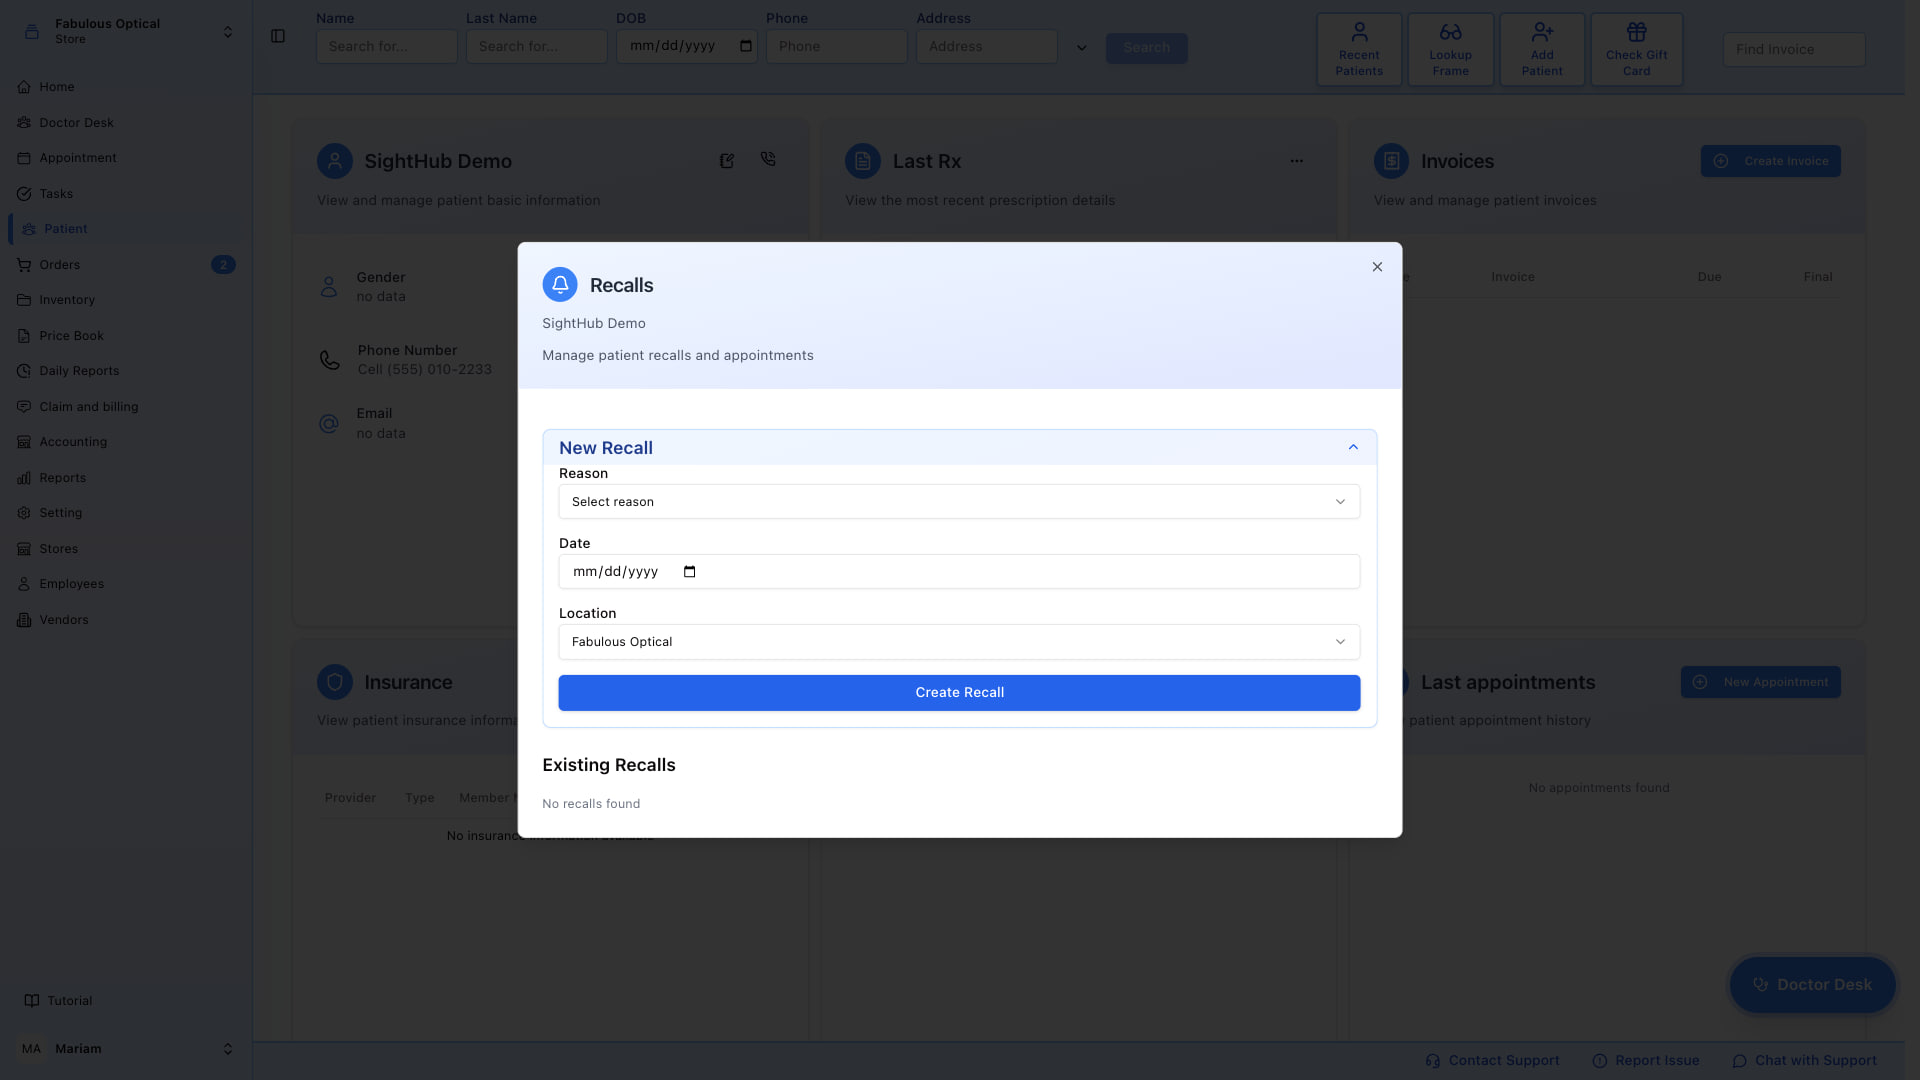
Click the phone icon. The Recalls dialog opens.
Create a recall
The New Recall panel is where you schedule a follow-up:
- Reason — pick from your list (annual follow-up, contact lens fitting, etc.). Reasons are configured in Settings.
- Date — when the recall is due.
- Location — which store handles the recall (defaults to your store).
Click Create Recall. The recall now shows in Existing Recalls below, and it will appear in the Recall List on its due date.
Existing recalls
The section under the form lists all recalls already set for this patient — you can see what's scheduled and remove any that no longer apply.