Appointment settings
Settings → General → Appointment decides four things about booking: who can be booked online, what a new patient is asked to fill in beforehand, what reasons a visit can have, and how long a slot lasts.
All four sit on one screen, one card each.
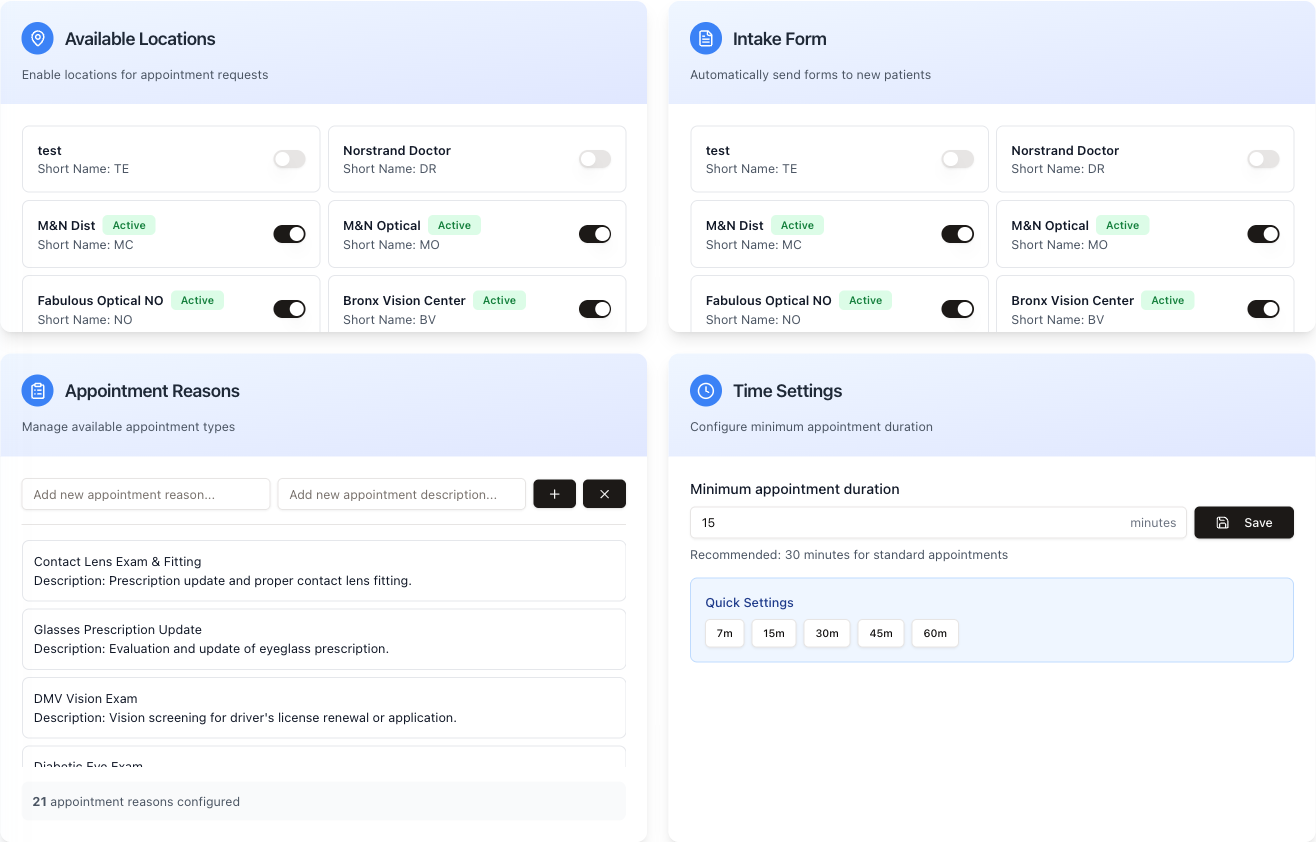
Available Locations
Every location of the practice is listed with a switch. Switch it on and that location starts accepting online appointment requests — the ones that land in Appointment Requests for the front desk to confirm. Switch it off and the location disappears from the patient-facing form; nothing changes for appointments your staff books by hand.
A location that is on shows a green Active badge.
The switch saves the moment you flip it — there is no Save button. A toast confirms it: Request appointment enabled or Request appointment disabled. If you see Error updating request appointment, the change did not go through and the switch stays where it was.
Intake Form
The same list of locations, a different question: should a new patient at this location be sent an intake form before the visit?
With the switch on, new patients booked at this location are sent the form automatically (the card's own words: Automatically send forms to new patients), so they can fill it in before they arrive.
Staff can also send the form by hand: open an existing appointment on the schedule and press Send next to Whould you like to send intake form?.
Same behaviour as above: the switch saves straight away, a location that is on shows Active, and the toast reads Intake form enabled or Intake form disabled (Error updating intake form if it failed).
The two lists are independent. A location can accept online requests without sending forms, and the other way round.
Appointment Reasons
The list of reasons a patient can be booked for — Contact Lens Exam & Fitting, Glasses Prescription Update, DMV Vision Exam, Diabetic Eye Exam and the rest. This is not the list behind the Visit Reason field staff fill in when booking on the schedule; that field reads a separate list.
Each entry has a name and a description. The description is the sentence the patient reads when picking a reason online, so write it for them, not for staff.
To add one, type the reason in the left field, the description in the right, and press + (or Enter in either field). The fields are not cleared after adding, so press the × next to them before typing the next reason; it clears both fields without saving.
Hover over a row and two buttons appear on the right: the pencil turns the row into two editable fields (the save icon commits, the cross cancels), the × deletes the reason straight away, with no "are you sure" step. Deleting a reason does not touch appointments already booked with it.
The grey strip at the bottom counts what you have — 21 appointment reasons configured in the shot above.
Time Settings
Minimum appointment duration in minutes — the size of one slot on the schedule grid. Set 15 and the day is drawn in quarter-hours; set 30 and it is drawn in half-hours.
The Quick Settings row underneath — 7m, 15m, 30m, 45m, 60m — sets it in one click. Use those buttons rather than typing into the field: the number is saved as you type, so typing 45 briefly saves 4 on the way. The Save button next to the field does nothing; the value is already saved by then.
30 minutes is the usual choice for a standard exam.