Edit an appointment
Once an appointment is on the calendar you can click it to change its status, adjust its time, swap the doctor or insurance, send the intake form, or delete it.
Open the edit window
On the Appointments tab, click the coloured block for the appointment.
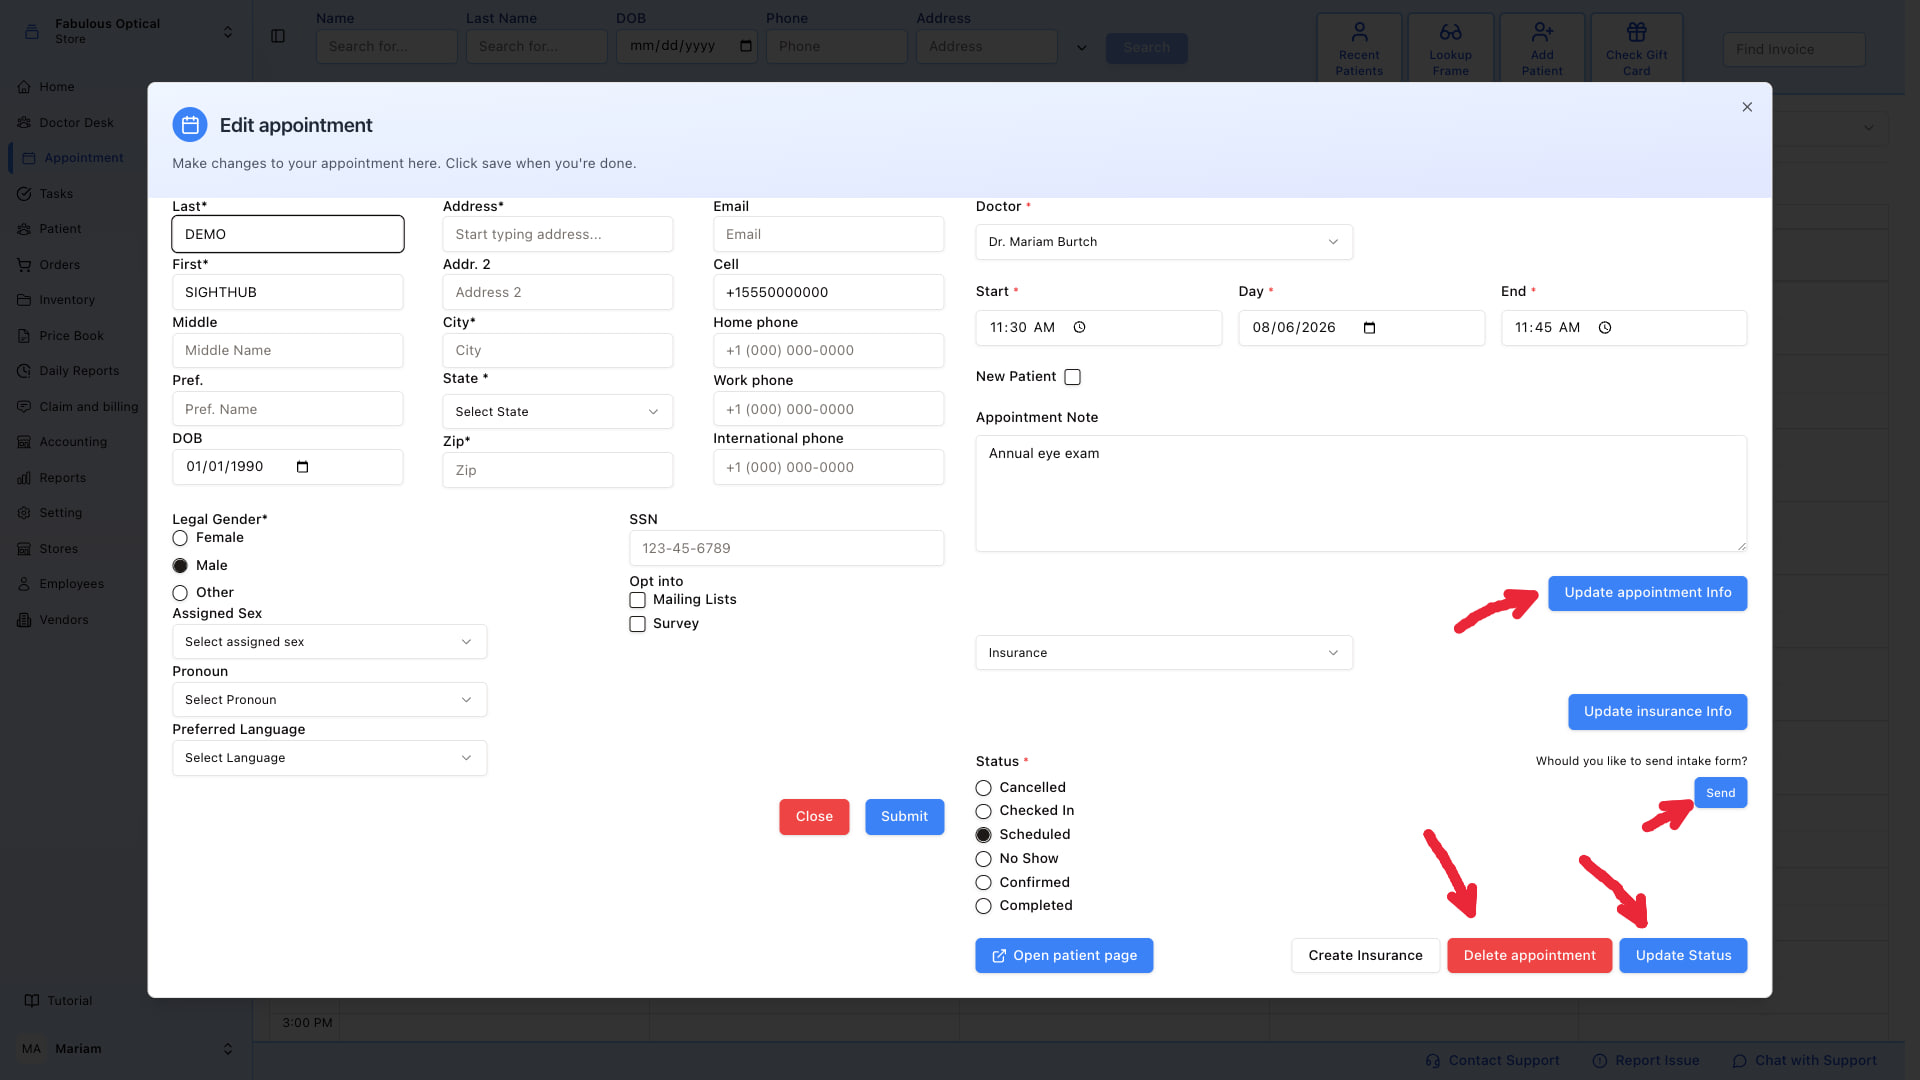
The Edit appointment window opens. The left half is still the patient's card; the right half switches to editable appointment details.
Change the status (the most common action)
At the bottom right, tick the new Status — Cancelled, Checked In, Scheduled, No Show, Confirmed, or Completed — and click Update Status.
Typical day at the front desk:
- Book → Scheduled
- Patient confirms by phone → Confirmed
- Patient walks in → Checked In
- Doctor finishes the visit → Completed
- Patient doesn't come → No Show
The block on the calendar changes colour as soon as the status is saved.
Change the time or doctor
Under Doctor / Start / Day / End change what you need, then click Update appointment Info (the blue button on the right, just below the Note field).
Change the insurance
Pick a different insurance from the Insurance dropdown and click Update insurance Info. If the patient has no insurances on file, click Create Insurance at the very bottom first.
Send the intake form
The intake form is a link you send to the patient so they can fill in their information (contacts, insurance, history) before they arrive.
In the section labelled Would you like to send intake form?, click Send. A confirmation toast appears once it's sent.
Send this once per visit — usually right after booking.
Delete the appointment
Click the red Delete appointment button at the bottom right. There's no confirmation dialog, so click deliberately. The block is removed from the calendar immediately.
If the patient may come later, prefer Status → Cancelled or No Show instead of deleting — it keeps the visit history.
Open the patient's page
Use Open patient page (blue button, bottom left) to jump to the patient's full record without closing the window unnecessarily.