Book an appointment
Booking an appointment is a three-step flow:
- Pick a time slot on the calendar.
- Find the patient (or create a new one).
- Fill in the appointment details and save.
You end up with a coloured block on the calendar for that patient, doctor and time.
1. Pick a time slot
On the Appointments tab, make sure the right Store and Doctor filter is set at the top, then click an empty slot in the doctor's column at the time you want.
A Create appointment window opens. It first asks you to find the patient.
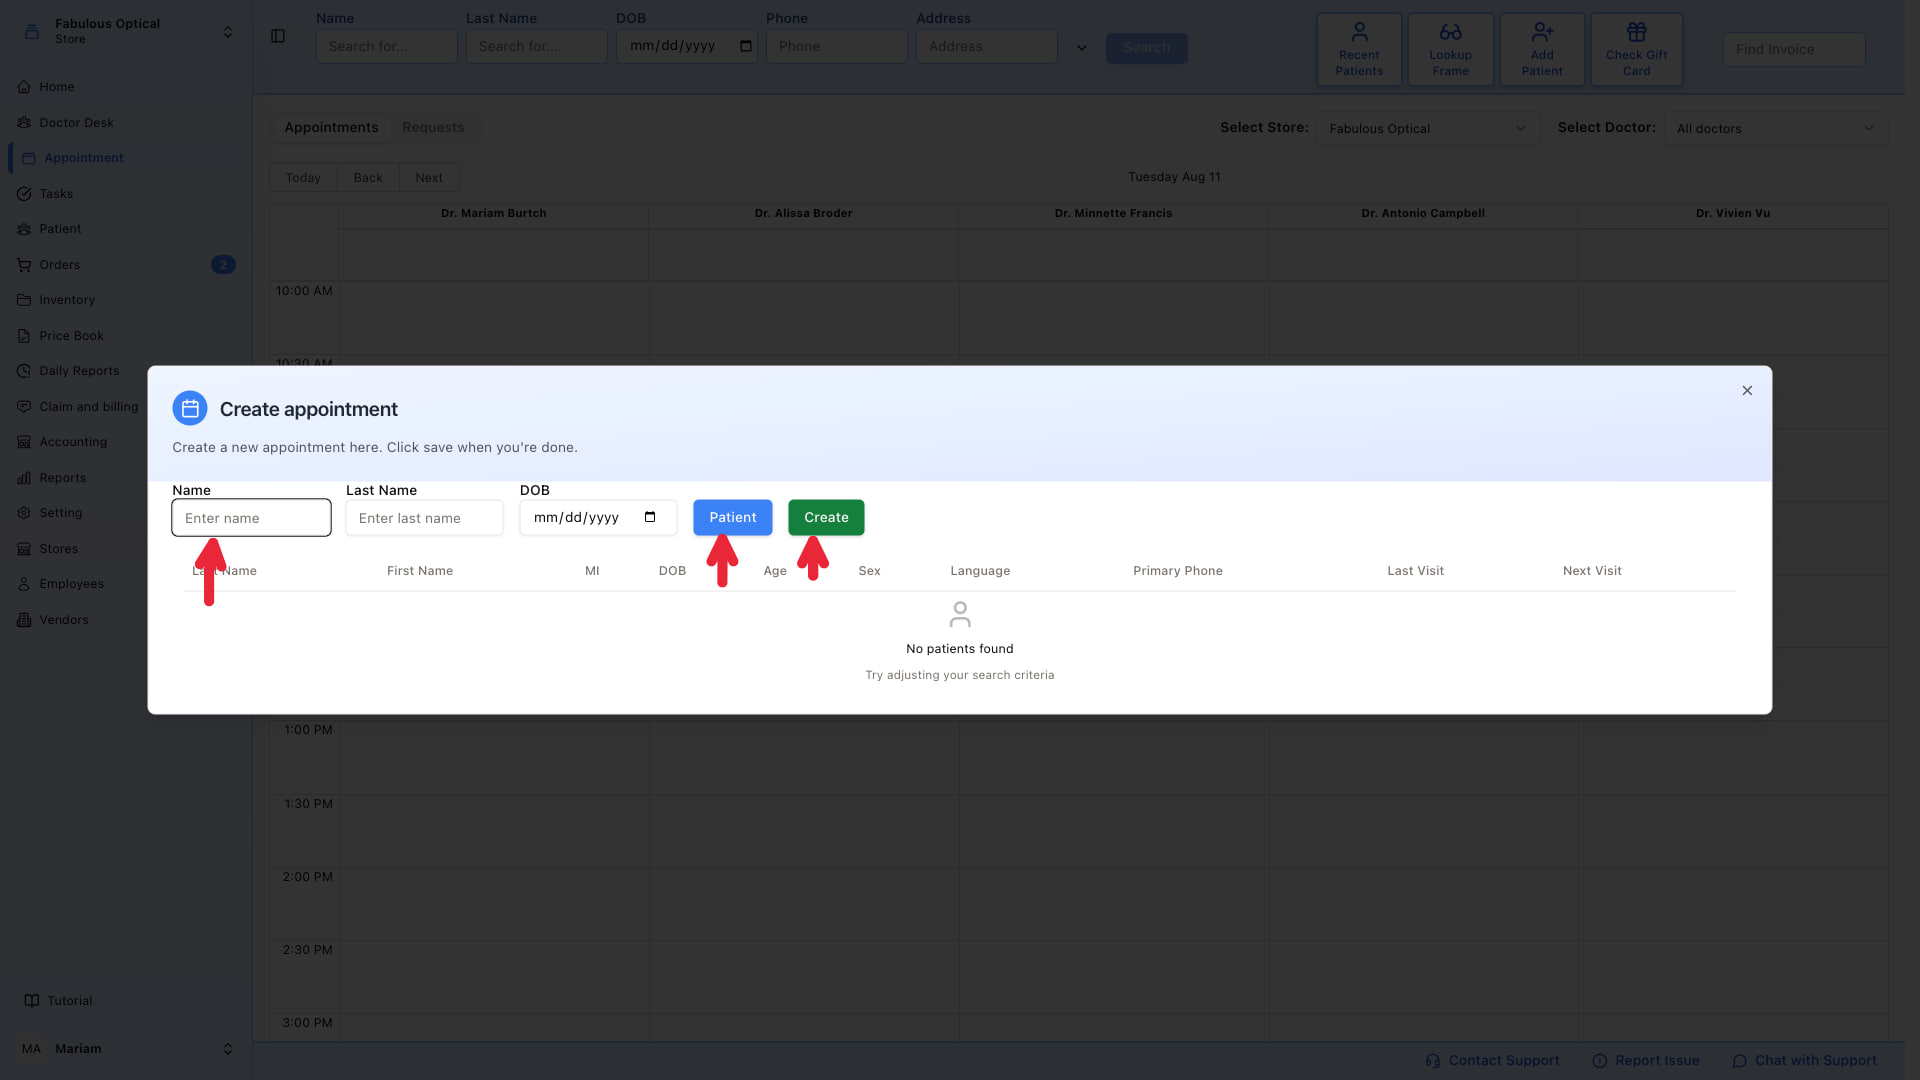
You cannot pick a slot in the past — the app will show an error and refuse.
2. Find or create the patient
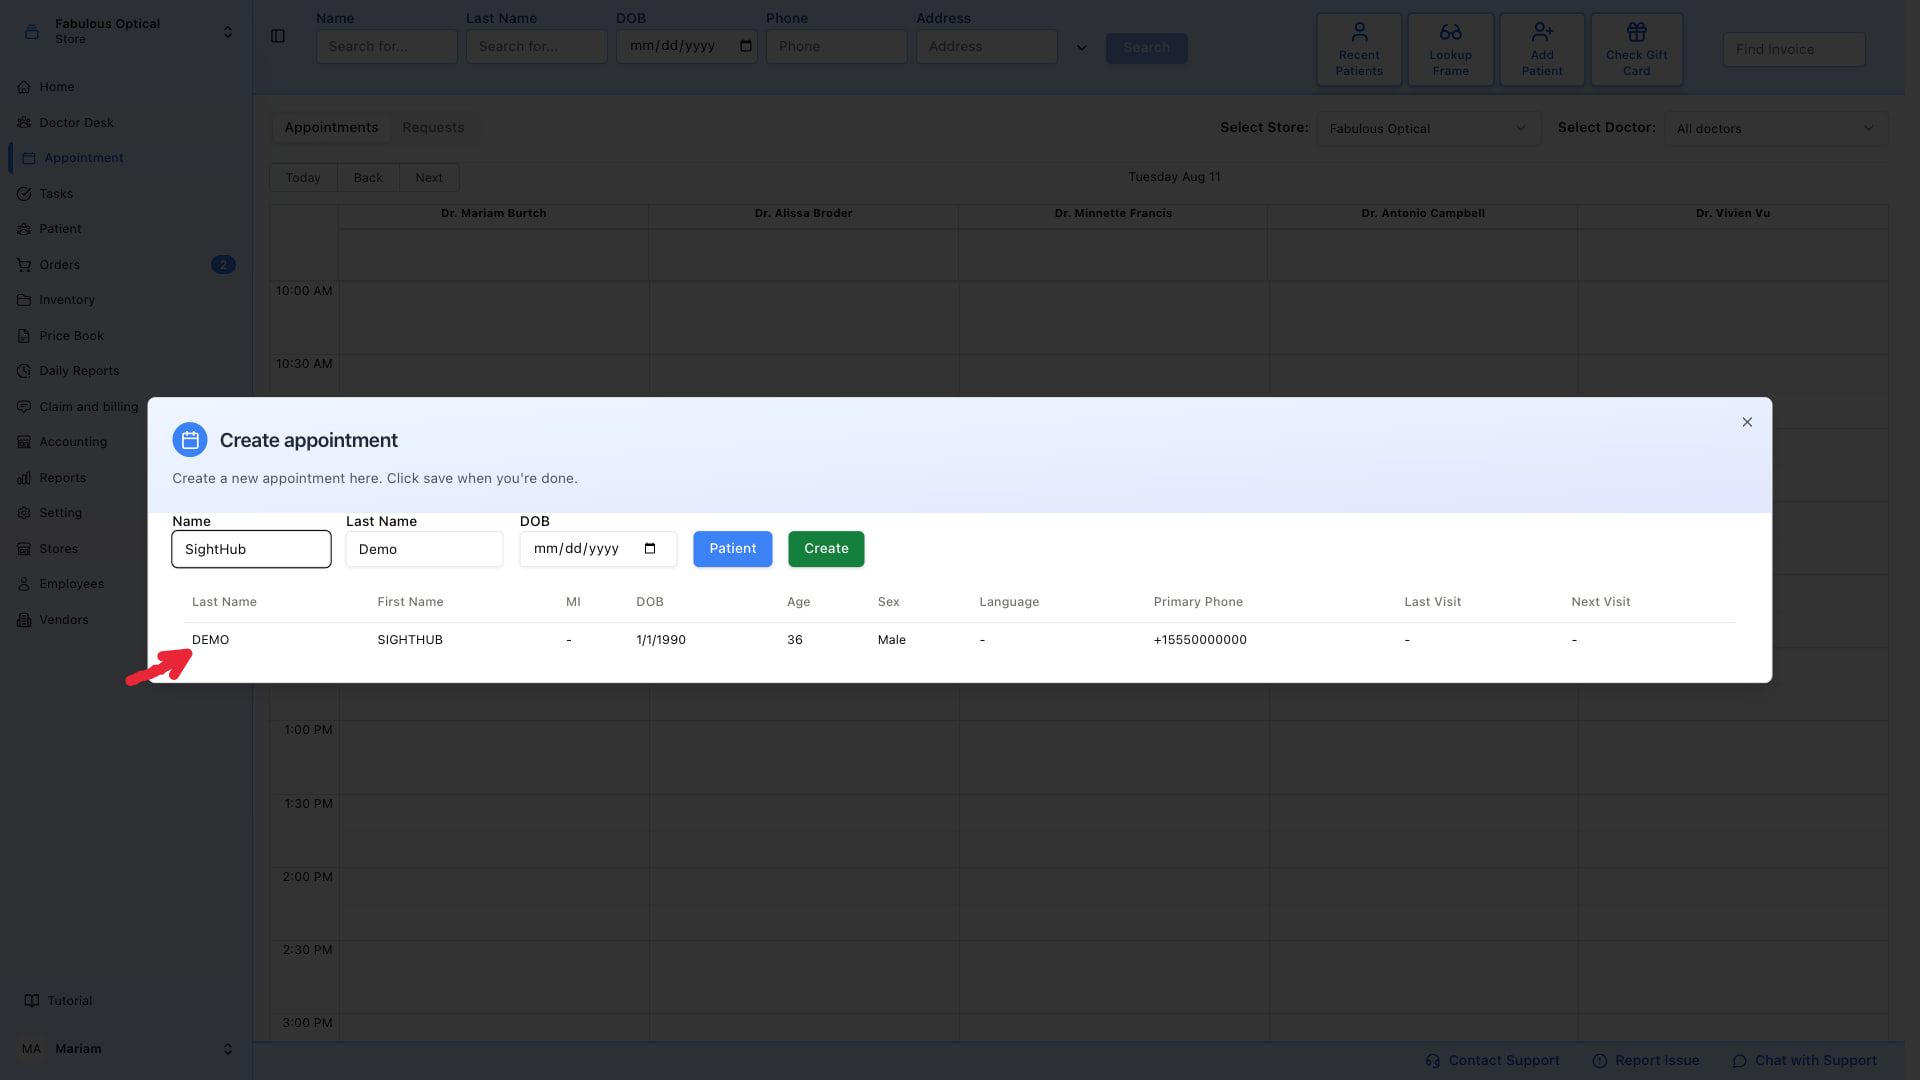
Type the patient's Name, Last Name, or DOB and click Patient to search. Matches appear in the table below.
- If the patient is in the list — click their row. The window switches to the appointment form (step 3).
- If they aren't in the list — click the green Create button. A new form opens; fill in at least the required fields (marked with
*) and click Submit. The patient is added; come back to this window and search for them by name to select them.
3. Fill in the appointment
Once the patient is selected, you see the full Create appointment form. The left half is the patient's card (you can adjust their details); the right half is the appointment itself.
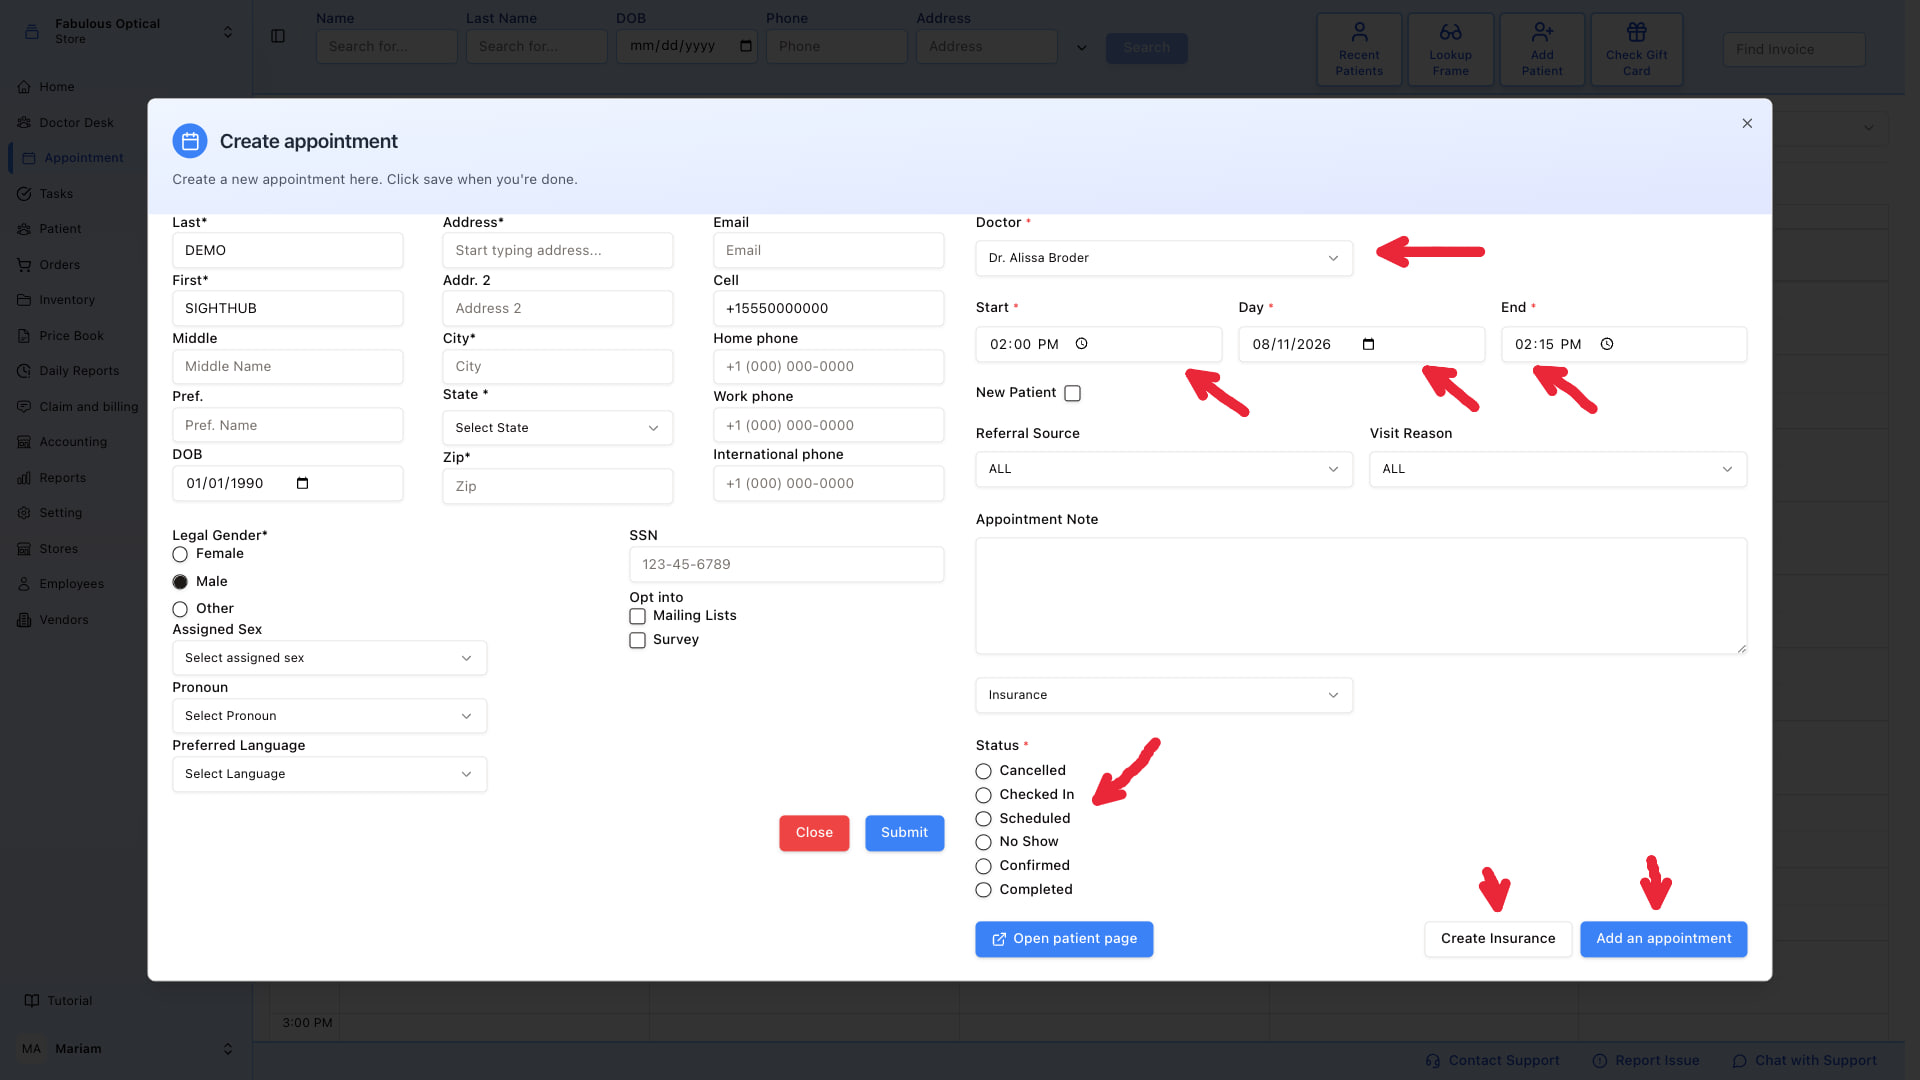
Fields on the right (required ones marked with *):
- Doctor
*— who is seeing the patient. If you clicked a slot inside a doctor's column, that doctor is preselected. - Start / Day / End
*— time of the visit. End is auto-filled from Start using the default appointment duration (set in Settings). Change it if the visit is longer. - New Patient — tick if this is the patient's first visit.
- Referral Source / Visit Reason — optional; comes from your value lists in Settings.
- Appointment Note — free text seen by the doctor at the visit.
- Insurance — pick from the patient's insurances. If none are on file, use Create Insurance at the bottom.
- Status
*— pick one:- Scheduled — booked, patient hasn't confirmed yet
- Confirmed — patient confirmed
- Checked In — patient has arrived
- No Show — patient didn't come
- Cancelled
- Completed — visit is over
Click Add an appointment at the bottom right to save.
4. Check the calendar
The new appointment appears as a coloured block in the doctor's column, with the patient's name and status.
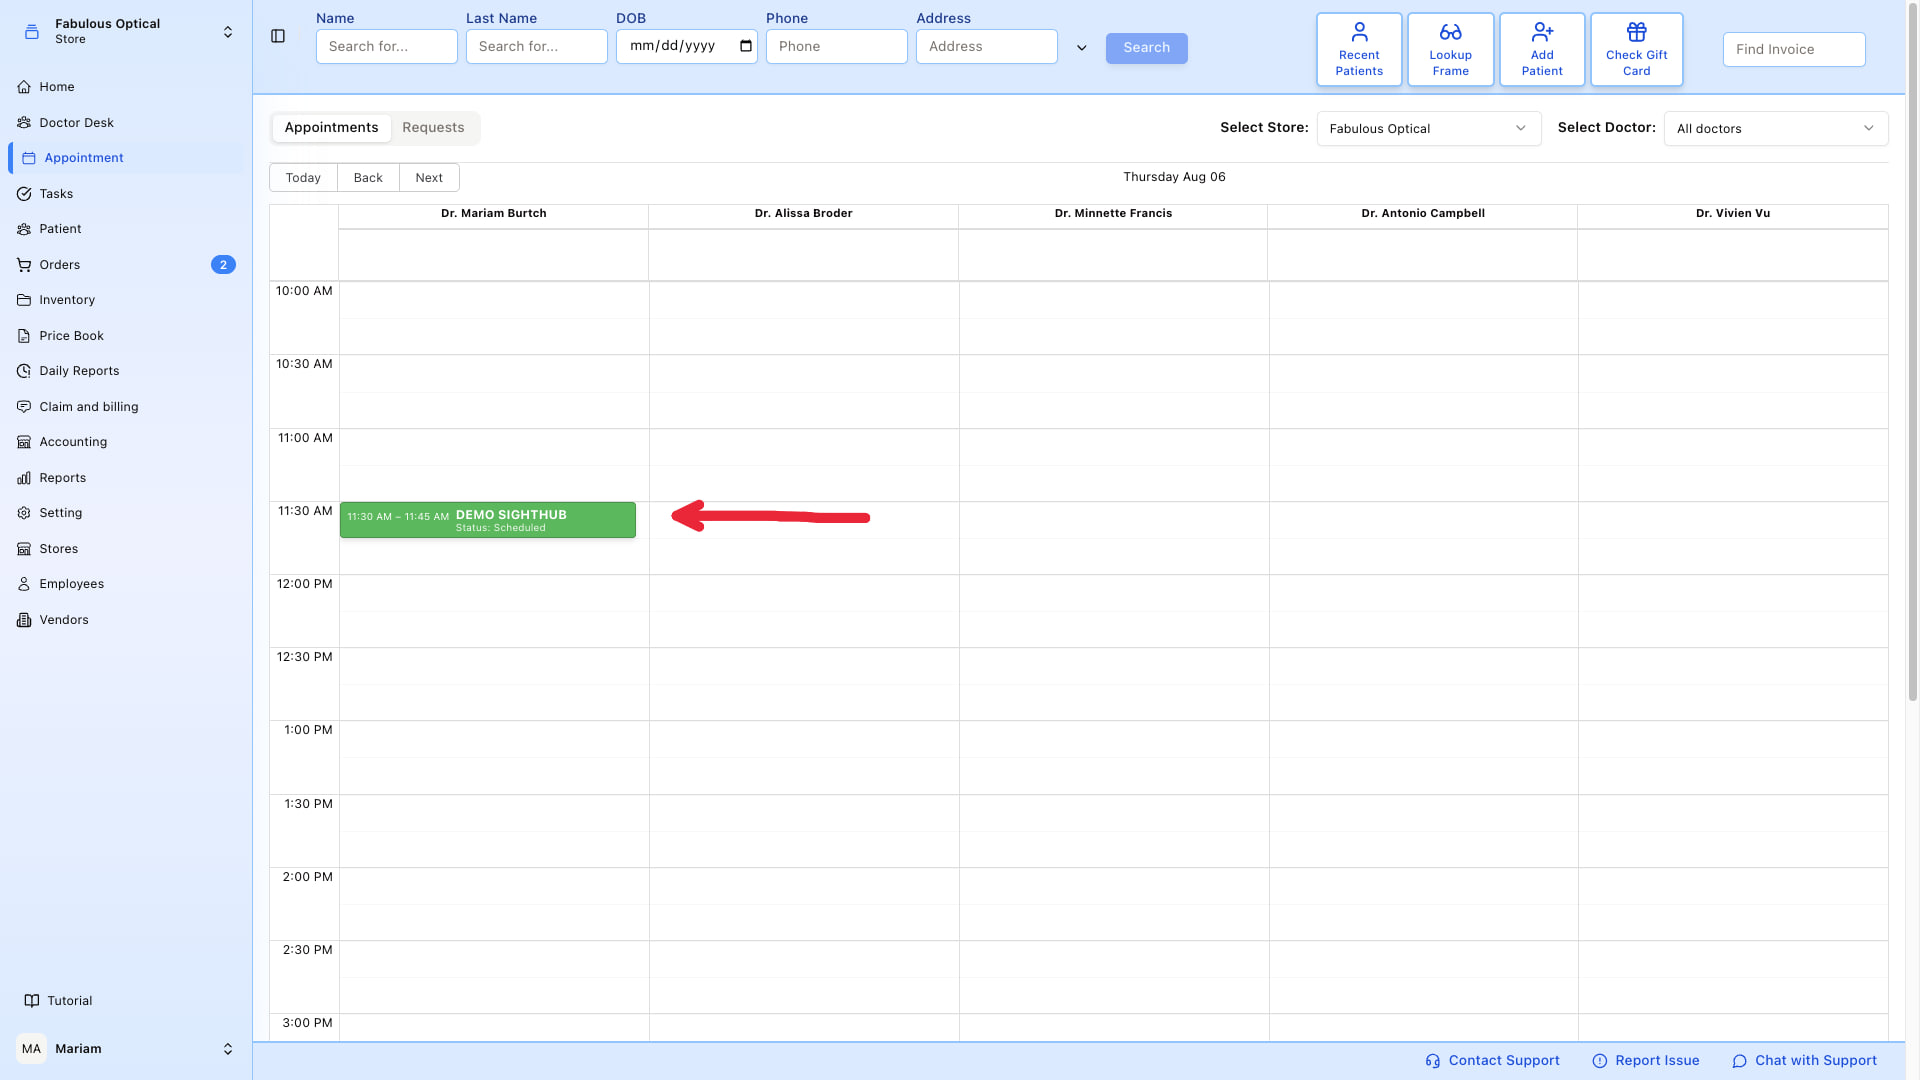
Colours follow the status:
- 🟢 Scheduled · 🔵 Confirmed · 🟠 Checked In · 🔴 Cancelled · ⚫ No Show