Patient files — upload, scan, phone-scan
The Files widget on the patient card holds documents attached to that patient: scans of Rx from an outside doctor, insurance cards, referrals, ID, whatever.
Three ways to add a file — pick whichever fits.
Click the three-dot menu at the top-right of the Files widget. You get three options:
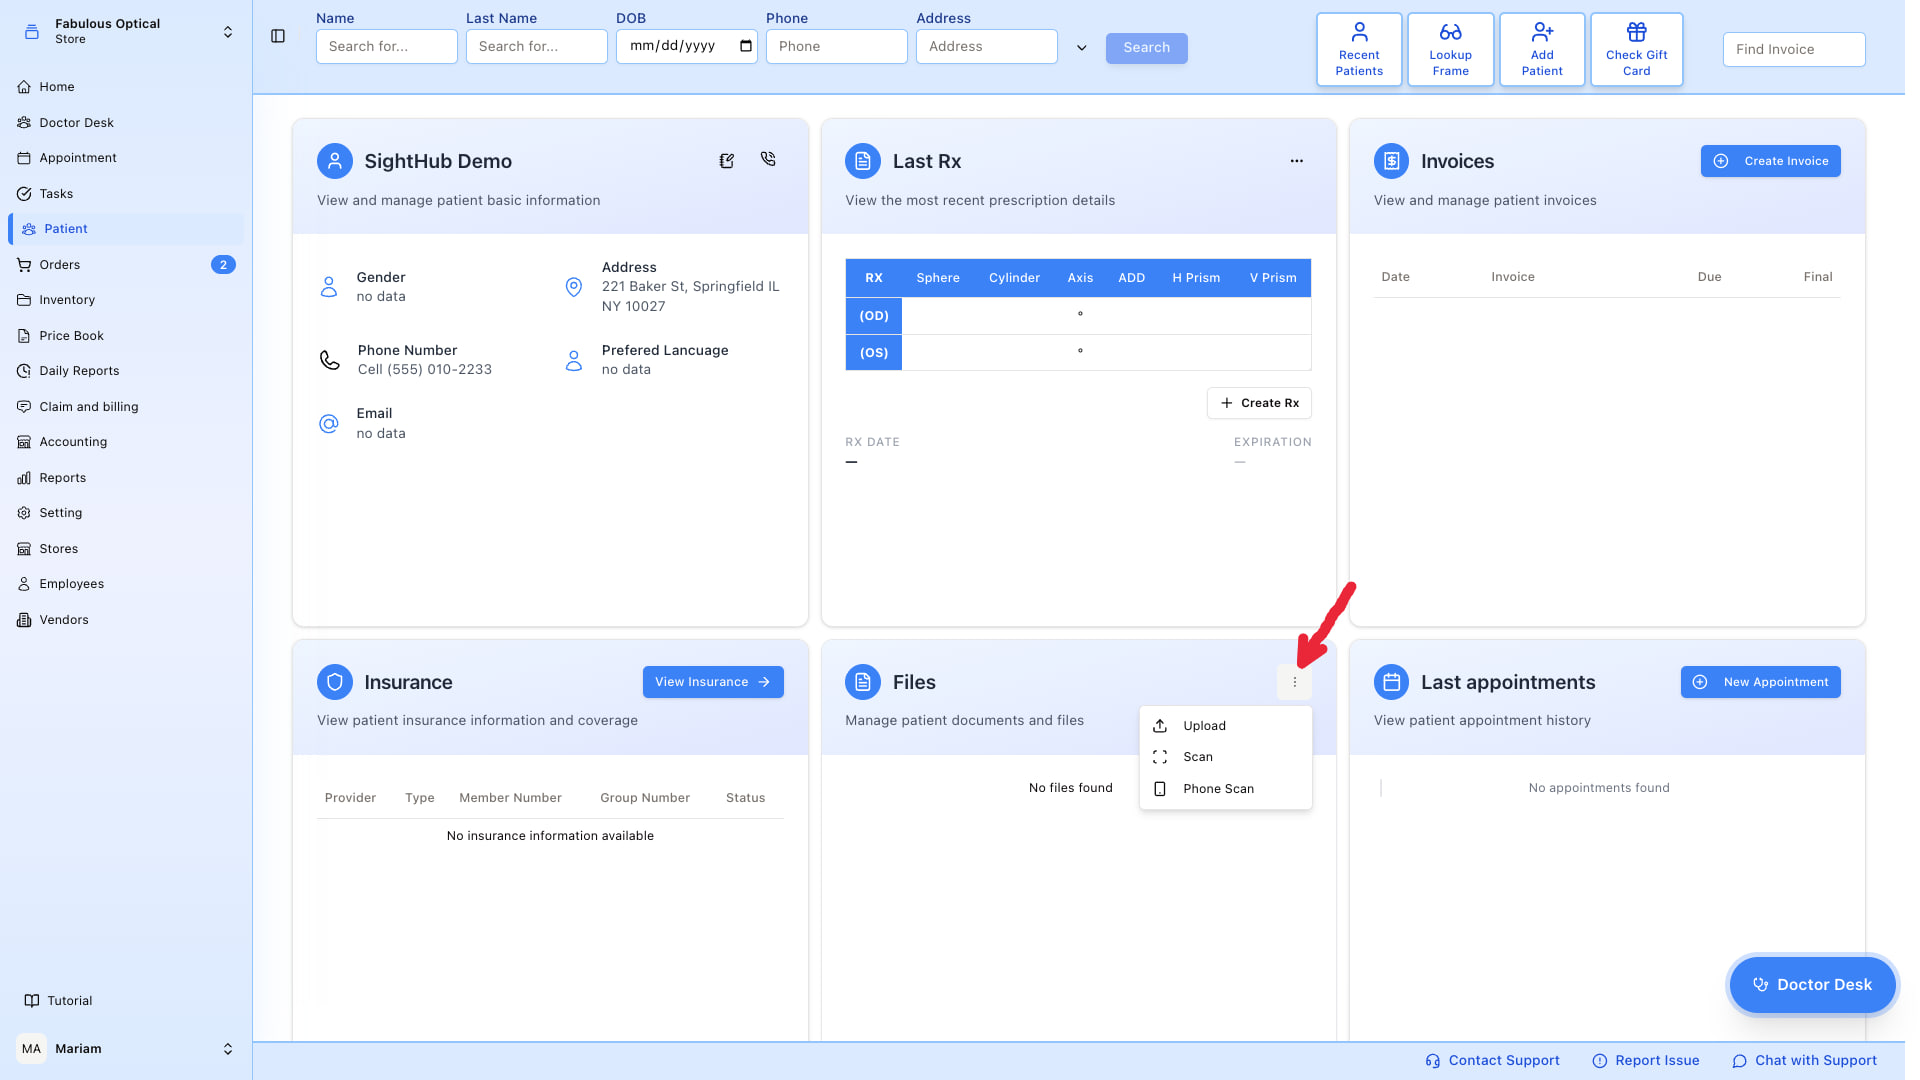
- Upload — a file already on your computer.
- Scan — a paper document, using a flatbed scanner connected to your workstation.
- Phone Scan — a photo taken with the patient's phone (great for insurance cards on the spot).
Upload from computer
Click Upload. The Upload File dialog opens.
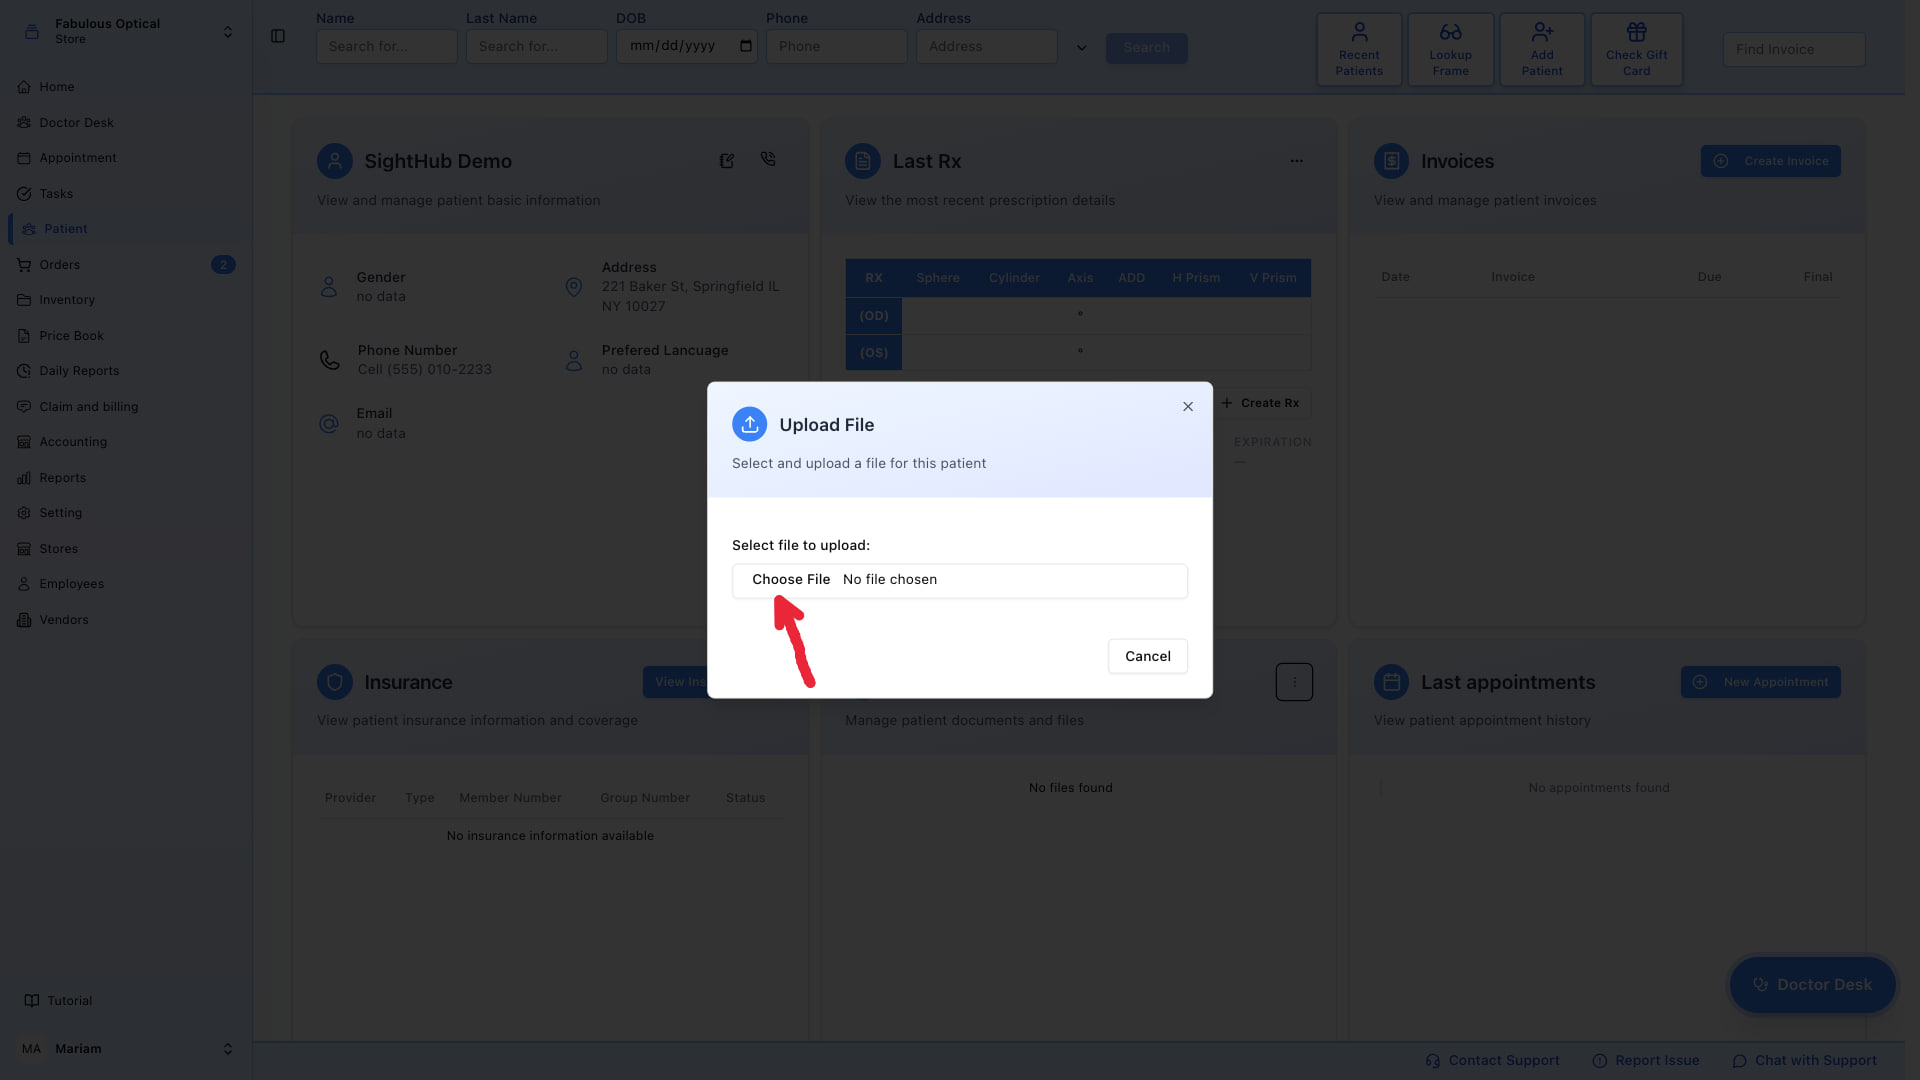
Click Choose File, pick the file, then the file uploads. It appears in the Files widget with the file name.
Supported formats include PDF, JPG, PNG, and other common types.
Scan from a connected scanner
Click Scan. A dialog appears with the scanners available on your workstation.
Requirements:
- A physical scanner connected to the machine (USB or network).
- The SightHub scanner helper service running on the workstation. If the menu says "no scanner service", the helper isn't running — ask IT to start it.
Pick your scanner, press the scan button on the device (or click Scan in the dialog), and the resulting image is uploaded to the patient's file list.
Scan with the patient's phone
Click Phone Scan. The dialog shows a QR code and a temporary URL.
- The patient scans the QR with their phone camera (no app needed).
- The link opens a mobile page where they take a photo.
- The photo lands directly in the patient's Files.
Use this for insurance cards, driver's licenses, or any paper they brought — no scanner needed and nothing sits on your phone.
Open a file
Click a row in the Files widget to open the file viewer.