The patient's medical chart
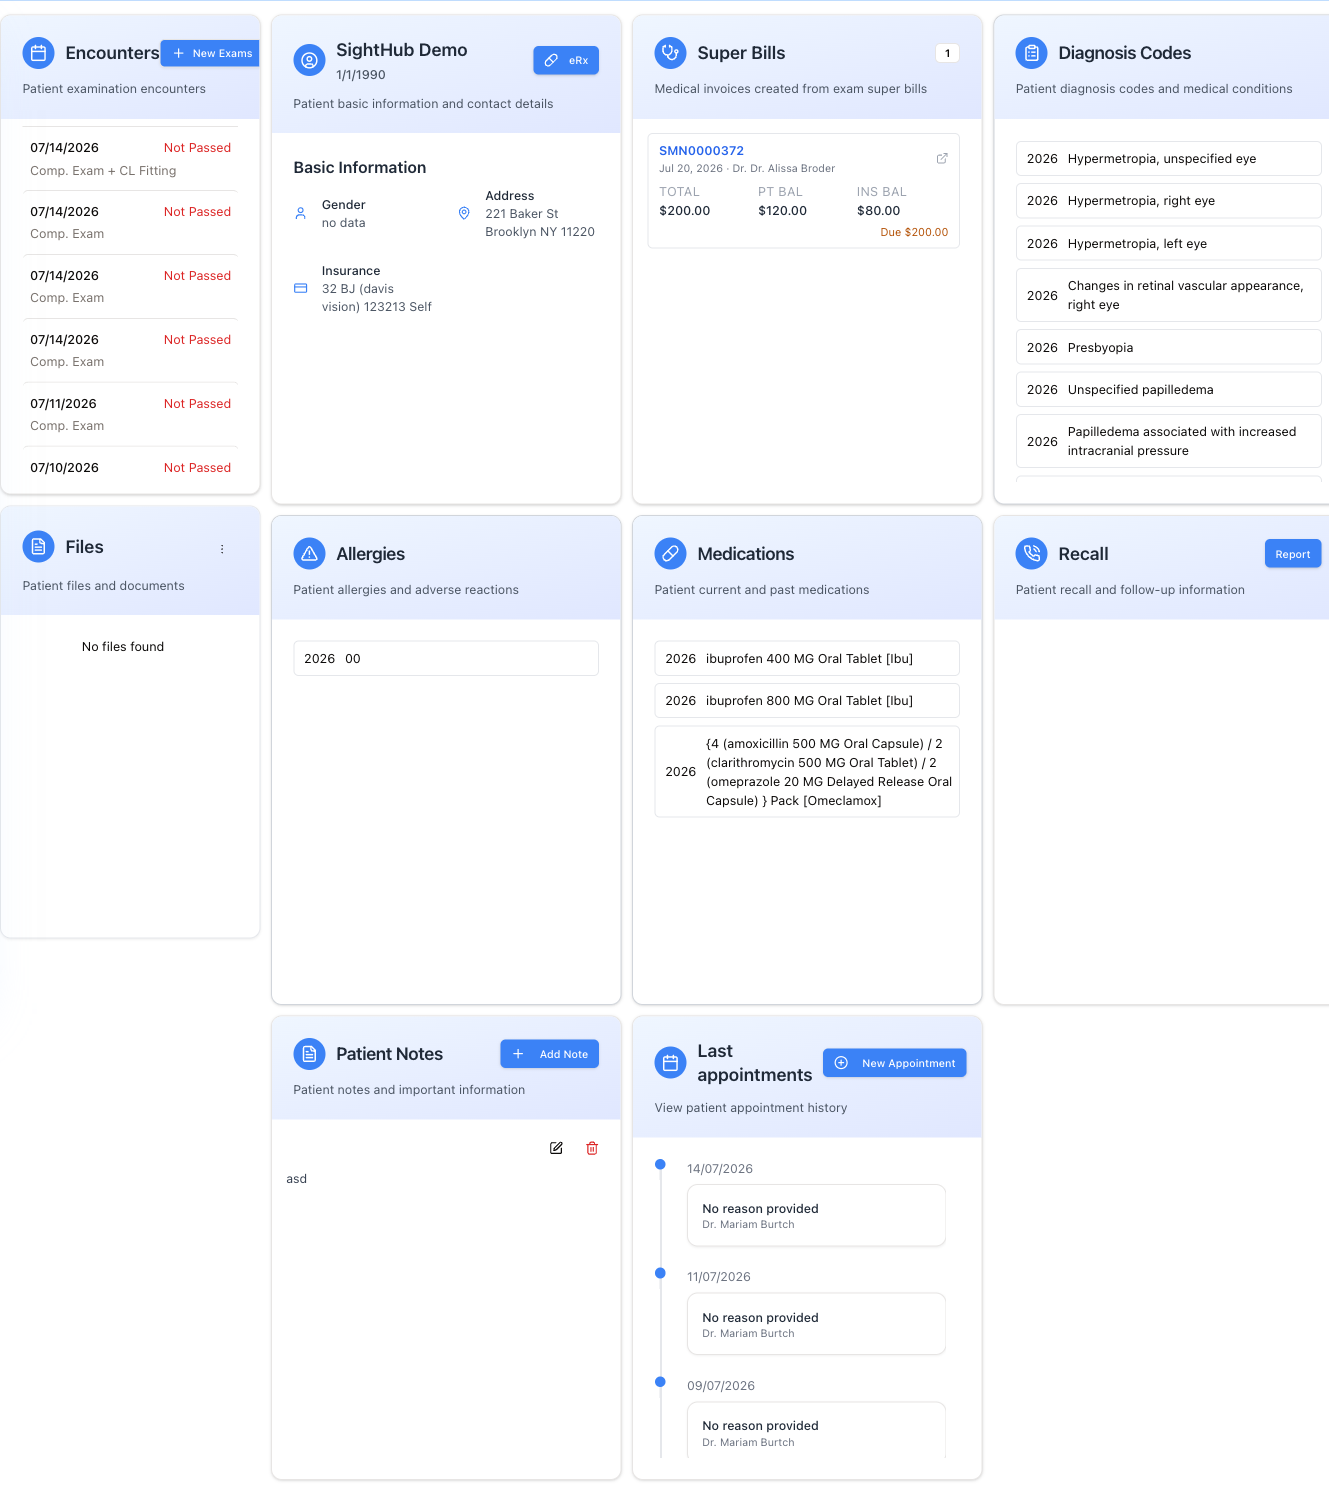
When a doctor opens a patient — from Doctor's Desk → Patient Search, from a row in Unassigned Exams, or from an appointment — they land on the patient's medical chart. It is a different screen from the front-desk patient card: the front desk sees contact details, invoices and insurance, while the doctor sees the clinical picture.
The address looks like /patient-details/<patient id>.
Layout
Two parts:
- Left column — Encounters and Files. It stays in place while you scroll, so the exam list is always within reach.
- Everything else — clinical cards: the patient header, Super Bills, Diagnosis Codes, Allergies, Medications, Prescriptions (eRx), Recall, Patient Notes and Last appointments.
Left column
Encounters
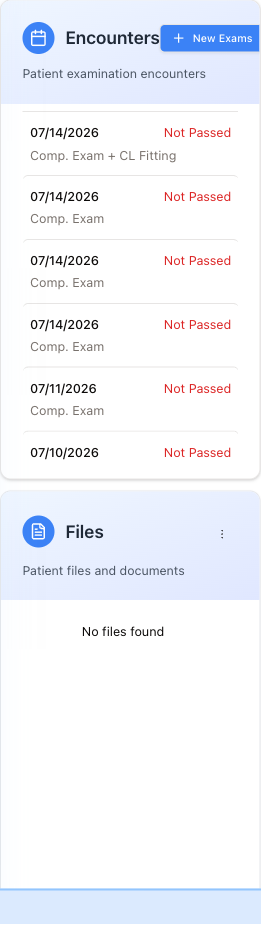
Every exam this patient has had, newest first — date, status, exam type and the store it was done at. The status reads Passed once the doctor has locked and signed the exam, Not Passed until then; an exam waiting for a manager to approve its deletion also carries a Pending deletion tag. Click a row to open that exam (the open one is highlighted in blue); the right-hand side is replaced by the exam workspace and the Encounters list stays visible so you can jump between visits. See Exam — overview.
Jumping to another visit from this list does not save the exam tab you had open, and neither does the Patient Page button. An exam tab saves itself only when you click another tab of the exam or press Back to Patient — do that first, then pick the other visit. (Closing or reloading the browser tab with unsaved changes only brings up the browser's own "leave this page?" warning.)
+ New Exams opens a small dialog (Create New Exams by Type) where you pick the type and press Create. The list starts on All Exam Types, which is not a type — leave it there and you get "Choose exam type". After Create the new exam opens straight away.
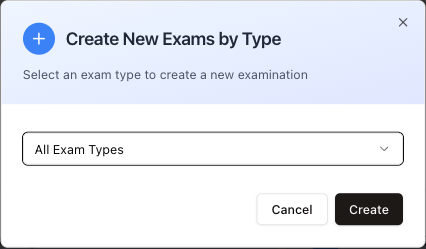
The list is your practice's own — on the demo data it reads Comp. Exam, Comp. Exam + CL Fitting, Contact Lens Dispense, Contact Lens Followup, Dilation Followup, Medical Office Visit, Medical Office Visit Followup, Rx Check, Procedure, Consultation.
Files
The patient's documents — Rx scans, ID cards, referrals, anything the office attached. Click a file to open it on its own viewer page. The three-dot menu adds a new one:
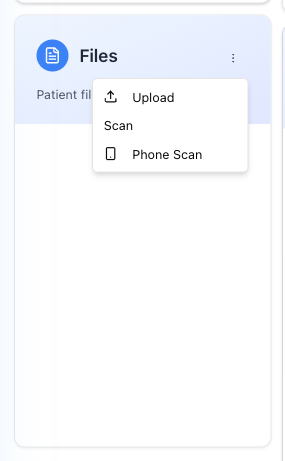
- Upload — pick a file from this computer.
- Scan — present in the menu, but not wired up yet: clicking it does nothing. To scan, use the same menu on the front-desk patient card.
- Phone Scan — after you confirm with Yes, send notification, sends a notification to your phone so you can photograph the document through the SightHub app; the window also shows a QR code to scan instead, and a countdown until the request expires. The pictures land in this patient's Files.
The patient header
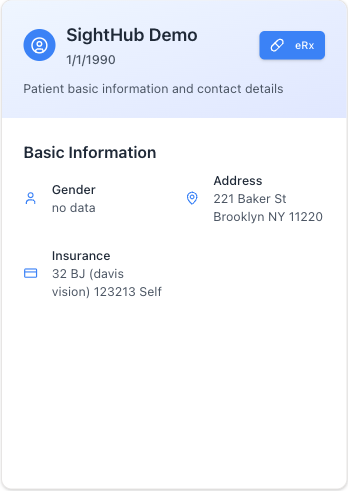
Name, date of birth, and a short Basic Information block — gender, address, and the insurance on file (company, group number, holder type). This is read-only here; to change it, use the edit dialog on the patient card.
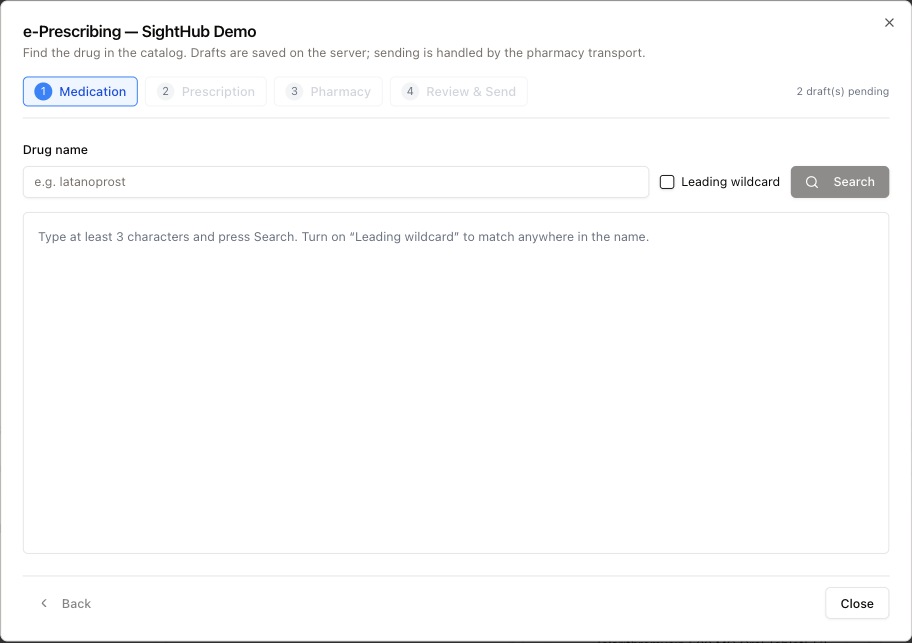
The eRx button opens e-prescribing — a four-step wizard that finds the drug, takes the prescription (directions, quantity, package, diagnoses), picks the pharmacy, and lets you check and send it. Drafts are kept on the server, so a half-finished prescription is still there when you come back; the counter in the corner shows how many are pending. The last step, Review & Send, is also where you cancel a sent prescription.
The clinical cards
- Super Bills — medical invoices generated from this patient's exam superbills. Each shows the invoice number, date, doctor, and the split Total · Pt Bal · Ins Bal. A Finalized badge appears on finalized invoices, and Due with the amount appears only when something is still owed. Click an invoice in the list to open it in a window over the page. See Assessment, Superbill & Referral.
- Diagnosis Codes — every ICD-10 code recorded for this patient, with the year it was coded. Filled in from the Assessment tab of each exam.
- Allergies — known allergies and adverse reactions, with the year.
- Medications — current and past medications, with the year.
Allergies and Medications are recorded on the History tab of the exam (its right-hand column), so anything added during an exam appears here too.
Prescriptions (eRx)
Every prescription written for this patient through e-Prescribing — What was sent to the pharmacy and what it answered. Each entry shows:
- the drug, the directions, the quantity, refills and the date it was written;
- a status badge — DRAFT, SENT, CANCEL REQUESTED, CANCELLED, CANCEL DENIED;
- a small line about the last message, e.g. NewRx: Delivered with the time — or Not confirmed / Failed with the reason;
- after a cancel request, the pharmacy's answer in a green (Approved — cancelled) or red (Denied — the prescription was not cancelled) box.
The card is for reading. + New opens the same e-prescribing wizard as the eRx button; to send a draft or cancel a sent prescription, go to its Review & Send step.
Recall, notes and appointments
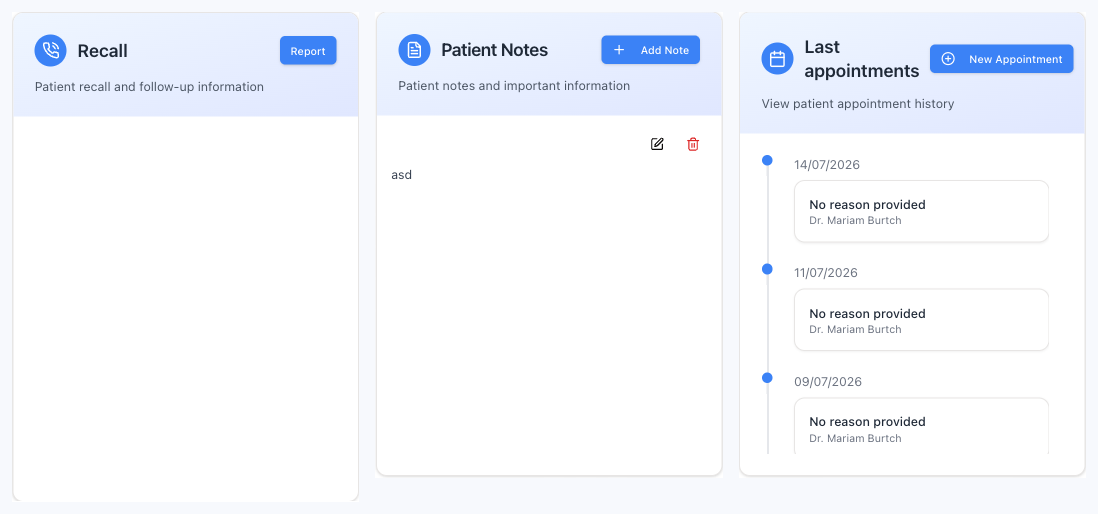
- Recall — the patient's follow-up history; each entry shows the Front desk note and the Need to call on date. Report opens a box where you type a recall report and press Add (empty text is refused). Only the last entry in the list can be clicked and edited (Edit Recall), and that box covers the front-desk note and the Need to call on date — not the report text itself.
- Patient Notes — free-text notes that stay with the patient. + Add Note creates one, with an Alert Date (Optional) and a Mark as top priority tick — top-priority notes get a yellow TOP tag and sit at the top of the list. The pencil edits and the bin deletes (after a confirmation).
- Last appointments — the appointment history as a timeline, each entry showing the date, the reason and the doctor. + New Appointment opens the booking flow — see Book an appointment.
The Patient Page button
The blue Patient Page button floats in the bottom-right corner. It jumps to the same patient's front-desk patient card — where invoices, prescriptions, insurance and communications live. Use it when you need the commercial side of the record rather than the clinical one.