Add insurance during booking
When you're booking (or editing) an appointment and the patient's insurance is not on file yet, you can add it right from the same window — you don't have to leave and go to the patient's page.
When you need this
- The patient is new and this is their first visit.
- The patient switched to a new insurance plan.
- The patient forgot to give the card last time and just brought it.
Anywhere the appointment window is open — the Create Insurance button sits at the bottom right, next to Add an appointment / Update Status.
Open the form
Click Create Insurance. A small window opens on top of the appointment window.
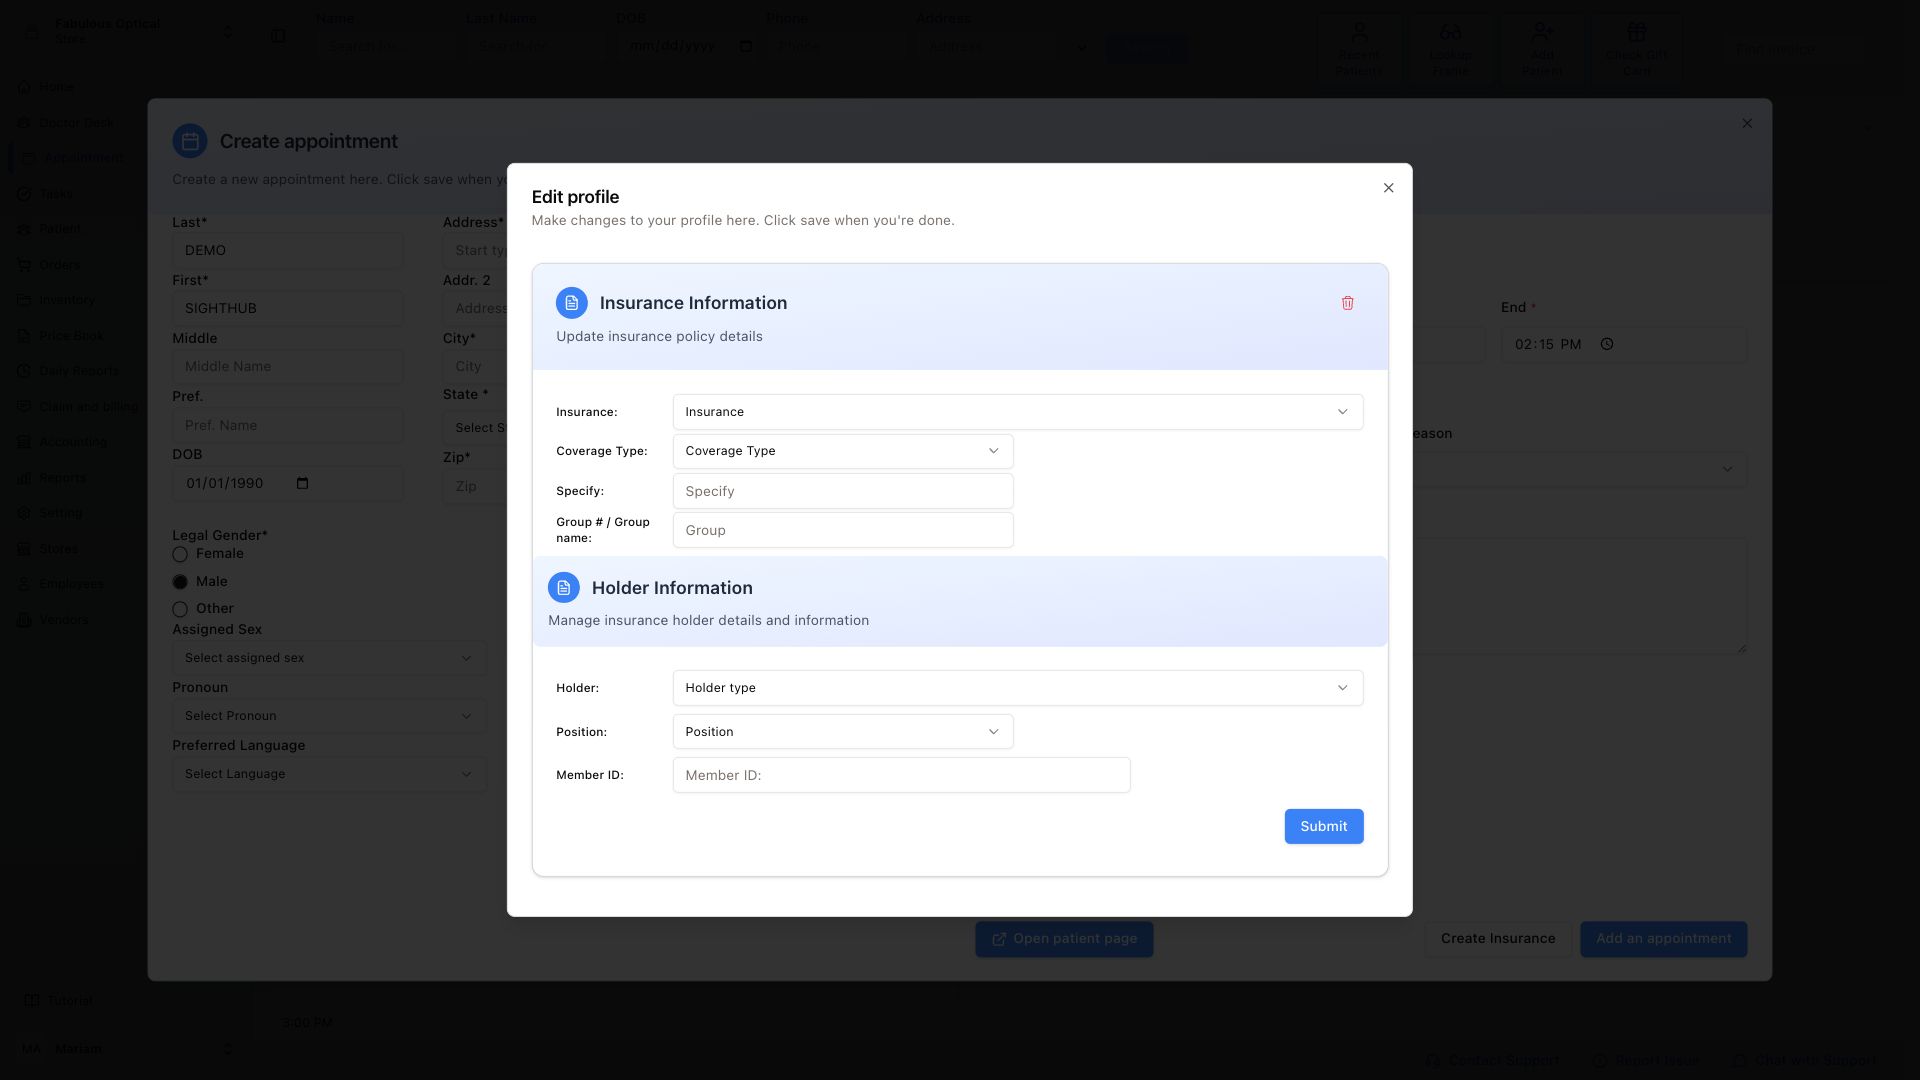
The form has two sections.
Insurance Information
- Insurance — pick the insurance company from the list. If it's not in the list, add it in Settings → Value Lists → Insurance Companies first.
- Coverage Type — Vision, Medical, or whatever your practice tracks.
- Specify — a free-text detail if Coverage Type needs it (e.g. "Frame allowance").
- Group # / Group name — from the insurance card.
Holder Information
- Holder — pick who the insurance is under (Self, Spouse, Parent, Child, Other).
- Position — the holder's position/relationship label.
- Member ID — the ID from the card (this is what the insurance uses to identify the patient).
Save
Click Submit. The insurance is added to the patient. The Insurance dropdown in the appointment window refreshes — pick the new insurance for this visit and continue.
Tip: this is the patient's insurance, not just for this visit
The insurance you add here goes on the patient's record permanently — same as if you added it from the patient's page. You can pick it again for future visits, and it shows up on claims.
If you only want to change which insurance is used for this appointment, don't create a new one — just pick a different one from the Insurance dropdown in the appointment window and click Update insurance Info (in the edit view).