Inventory — stock, receipts and returns
Inventory covers everything physical the store holds: what is on the shelf, what is arriving, and what is going back. Three menus across the top divide it up.
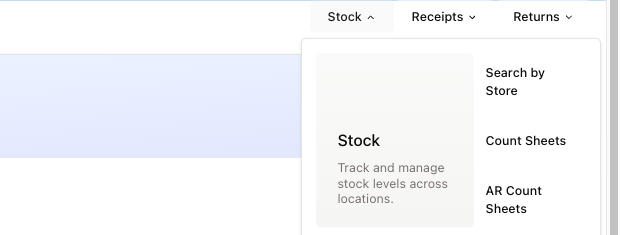
| Menu | What is inside |
|---|---|
| Stock — track and manage stock levels across locations | Search by Store, Count Sheets, AR Count Sheets |
| Receipts — manage all incoming inventory from vendors and stores | From vendors, From stores, Transfer |
| Returns — handle inventory returns from patients or vendors | From Patients, To vendors |
Inventory Search
The landing page of the section. Two tabs — General and Models — and a column of filters down the left.
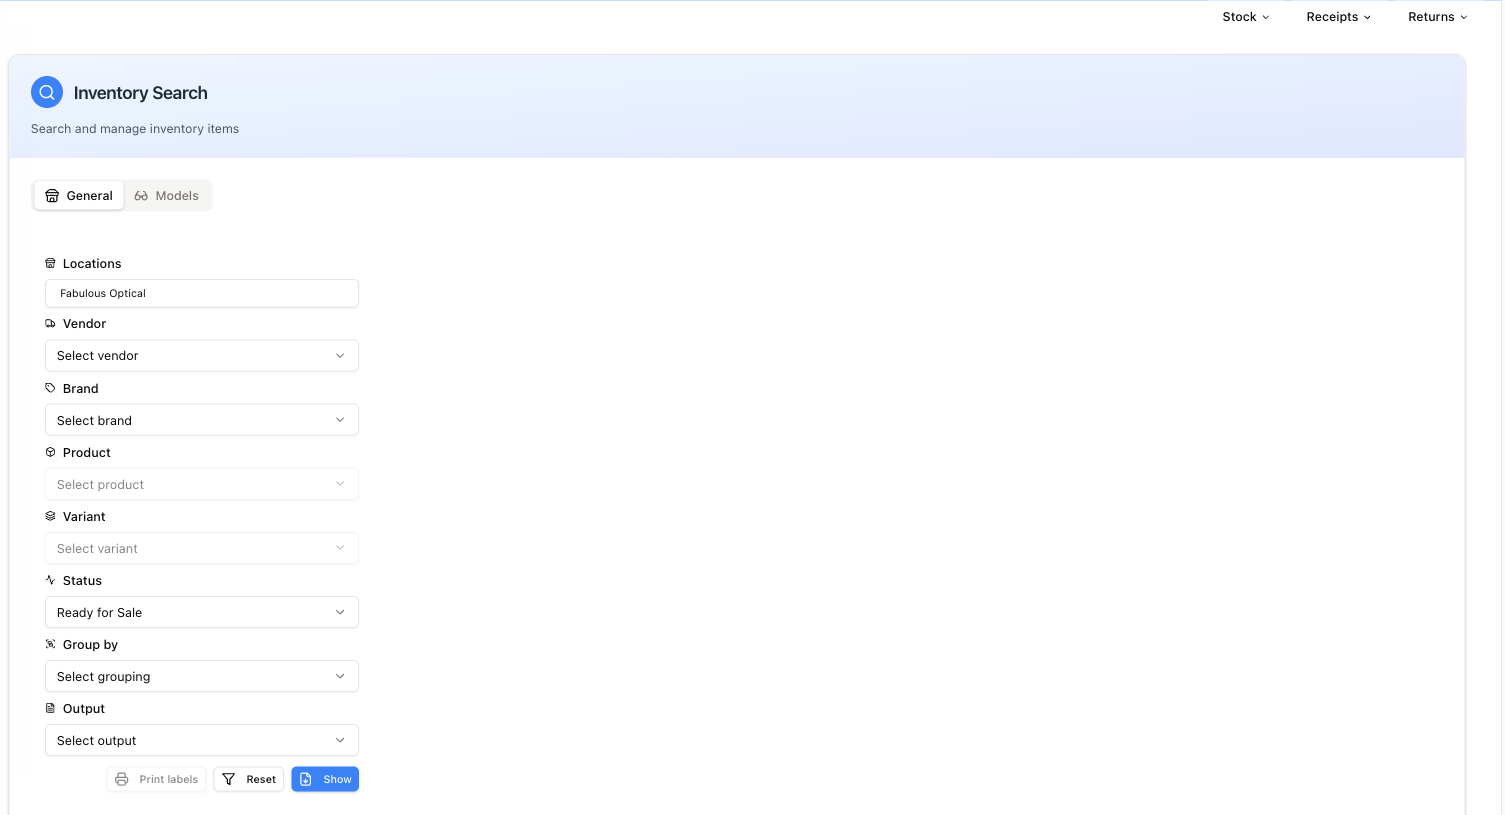
- Locations — which stores' stock you are looking at; more than one can be ticked. It starts on your own location.
- Vendor and Brand — narrow to a supplier or a brand.
- Product — stays greyed out until a brand is chosen, then narrows to a model.
- Variant — stays greyed out until a product is chosen, then narrows to a colour.
- Status — the state of the item; Ready for Sale is the default, All drops the filter.
- Group by — SKU or Model.
- Output — Screen shows the table below; CSV downloads the result as a file instead.
Show runs the search and Reset clears the filters (including Locations, which goes back to empty rather than to your own store). Print labels is separate from the results: it stays greyed out until Locations, Vendor and Brand are all chosen, and then prints for that combination whether or not you have searched.
Results come a page at a time — use Load More under the table to pull the rest.
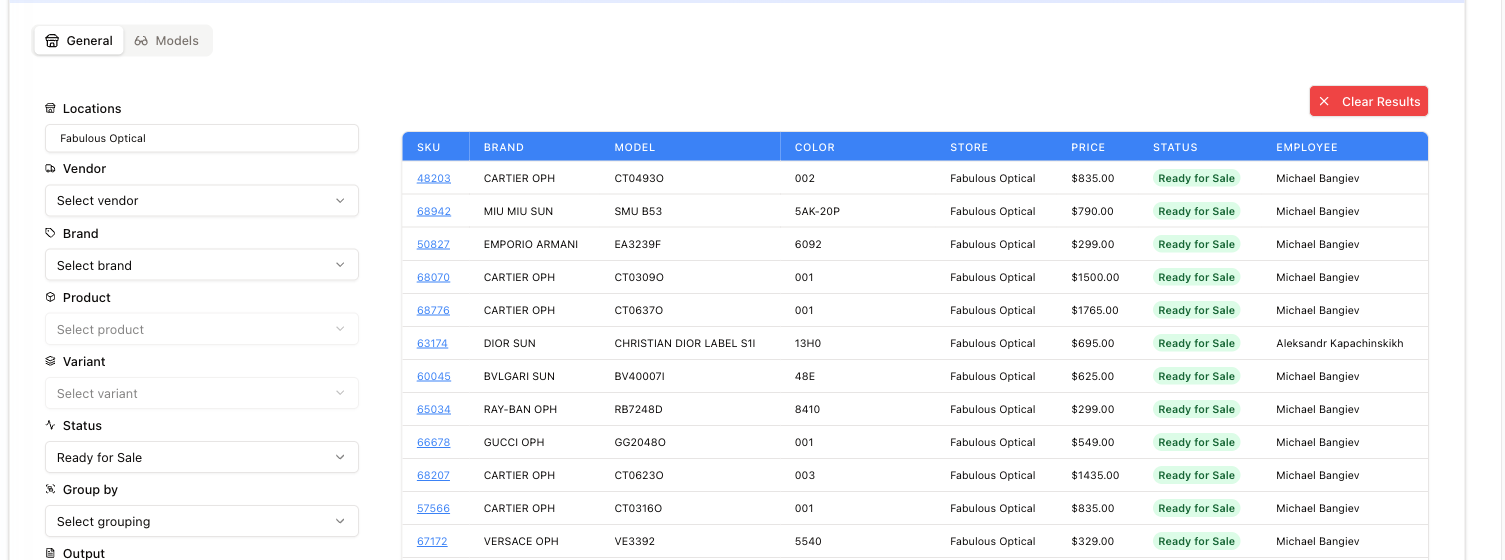
Results come back as a table: SKU, BRAND, MODEL, COLOR, STORE, PRICE, STATUS and the EMPLOYEE who last handled the item. Click a SKU to open that item's details in a pop-up. Clear Results empties the table.
A frame on its way from one location to another is already listed under the STORE it is going to, with the status ICT (sent and not received), and no longer under the one that sent it; it cannot be sold or changed until it is received there.
The Models tab is a quicker search by name: type a model name or number into Model Search and press Show. Results come back grouped by store, with SKU, Brand, Model, Color, Price and Status. Switching between the two tabs clears whatever results are on screen.
Count Sheets
A count sheet is one stock-take: a defined slice of inventory, counted item by item.
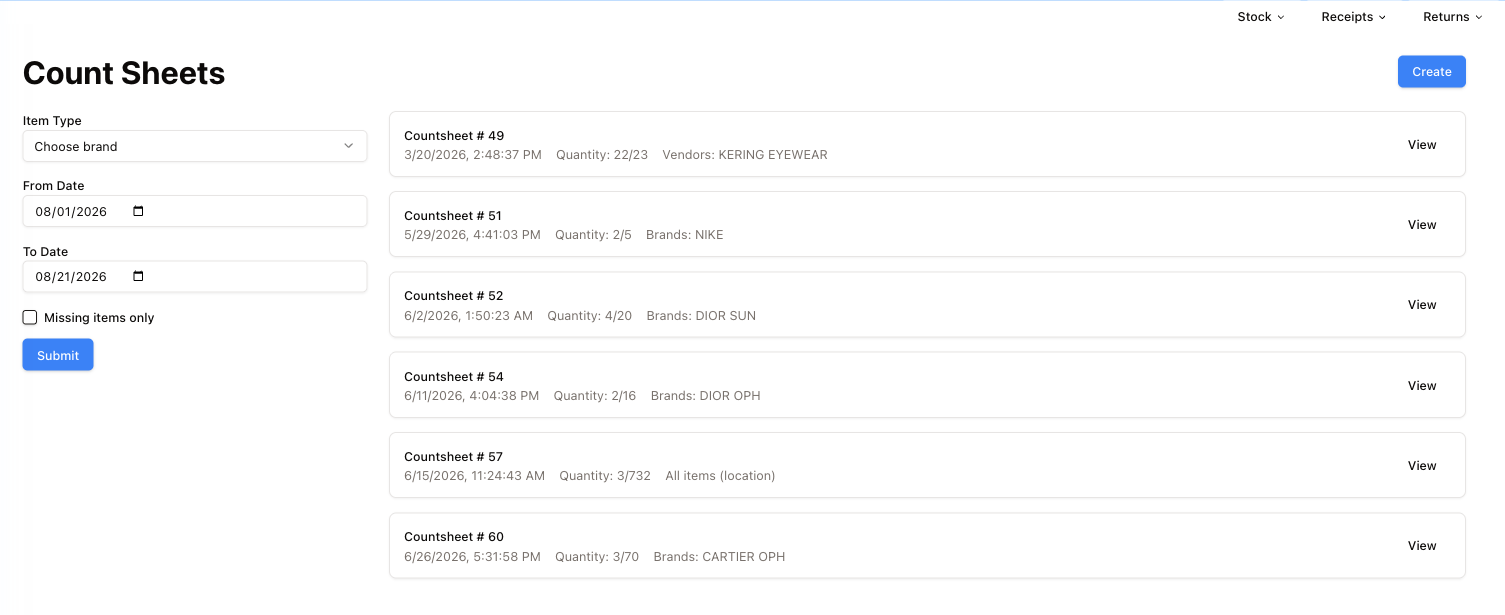
The list shows each sheet with its number, when it was created, a Quantity of counted / expected — 22/23 means one item is still unaccounted for — and what it covers (a vendor, a brand, or all items in a location). Filters on the left narrow by Item Type (despite the name, a list of brands), a date range, and Missing items only; press Submit to apply them. View opens a sheet.
Create starts a new sheet and asks what it should cover: By Brand, By Vendor, or Entire location (every Ready-for-Sale frame at your current location). Pick the brand or vendor where asked and press Submit — the new sheet opens straight away. Whatever it covers, a sheet expects only frames in Ready for Sale, and only those count in its Quantity; anything else that turns up comes in as an exception.
Details
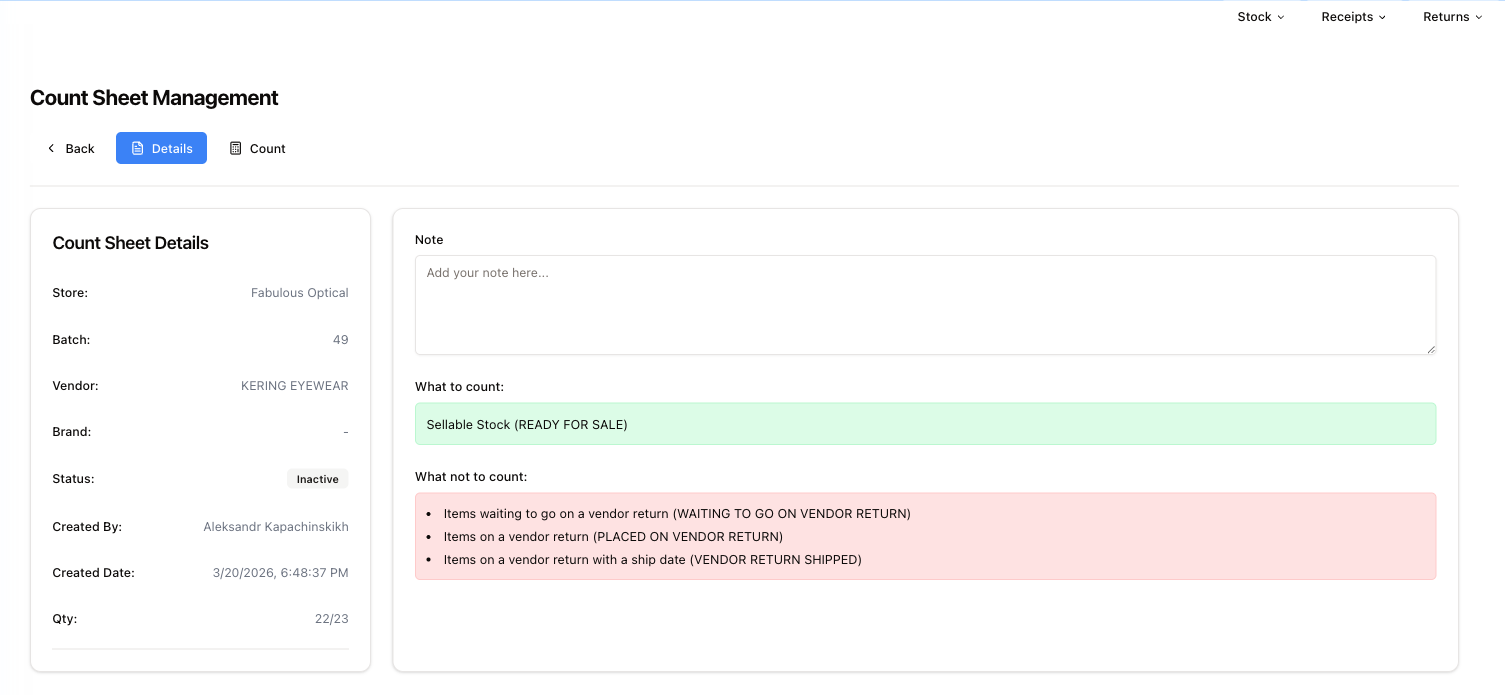
The left card is the sheet's identity: store, batch number, vendor and brand (or All items (location) on a whole-location sheet), status, who created it and when, and the running Qty.
The right side is the instruction for whoever is counting — a Note field, then two colour-coded lists:
- What to count, in green — for example Sellable Stock (READY FOR SALE).
- What not to count, in red — items already committed elsewhere: waiting to go on a vendor return, placed on a vendor return, or shipped on one.
That second list is the point of the screen. Counting an item that is already on its way back to the vendor produces a discrepancy that is painful to unpick later.
Under the left card sit three buttons while the sheet is open:
- Save — saves the Note.
- Close — finishes the sheet. It asks for confirmation first, and closing cannot be undone. If you are not allowed to close count sheets yourself, the close is sent to a manager instead: the sheet shows Waiting for manager approval, and scanning, notes and deletions are blocked until the manager decides (see Requests).
- Delete — removes the whole sheet, after an Are you absolutely sure? check. Its frames stay as they were, and their history keeps what the sheet recorded, with Count Sheet: Deleted added.
Count
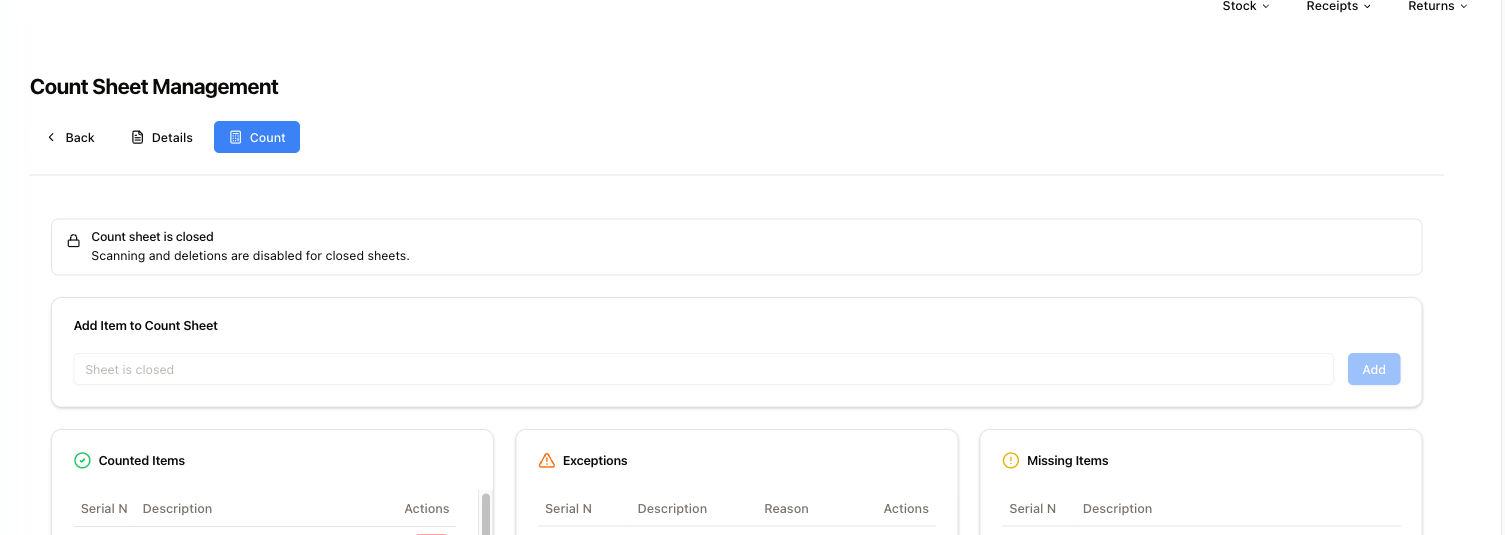
Where the counting happens. Add Item to Count Sheet takes a scanned or typed serial number and Add puts it in.
The results split into three columns:
- Counted Items — what has been scanned in Ready for Sale.
- Exceptions — frames the sheet does not count, with a Reason (their status): one scanned in any other status (SOLD, Defective, On Return, Missing…), and one it expected or had counted that is sold, returned to the vendor, made Defective, removed, deleted or sent to another store while the sheet is open (Sent to … for that).
- Missing Items — expected but not found.
On Counted Items and Exceptions each row has an eye button (look the item up) and a bin (take it off the sheet). A scan that lands in Exceptions shows a warning with the reason, and the input box turns yellow.
A frame found while Removed or Missing waits in Exceptions until the sheet closes. Closing puts it back in Ready for Sale where it is and counts it. Closing also marks every frame still expected and not found as Missing — but one that left Ready for Sale while the sheet was open keeps its own status among the exceptions; it is never overwritten with Missing.
Every step is also written in the history of each frame the sheet holds: Count Sheet: Open when the sheet is created, Count Sheet: Counted, Count Sheet: Exception, Count Sheet: Uncounted when a frame is taken off the counted, Count Sheet: Closed — Counted, — Missing or — Exception at the close, and Count Sheet: Deleted if the sheet is deleted.
A finished sheet is closed, and the page says so: Count sheet is closed — scanning and deletions are disabled for closed sheets. The input is greyed out with the placeholder Sheet is closed.
AR Count Sheets look similar but count something else entirely: outstanding AR invoices, not stock. Create AR Count Sheet starts one straight away, with nothing to choose. You add invoice numbers rather than scanning SKUs, and the result is two lists — Counted Invoices and Missing Invoices.
Receipts and Returns
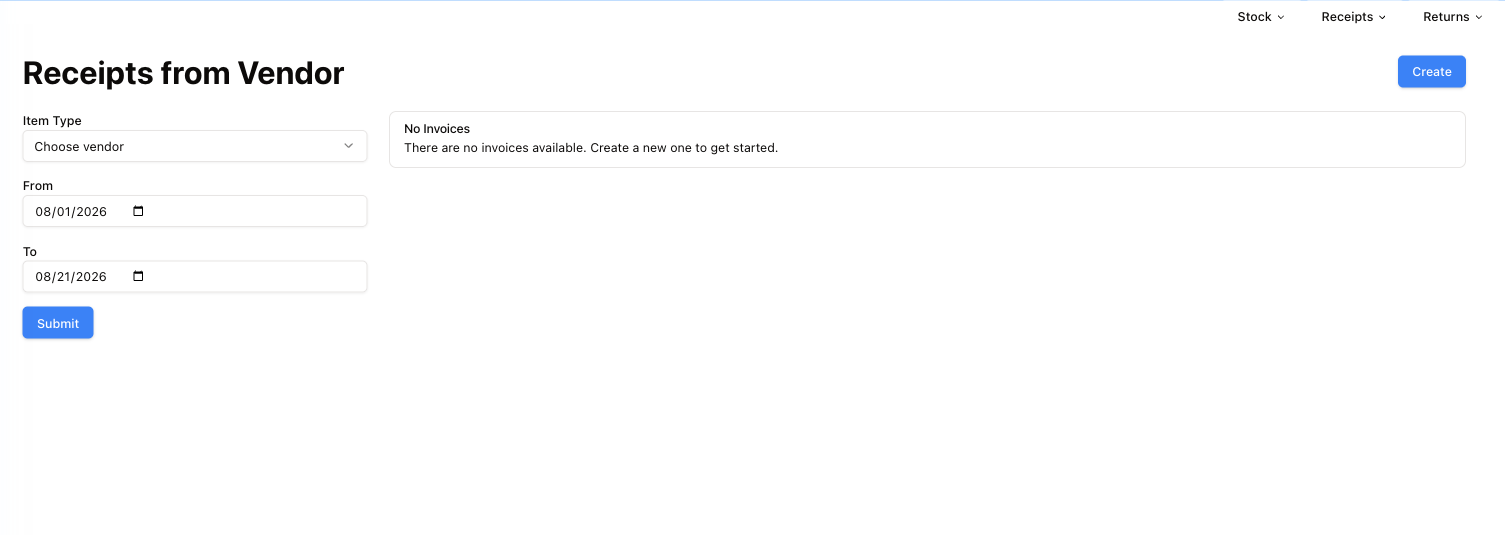
Receipts → From vendors lists incoming vendor invoices, filtered by vendor and a date range, with Create for a new one. From stores and Transfer handle stock moving between the practice's own locations. A store with a warehouse receives at the warehouse — vendor deliveries and transfers from other stores — and the warehouse passes stock on to the showcase; only a store with no warehouse receives at its showcase.
Returns → To vendors sends stock back to the supplier — one list for the store, shared by its showcase and its warehouses; From Patients handles what a patient brought back — the same returns that start from the invoice page.
All five pages are covered step by step in Receipts, transfers and returns — including why these pages so often look empty when they are not.