Invoice detail — items, payments and actions
The invoice page is one sale: what the patient bought, what has been paid, and what is still owed. You get here by clicking a row in the Invoices widget on the patient card, or by pressing + Create Invoice there to start a new one.
The address looks like /patient/<patient id>/invoice/<invoice id>.
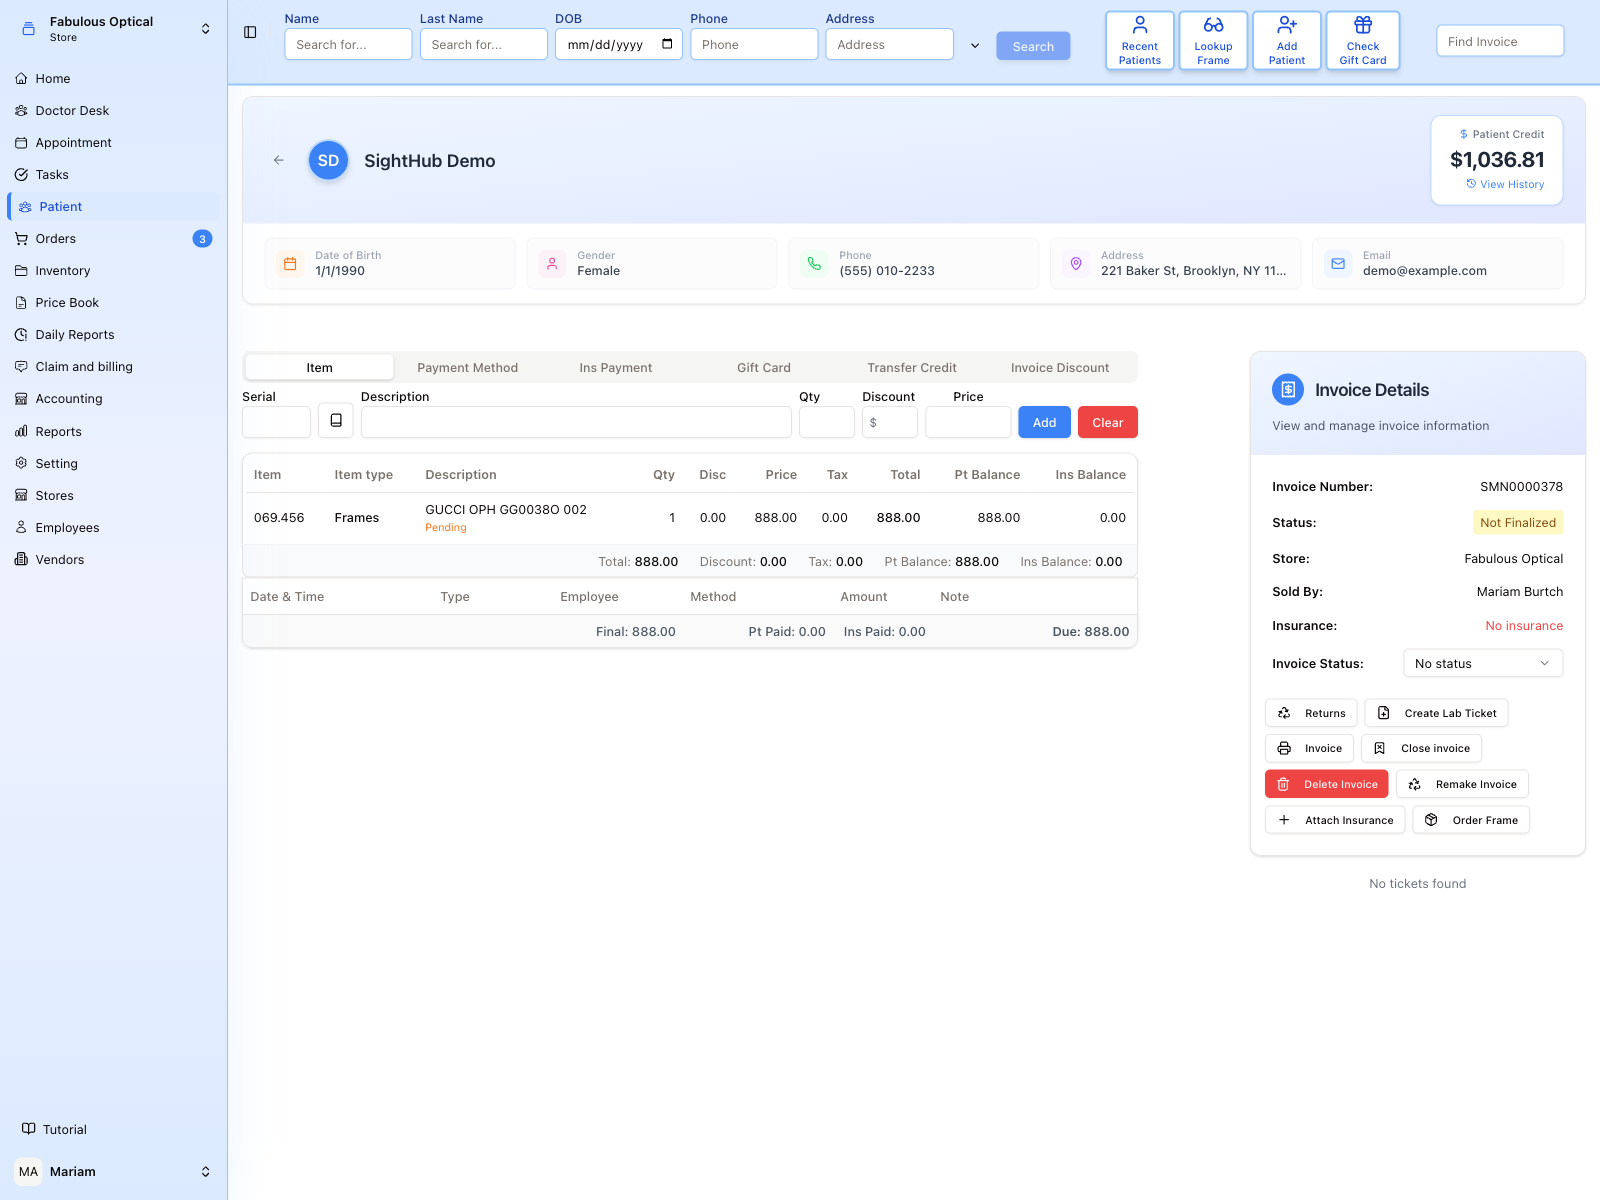
Across the top runs the patient strip — name, date of birth, contact details and the Patient Credit balance (see Credit Management below). Under it the page has two halves: the working area on the left, and Invoice Details on the right.
The six tabs
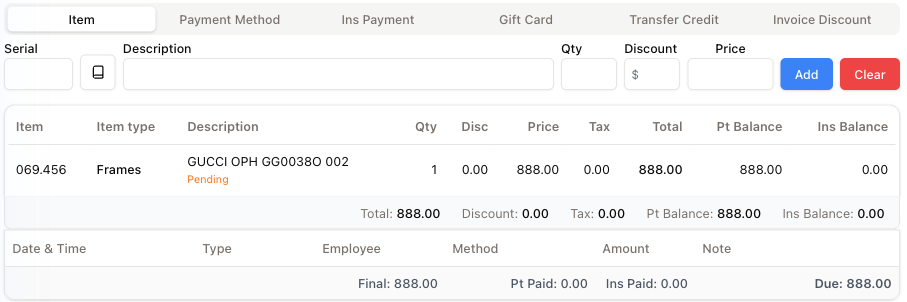
The tab strip switches what the working area does. The item table underneath, and the running totals below it, stay visible on every tab — so you always see the effect of what you just did.
Item
Add what the patient is buying. Serial identifies the product (the small book button next to it opens the price book lookup), then Description, Qty, Discount and Price. Add puts the line in the table; Clear empties the form. You can also type a frame's SKU in Serial and press Add with the rest empty — the page looks the frame up and fills in the description and price; press Add again to put it on the invoice.
Only a frame that is at this location can be sold here. A frame at the store's warehouse is refused, and the message says where it is: the frame is not at this location: the frame is at … — the inventory manager or the store manager transfers it to the showcase before it is sold. Once one of them has transferred it (see Receipts, transfers and returns), add it as usual. A frame still on its way to the store, or one ordered for another patient, is refused the same way, and the message says why.
Picking a contact lens from the price book opens a Contact Lens window instead: set the Right Eye and Left Eye quantities and the price per lens/box, then Add — each eye goes on the invoice as its own line.
A lens from an outside catalogue cannot be added once the invoice already has lens options (add-on services) on it — you get Cannot add … lenses: invoice already has additional services.
The table shows each line with Item, Item type, Description, Qty, Disc, Price, Tax, Total, and the split between Pt Balance (what the patient owes) and Ins Balance (what insurance owes). A frame ordered for the patient (see Order Frame below) shows under its description where the order is: Pending while it is on order, In transit on its way here from the store's warehouse, Received once it has come in and waits for the patient. Click a line to change or remove it — see Item Details below.
Under the table a strip adds it all up: Total, Discount (line discounts plus any invoice discount), Tax, Pt Balance and Ins Balance. Ins Balance only appears when insurance is attached to the invoice (or there is already an insurance balance). On a line, an invoice without insurance shows a dash in Ins Balance.
Frames cannot be sold below their selling price. If you type a lower price you get Cannot sell frames below selling price ($…). Use Discount to lower the total.
Discount items — DI and DL
The price book's Miscellaneous list has two special items that take money off rather than add it:
- DI — insurance discount. It can be at most the invoice's insurance balance.
- DL — lens discount. It can be at most a set percentage of the lenses on this invoice.
In the lookup, the Discount column shows the most you can give on this invoice in dollars — for example Up to $45.00. When you pick one, a hint under the Item form repeats it: Discount: enter the amount as Price, up to $45.00. If the invoice has no insurance balance yet, DI says Insurance discount needs an insurance balance on this invoice — there is none yet.
Enter the discount amount in Price. How the limits are set is in Price Book.
Discount over your limit — asking a manager
Every job title may give only so much discount per type of item (set in Settings → Employee → Discounts — see Value lists). If you add a line, or change a line's discount, above your limit, the invoice does not save it and opens Discount over your limit instead:
- it tells you your limit and what you asked for, e.g. You can give up to $39.90 (10%) here; you asked for $80.00.;
- Reason * — required;
- Ask a manager sends the change to Requests; Cancel drops it.
Nothing on the invoice changes until a manager approves. Then the line is added with its discount, or the existing line gets the new discount. You can keep working on the invoice meanwhile.
Payment Method
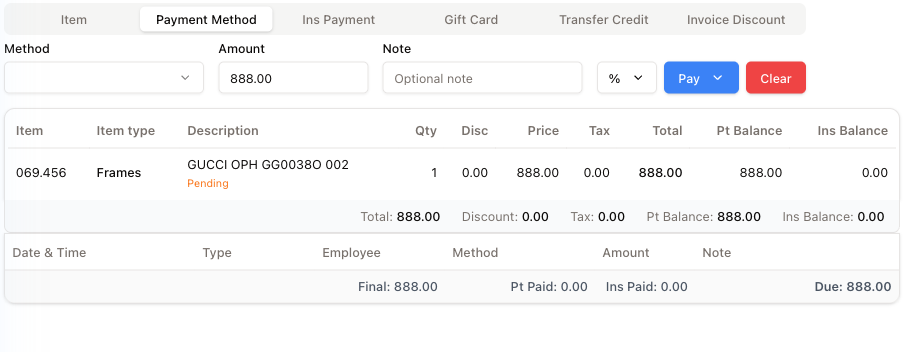
Take money from the patient. Pick a Method, check the Amount (it pre-fills with the patient's balance, Pt Balance), add an optional Note, then open Pay — it is a menu, not a button. Manual records the payment as taken; Terminal (offered only for methods wired to a card terminal) sends the amount to the terminal for the patient to tap. The red Clear next to it empties Amount and Note (the method stays picked). The % selector next to it is a shortcut, not a mode switch: pick 25, 50, 75 or 100 and it fills Amount with that share of the patient's balance.
The methods on offer: Amex, Visa / MC, Discover / JCB, ALPHAEON, Care Credit, American First, Acima, PayPal, Shopify, Sezzle, Afterpay, Zelle, Issue Ref Ck, Cash, Check, Patient Credit, Transfer Credit and Cherry Finance.
Every payment lands in the payments table below the items — see The payments table below.
Ins Payment
Record what the insurance company paid. Choose the Insurance (the policy attached to the invoice is picked for you) and the Payment type (check, EFT and so on — required), enter the Amount, plus an optional Ref # and Note, then press Pay.
Adjustment — the part written off rather than paid — fills itself in as the invoice's due minus the amount you typed; you can change it. When it is above zero it is saved as a second, separate adjustment line in the payments table.
If you pick a different insurance from the one attached (or any insurance when none is attached yet), Pay first asks Confirm Insurance Change; Confirm attaches the new policy to the invoice and then records the payment.
Only billing staff can do this. Recording an insurance payment or adjustment, and deleting one, needs the Claim & Billing permission at this invoice's store (or an admin). Anyone else gets a message saying exactly that.
Gift Card
Pay with a gift card: enter the Gift Card Number — when you leave the field the page shows the Available balance — then enter the Amount to take off it and press Pay. The amount cannot be more than the available balance.
Transfer Credit
Use credit the patient already has on their account. It shows the Available credit; enter how much of it to put against this invoice in Amount and press Pay. You cannot use more than is available.
Invoice Discount
Take a discount off the whole invoice rather than a single line — enter the Discount Amount and press Add Discount (Edit Discount once there is one).
On the Ins Payment and Gift Card tabs there is a further yellow button — Disconnect Ins. and Disconnect Gift Card. Both act at once, with no confirmation.
Item Details — changing or removing a line
Click any line in the item table and the Item Details window opens.
- Serial / Item — read only.
- Quantity and Description — the description cannot be changed on a frame.
- Price.
- Discount — with a $ / % switch. In % you type a percentage and it is turned into dollars of price × quantity for you.
- Patient Balance and Insurance Balance — how this line's total is split. Change one and the other fills itself so they add up to the total. Both are locked until insurance is attached to the invoice (Attach insurance to the invoice first.). On a DI or DL discount line they are always locked: A discount line has no patient / insurance split.
- Taxable — the switch, with State default: …% under it. When it is on, Tax rate (%) appears. Change the rate and a Custom tag shows, with Reset to go back to the state default.
- Total — worked out for you, with the price and tax shown separately when there is tax.
Save Changes saves everything you changed. Delete Item removes the line.
Good to know about this window:
- Tax and the split do not mix in one go. Once you change a balance, the Taxable switch locks; once you flip Taxable, the balances lock. Save, open the line again, then do the other.
- Lowering a price needs the Lower Item Price permission. Without it you get a message naming the permission.
- A discount above your limit opens Discount over your limit, as described above.
- Deleting a line asks for a reason. The window Delete this line? has a required Reason * box; the reason goes to the deleted invoice lines report. The line is removed at once — no manager needed.
- Deleting a frame line puts the frame back in stock where it is, at the showcase that sold it — it does not go back to the warehouse by itself; that takes a transfer. Deleting the line of an ordered frame cancels the order; a frame that has already come in stays in stock, free to be sold to anyone.
The payments table
Below the item totals is one table of everything paid — patient payments and insurance payments together, newest first: Date & Time, Type (Patient or Insurance, with a Void or Refund tag when that is what the row is), Employee, Method, Amount and Note. The footer shows Final, Pt Paid, Ins Paid and Due.
Click a payment to open Payment Details:
- A patient payment taken on a card terminal offers Void (same day, before the batch closes) or Refund with card (the patient taps their card again).
- Any other patient payment lets you correct the Amount and Save, or Delete Payment.
- An insurance payment shows its details and Delete Payment.
Deleting a payment asks for a reason — Delete this payment? / Delete this insurance payment? with a required Reason *. The payment is removed and the due recalculated; the reason goes to the deleted invoice lines and payments report.
Under the payments table, once there is at least one return, Return Invoices lists the returns made against this invoice, each with its status; click one to see what came back. The … menu on a return offers Delete, Confirm and Cancel — the same as in the Returns window (see below).
Invoice Details
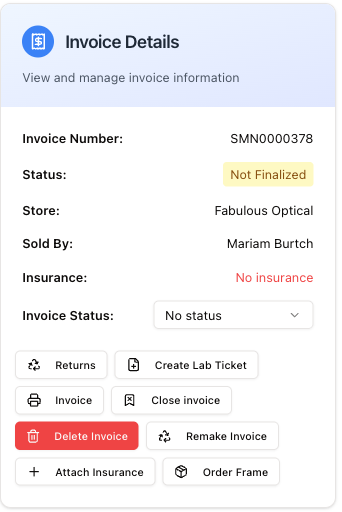
The right-hand card is the invoice's identity and its actions.
- Invoice Number, Store, Sold By — who sold it and where.
- Status — Not Finalized while the invoice is still open, Finalized once closed, or Pending deletion while a deletion waits for a manager.
- Insurance — the policy attached to this invoice, or No insurance.
- Invoice Status — a status you set yourself from the dropdown. Shipped to Customer, Picked Up by Customer and Dispensed in Store mean the patient has the goods: an ordered frame on the invoice that has come in (Received) counts as sold then. While one has not arrived yet (Pending or In transit), these statuses are refused, and the message names the frame — for example frame … of this invoice is still on order: it has not arrived.
The buttons:
| Button | What it does |
|---|---|
| Returns | Return items from this invoice |
| Create Lab Ticket | Send the prescription to the lab — see Lab ticket |
| Invoice | A menu: Print, Send Email or Send SMS the invoice to the patient |
| Close invoice | Finalize it — no more edits |
| Delete Invoice | Ask a manager to delete the invoice |
| Remake Invoice | Start a new invoice for items being redone |
| Attach Insurance | Put an insurance policy on the invoice (reads Remove Insurance once one is attached) |
| Order Frame | Special-order a frame from the vendor and add it to this invoice |
Order Frame — ordering a frame the store does not stock
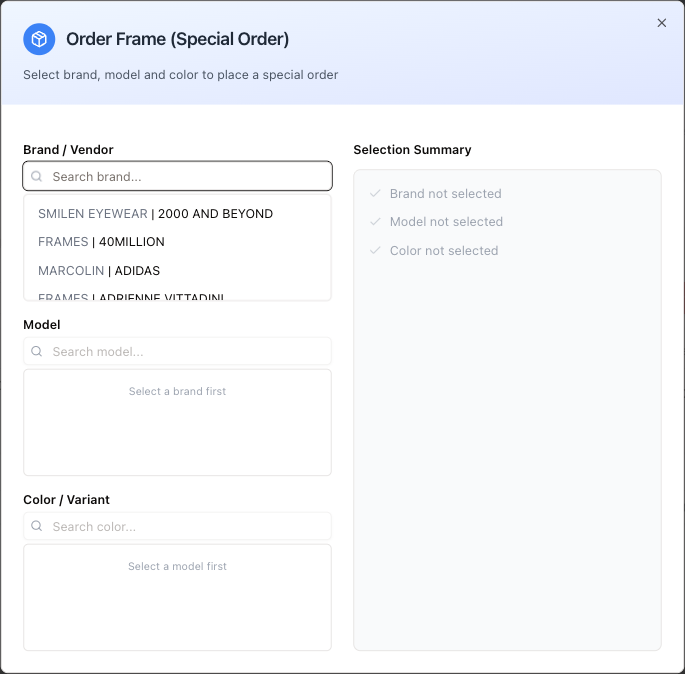
A special order goes in three steps down the left side, and the Selection Summary on the right ticks them off as you go:
- Brand / Vendor — type a few letters to filter the list. Each entry shows the brand and the vendor it comes from.
- Model — the models that brand offers.
- Color / Variant — the colour codes for that model.
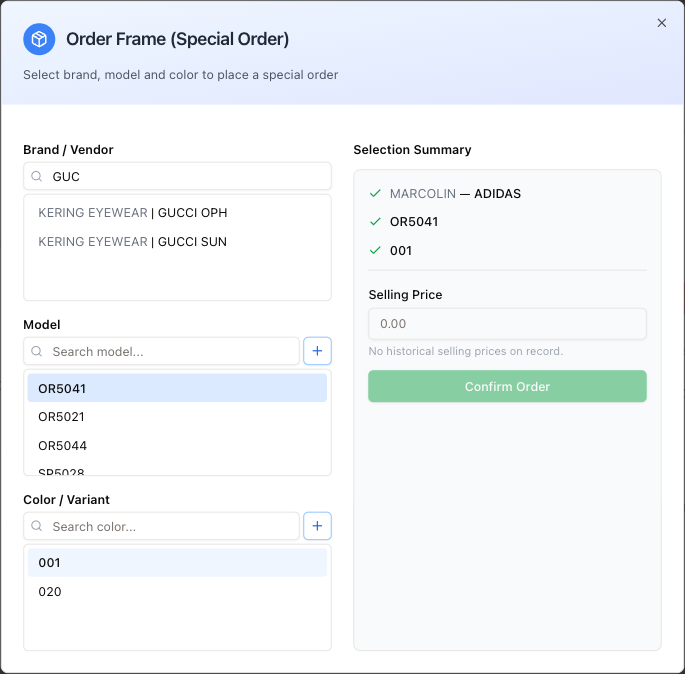
With all three chosen, the summary fills in and Selling Price appears. Under the price field the page tells you whether this model has been sold before. When it has, it lists what it went for and turns each figure into a button — tap one and it fills the price field. When it has not, it says No historical selling prices on record — there is no past price to copy, so the figure is yours to decide.
Confirm Order places the special order and adds the frame to this invoice as a new line (the message shows its new SKU). It does not appear at all until a colour is picked, and then stays disabled until you have entered a Selling Price. The + buttons next to Model and Color add an entry that is not in the catalogue yet.
From then on the frame is kept for this patient. Its line reads Pending until the vendor's shipment is received — at the store's warehouse when the store has one, and from there the frame goes straight on to the showcase, In transit until the showcase receives it — and then Received. Meanwhile it cannot be sold on another invoice, transferred elsewhere or returned to the vendor. It counts as sold when the patient gets it: when Invoice Status is set to Shipped to Customer, Picked Up by Customer or Dispensed in Store, or the lab ticket to Dispensed in Store * or Shipped to Customer *.
Returns — sending items back
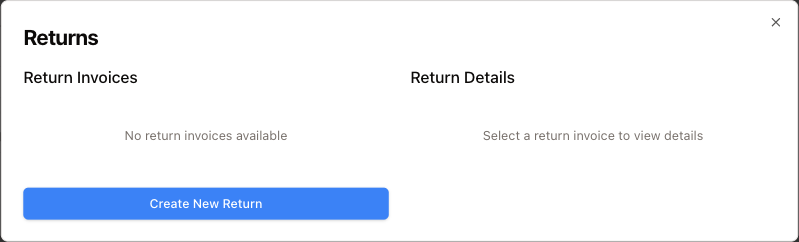
The dialog opens on the returns already made against this invoice. Create New Return moves to the item list:
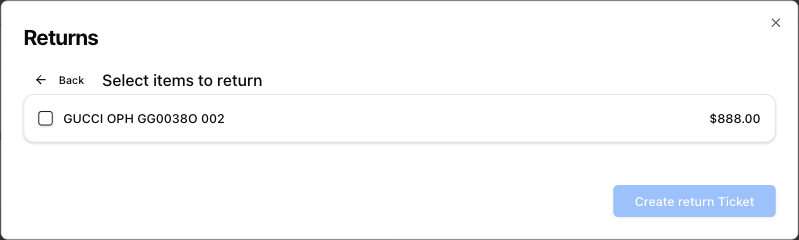
Tick what is coming back — you don't have to return the whole invoice — and use + / − to return fewer than the full quantity of a line — then Create return Ticket.
The new return appears in the list with its status. Click it to see its lines and Total Return Amount; its … menu has Confirm, Cancel (deny the return) and Delete.
Remake Invoice — doing the work again
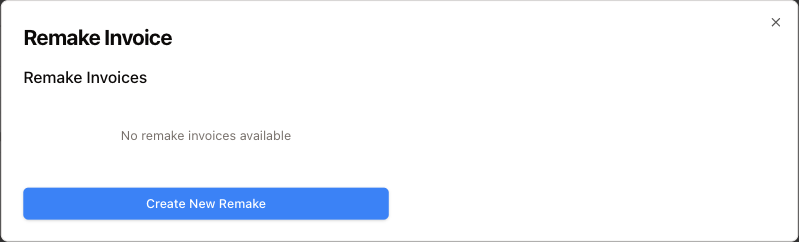
Same shape as Returns: Create New Remake, tick the items, then Create new Remake Invoice. SightHub creates a new invoice with those items and opens it. Use this when the job is being redone — a lens remade under warranty — rather than refunded.
Attach Insurance
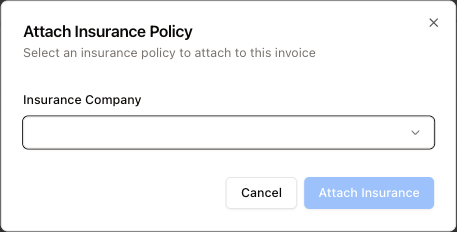
Pick a policy from the patient's active insurances and press Attach Insurance. The claim is then built against that policy. Until insurance is attached, no line can carry an insurance balance.
Once a policy is attached the button reads Remove Insurance. It takes the policy off at once, with no confirmation (the yellow Disconnect Ins. on the Ins Payment tab does the same).
Delete Invoice — goes to a manager
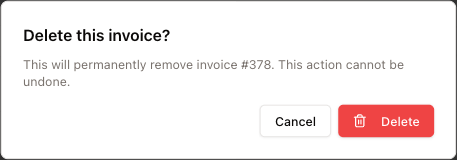
Deleting an invoice is never immediate. It is a request a manager approves.
- Press Delete Invoice.
- The window Delete this invoice? reminds you that only an empty invoice can be deleted — no items, payments or lab ticket — and that a manager approves the deletion in Requests.
- Type a Reason * (required).
- Press Send for approval.
You see Sent to a manager for approval. You'll see it in Requests until it's decided. and go back to the patient card. Follow it in Requests under My requests, where you can also Withdraw it.
While the deletion is waiting
The invoice is frozen — nobody can change it until the manager decides.
- People who can approve still see it in the patient's invoice list with an amber Pending deletion tag. On the invoice page they see the banner Waiting for a manager to approve its deletion — it can't be changed until then. Approve or decline it in Requests. The tabs are gone, lines and payments cannot be clicked, and Invoice Details offers only the Invoice print menu.
- Anyone else who opens it sees only that message and a Back to patient button.
- Credit cannot be transferred onto it — it shows Pending deletion in the invoice search.
If the manager declines, the invoice is back to normal. If they approve, it is deleted.
Close invoice — careful with this one
Close invoice has no confirmation. One click finalizes the invoice immediately.
It is also a toggle. Once the invoice is finalized the same button reads Open invoice, and clicking it un-finalizes the invoice and lets it be edited again. So a mis-click is recoverable — but it does change the invoice's status the moment you press it, with nothing asking whether you meant it.
Any lab tickets made from this invoice are listed under the card; while there are none it says No tickets found.
Credit Management — the patient's credit
The Patient Credit box in the patient strip shows how much credit the patient holds. View History under it opens Credit Management, with Available Credit in the corner and two tabs.
- Payment History — the credit payments on this patient's account: Invoice Number (click it to open that invoice), Employee, Amount and Payment Timestamp.
- Transfer Credit — use this patient's credit to pay an invoice, including another patient's (a family member, for example):
- In Search Invoice, type at least two characters of the invoice number.
- Pick the invoice from the results (Invoice #, Patient, Due, Status) — only patients' invoices are listed. Change lets you pick again.
- Enter the Amount to Transfer — it cannot be more than the available credit.
- Press Transfer Credit.
The same strip — and this window — is also on the patient's Rx and insurance pages.