Stores — practice locations
Stores holds the practice's locations. Two tabs: Locations and Warehouse.
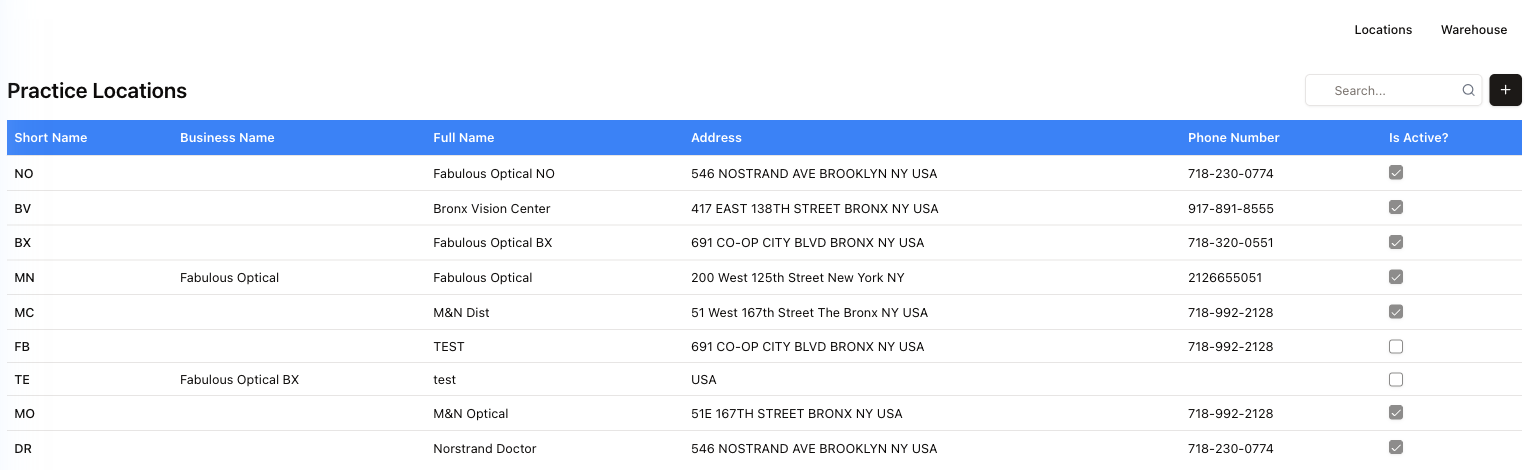
The table lists every location with its Short Name (the two-letter code used across the app — MN, BX, NO), Full Name, Business Name, Address, Phone Number and an Is Active? tick. Full Name is what the location form calls Location Name; Business Name is the field of the same name on the form. The search box filters the list by Full Name; + adds a location.
Those short codes are worth knowing: they are what you pick from in Select Location filters everywhere else in the system.
Editing a location
Click a row to open it.
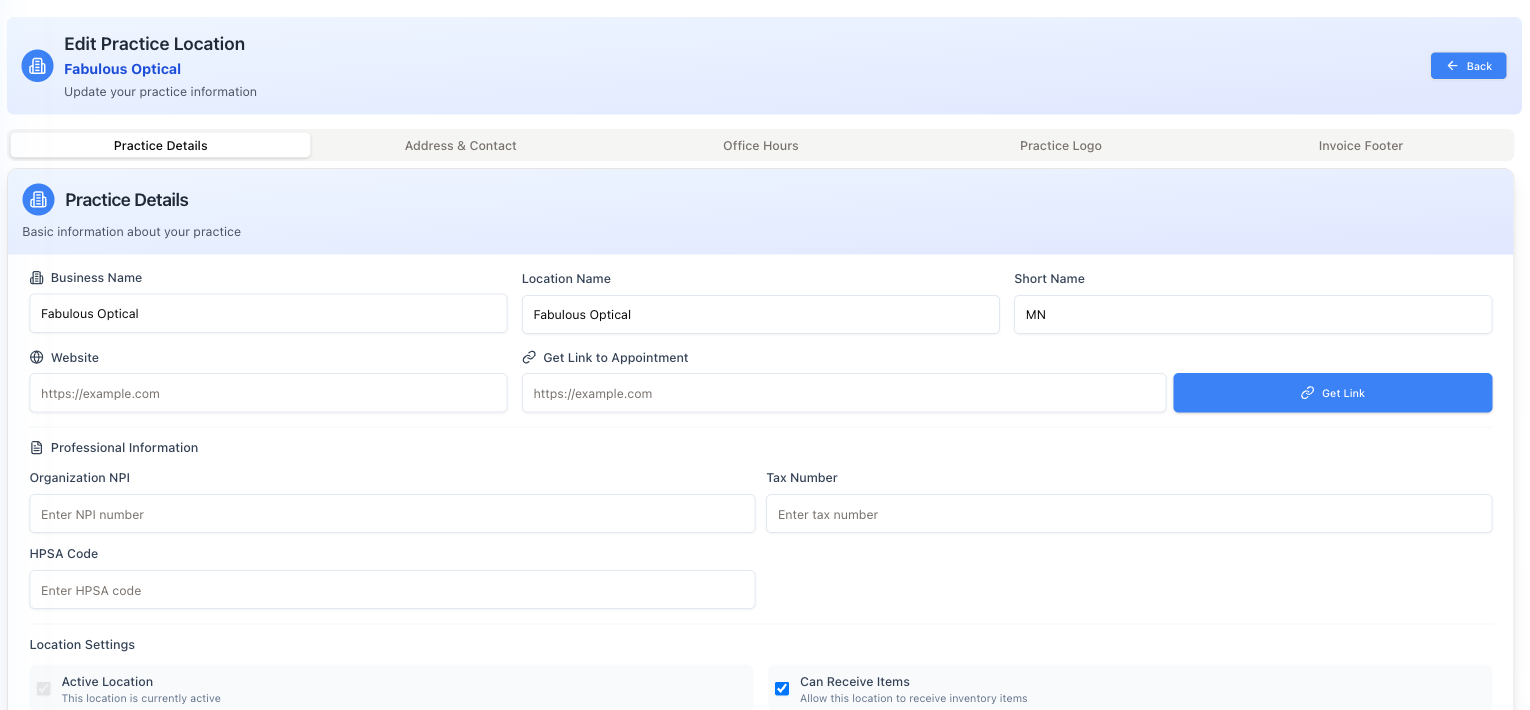
Five tabs: Practice Details, Address & Contact, Office Hours, Practice Logo, Invoice Footer.
Practice Details holds:
- Business Name, Location Name, Short Name.
- Website, and Get Link to Appointment with a Get Link button — the public booking link for this location; pressing it also copies the link. It shows only on a location that has already been saved.
- Professional Information — Organization NPI, Tax Number, HPSA Code. The first two go on every electronic claim: Organization NPI is the Type 2 billing NPI of the practice (not a doctor's NPI), and Tax Number is the federal Tax ID / EIN. A store missing either one cannot bill through TriZetto — the TriZetto settings page calls them Billing NPI and Tax ID / EIN.
- Location Settings — Active Location, which is shown here but cannot be ticked by hand (use the Activate Location button at the bottom), and Can Receive Items, which decides whether inventory can be received here. While a warehouse connected to the location can receive items, the warehouse receives for it: the tick stays off here, and ticking it is refused when you press Update Location — nothing on the form is saved. See Warehouse below.
Practice Logo and Invoice Footer control what prints on the location's paperwork.
At the bottom: Back, Activate Location (asks for the location to be switched on — Store activation requested), and Update Location, which saves the first four tabs (on a new location the button says Create Location and takes you back to the list once it is saved).
Invoice Footer is saved separately, with its own Save Footer button — Update Location does not save it. It has four blocks, Return Policy, Not Responsible For, Store Policy and Signature, each with its text and a switch between Visible on invoice and Hidden; Reset throws away unsaved changes. On a location that has not been saved yet it only says Save the location first to configure the invoice footer.
Warehouse
The second tab lists the warehouses rather than the shops.
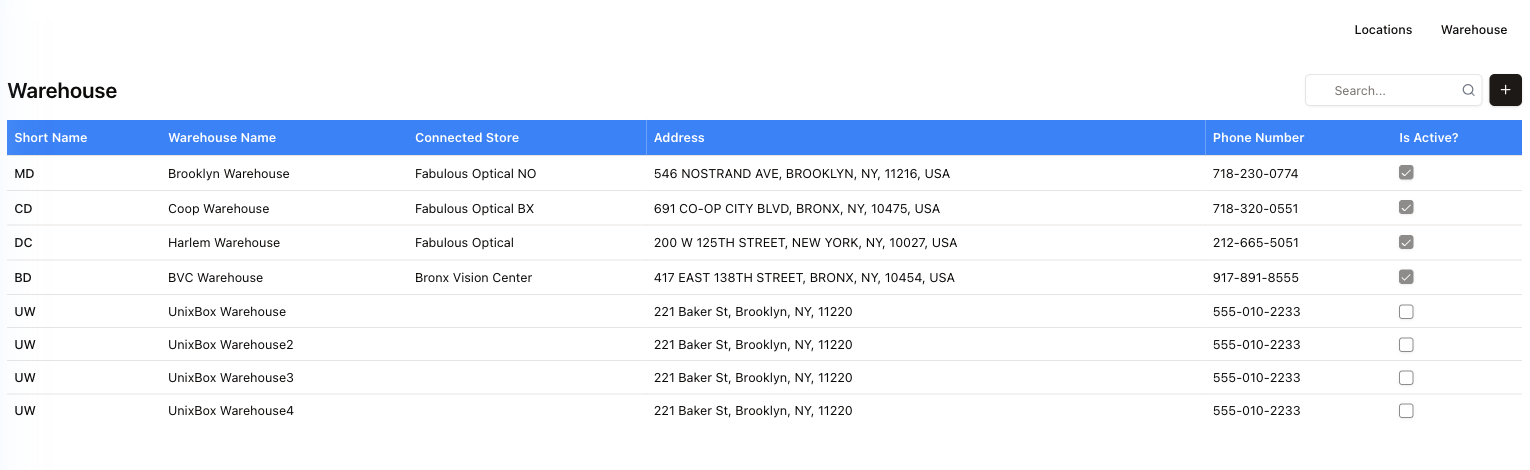
Each row has a Short Name, the Warehouse Name, the Connected Store it serves, the address, a phone and an Is Active? tick. A warehouse without a connected store is not tied to any shop. (The search box above this list does not filter anything yet — scroll instead.)
Warehouses are where stock lives before it reaches a shop. Stock moves between a shop and a warehouse with an Internal transfer — see Receipts, transfers and returns.
A shop with a warehouse that can receive items receives through it. Deliveries from vendors, and ordered frames, are checked in at the warehouse — the shop itself refuses them — and a frame another store sends goes to the warehouse; the warehouse then transfers to the shop (an order for the shop goes on to it at once). A shop with no such warehouse receives at the shop.
Adding or editing a warehouse
The + on the warehouse list opens Add New Warehouse; clicking an existing row opens the same form as Edit Warehouse.
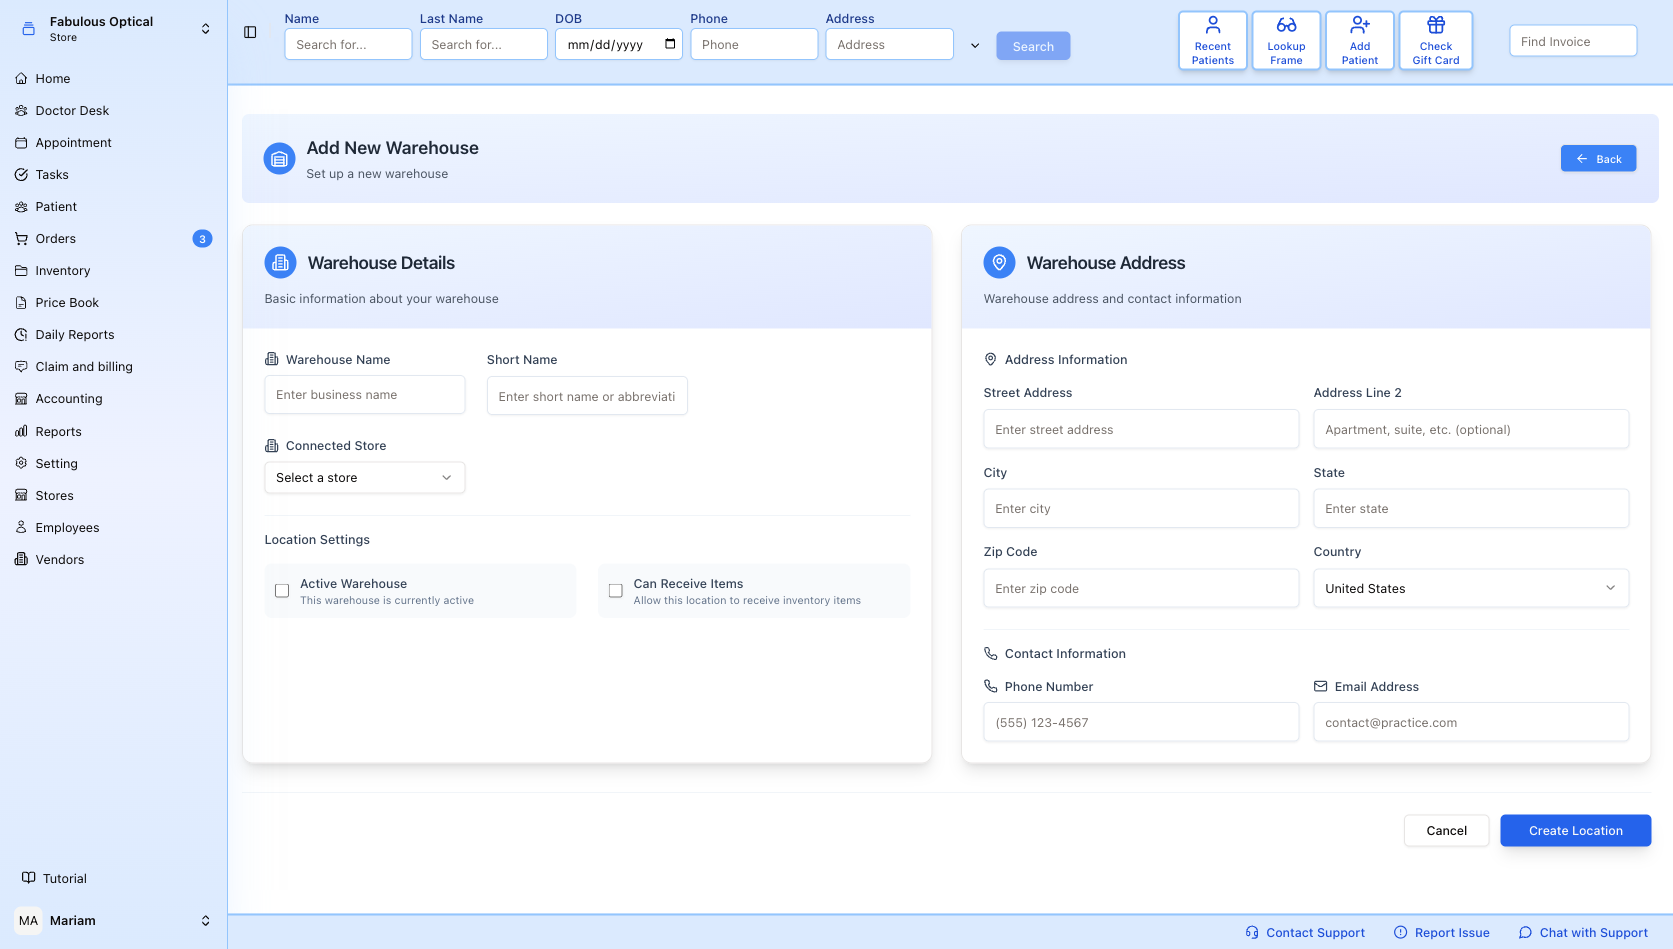
Two cards side by side.
Warehouse Details — Warehouse Name, Short Name (the abbreviation that appears in tight columns and on transfer reports), and Connected Store, the shop this warehouse supplies. Under Location Settings sit the two ticks that decide whether the warehouse is usable at all:
- Active Warehouse — whether it is currently in service.
- Can Receive Items — whether stock can be received into it (Allow this location to receive inventory items).
Saving a warehouse keeps its shop in step: while the warehouse can receive items — whether or not it is active yet — the Connected Store's own Can Receive Items is off. A new warehouse with the tick on switches the shop's off. Taking the tick off here switches the shop's back on, unless another of its warehouses still receives; connecting the warehouse to another store does the same for the shop it leaves, and switches the new one's off.
Warehouse Address — the postal address, plus Phone Number and Email Address under Contact Information. Use the address where deliveries actually arrive.
Create Location at the bottom saves it — the button says Location rather than Warehouse, but it is the warehouse you are creating — and then opens the new warehouse for editing. On an existing warehouse the same button reads Update Location. Cancel and Back both leave without saving.