Vendors and laboratories
Vendors is the address book of everyone the practice buys from. Two tabs: Vendors / Distributors and Laboratory.
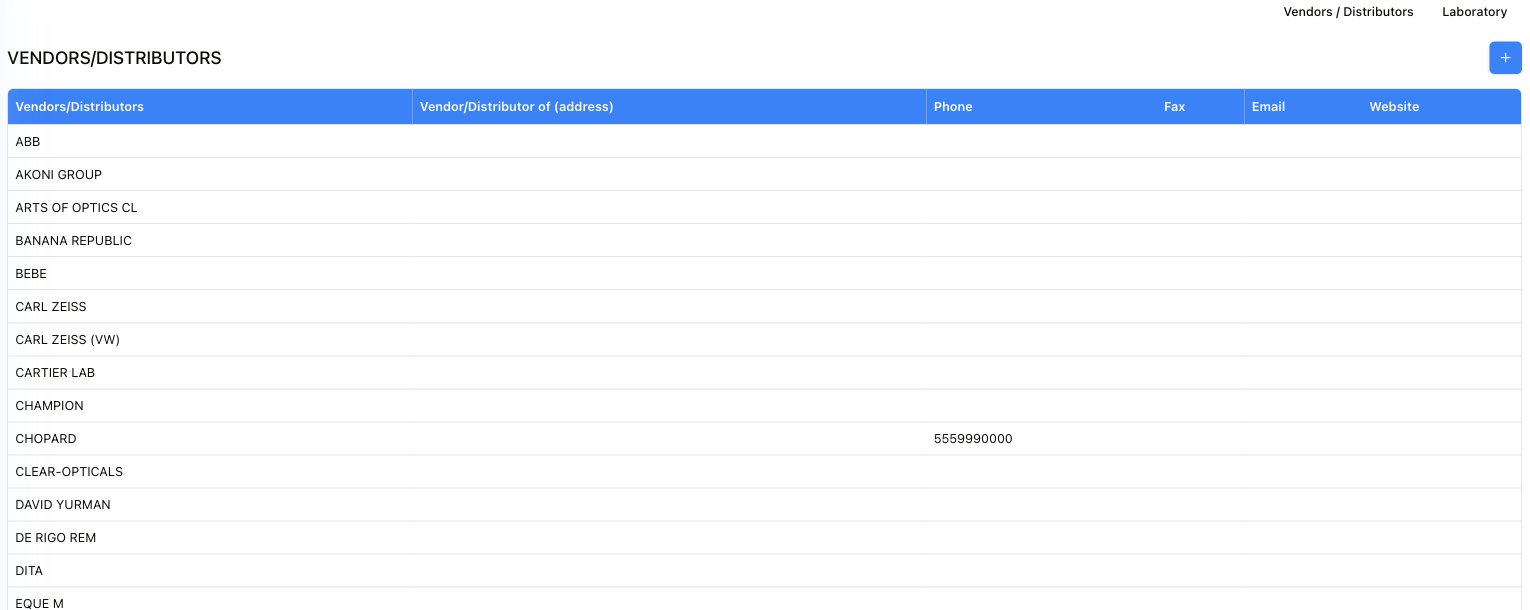
Each row holds the name, the address it distributes from, Phone, Fax, Email and Website. The list is paged — the footer says which page you are on and how many records there are in total, e.g. Page 1 of 3 (53 records), with Previous and Next on either side of it.
These entries are not just a contact list. The vendor picked here is what appears when you order a frame from an invoice, when you receive stock, and when you filter inventory by supplier — so an entry with no phone or email is a vendor nobody can chase when an order is late. On most practices' lists the majority of rows are name-only, which is exactly the problem: worth filling in the ones you actually order from.
Adding a vendor
The blue + at the top right opens Add Vendor, and it is two address books side by side.
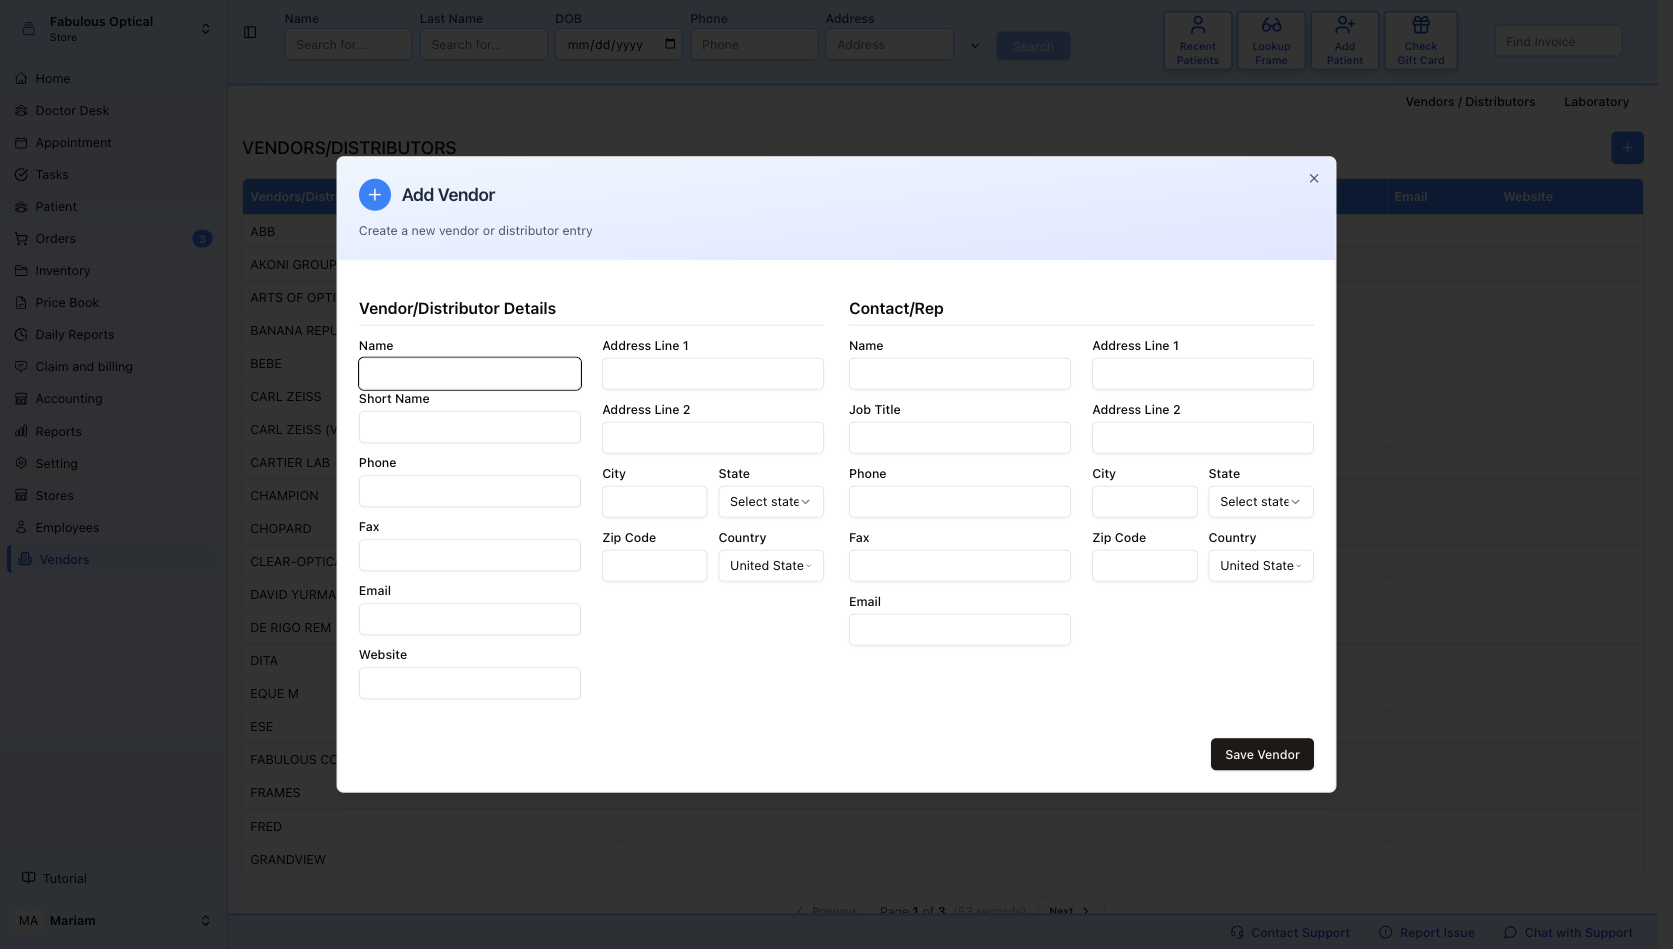
Vendor/Distributor Details — the company: Name, Short Name, Phone, Fax, Email, Website, and its address (Address Line 1 and 2, City, State, Zip Code, Country).
Contact/Rep — the person you actually deal with there: Name, Job Title, Phone, Fax, Email and their own address. This is the rep who takes your call when a frame order is late, so it is the half worth filling in even when you skip the rest.
Nothing is marked required and Save Vendor will take an entry with only a name — which is how name-only rows appear. Short Name is what shows up in tight columns elsewhere, so give it one.
The vendor card
Click a vendor's row to open its card. The vendor's name is the title, and a menu down the left switches between six tabs: Details, Agreements, Contacts, Frames, Contact Lens and Lenses.
Save Changes at the bottom of the left menu saves the Details tab and closes the card.
Delete at the top right removes the vendor at once — there is no "are you sure?". It sits right next to the window's close cross, so take care.
Details
The company itself, in two columns. Contact: Vendor Name, Short Name, Phone, Fax, Email, Website, and two ticks, Lab and Visible. Address: Street Address (it suggests matching addresses as you type and fills the rest in when you pick one), Address Line 2, City, State, Zip Code, Country.
Tick Lab and a VisionWeb Account block appears with Account #, SLO ID, VW Bill and VW Ship — the account numbers this supplier gave the practice in VisionWeb.
Agreements
Where the signed paperwork with this vendor lives — price agreements, terms, contracts — so nobody has to dig for them in a drawer.
Each agreement is one line: its title and the period it covers, start date to end date. No agreements yet when there are none.
To add agreements:
- Press Add Agreement (the dashed button under the list). The Upload Agreements window opens.
- Under Select PDF Files pick one or more PDFs. Only PDFs are taken — anything else is dropped with the warning Only PDF files are allowed.
- Each chosen file gets its own small card. Check the Title (it starts as the file name), and fill in Start Date and End Date. The cross on a card takes that file out of the batch.
- Press Upload (2) — the number is how many files are going. Cancel closes without uploading.
The window closes and the new agreements appear in the list.
To open or remove one, hover over its line: two icons appear on the right. The eye opens the PDF in a large window, with a Download PDF button under it. The bin deletes the agreement straight away, with no confirmation.
Fill in both dates when you upload — they are what the list shows, and the quickest way to see whether an agreement is still current.
Contacts
The rep at this vendor — Name, Job Title, Phone, Fax, Email and their address. This tab has its own Save button underneath; use it, not Save Changes, after changing the rep. Like Save Changes, it closes the card when the save goes through.
A receipt from this vendor shows the rep's Phone, Fax and Email as the vendor's contacts (see Receipts, transfers and returns). Any of them the rep does not have — all three, when there is no rep — is taken from the vendor's own on Details.
Frames, Contact Lens and Lenses
The brands this vendor supplies, one tab per kind of product. The table shows Brand Name, Can Lookup, Print Model on Tag, Print Price on Tag, Short Name and Discount.
Add Brand opens a short form: Brand Name, Short Name, Return Policy, Note, Discount (%) and the three ticks — then Save Changes. Click an existing brand to edit it; the edit window also shows the brand's Pricing Rules (see Pricing formulas) and a Delete Brand button, which removes the brand from this vendor at once, with no confirmation.
A brand added on the Lenses tab is this vendor's lens brand in the Price Book too, listed with this vendor even before any lens of that brand is in the catalog.
Laboratory
The second tab is the list of labs that make lenses.
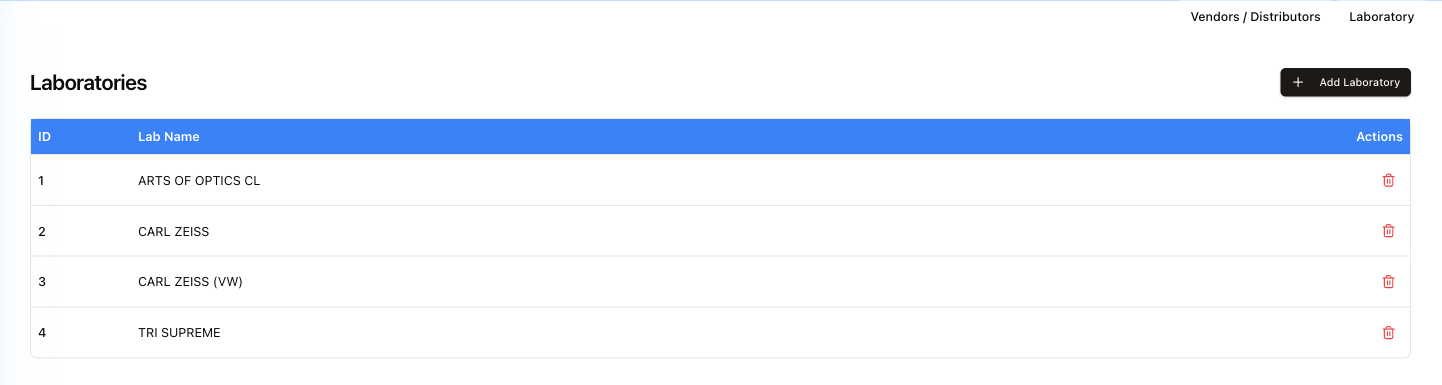
Deliberately spare: ID (just the row number in this list), Lab Name, and a red bin in Actions. Click anywhere else on the row to edit it — the same form opens as Edit Laboratory. Which lab a job goes to is chosen on the lab ticket — this list is what that dropdown offers.
Deleting asks for confirmation first, and the delete is permanent. Do not delete a lab that still has jobs in flight — their tickets point at it.
Add Laboratory opens a single-column form:
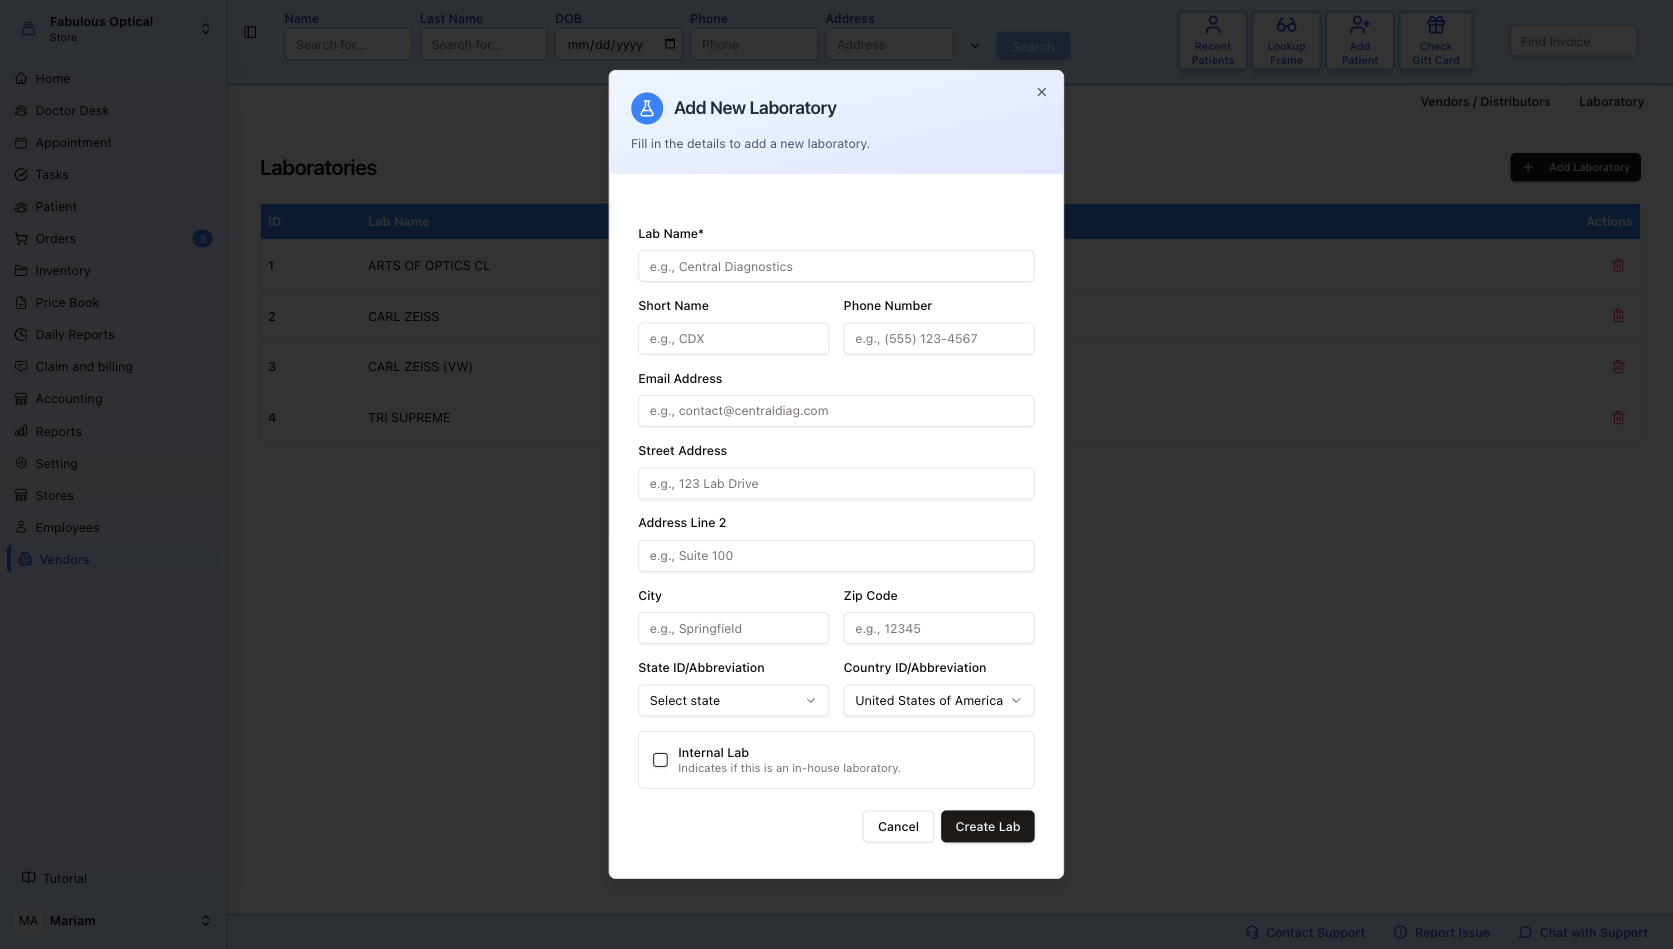
Lab Name is the one field marked with an asterisk — the form does not actually stop you saving without it, so always fill it in. Then Short Name, Phone Number, Email Address, and the address — Street Address, Address Line 2, City, Zip Code, State ID/Abbreviation, Country ID/Abbreviation.
At the bottom sits the tick that matters: Internal Lab — Indicates if this is an in-house laboratory. Tick it for a lab bench in your own back room, leave it clear for an outside lab you ship to. Create Lab saves a new lab (Save Changes on an existing one); Cancel closes without saving.
Note that a lab added here is not the same thing as an integration. Electronic ordering — sending the job to Zeiss or through VisionWeb from the lab ticket — is switched on separately in Integrations. A lab in this list with no integration behind it is one you send paperwork to.