Settings — the lists the rest of the system chooses from
Settings is where the practice's own vocabulary lives. Almost every dropdown you meet elsewhere — lens types, ticket statuses, payment methods, insurance companies — is a list defined here. Change a list, and the dropdown that reads from it changes for everyone.
How it is organised
The sidebar turns into the settings menu. A Home link back to the app sits at the top, then three collapsible groups:
| Group | What is inside |
|---|---|
| General | Integrations, Appointment, Security |
| Modules | Optical, Frames, Prof Service, Additional Services, Insurance, Inventory, Invoice, Employee |
| Marketing | Mailing |
Tutorial at the bottom of the menu is not a settings page — it is a link out to this wiki.
The Marketing group also shows a second entry next to Mailing, spelled Markieting. It has no page behind it; clicking it opens a blank screen.
How every settings page works
Pick a module, and it opens with its own list of sections down the middle. Choose a section and its values fill the table on the right.
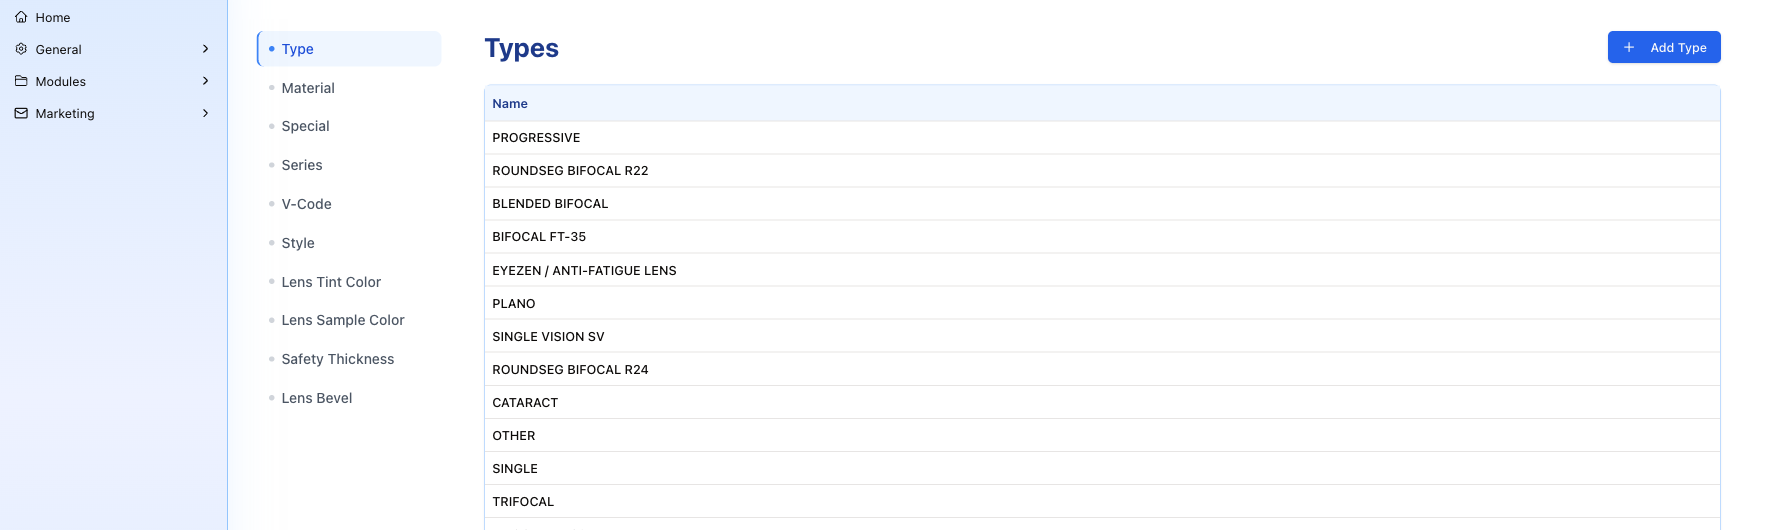
Above the table sits Add (or Add Type, Add Material — named for what it adds). The table itself is the list as the rest of the system sees it. To change or remove a value, open it: on the Optical lists press the pencil on its row, on the other modules click the row itself. The window that opens has Save and Delete. Two lists can only be added to: Type and Material under Optical have no pencil.
That is the pattern for most modules. Integrations, Appointment, Security, Inventory and Mailing are the exceptions: each works in its own way, described on its own page below.
Optical
The lens vocabulary: Type, Material, Special, Series, V-Code, Style, Lens Tint Color, Lens Sample Color, Safety Thickness, Lens Bevel.
Open Type and you get exactly the list the doctor picks from on a lab ticket — Progressive, Single Vision SV, Bifocal FT-28, Cataract, Plano and the rest. Add a lens type here and it appears on the ticket; the two are the same list seen from opposite ends.
Invoice
Three sections: Lab Ticket, Invoices, Notifications.
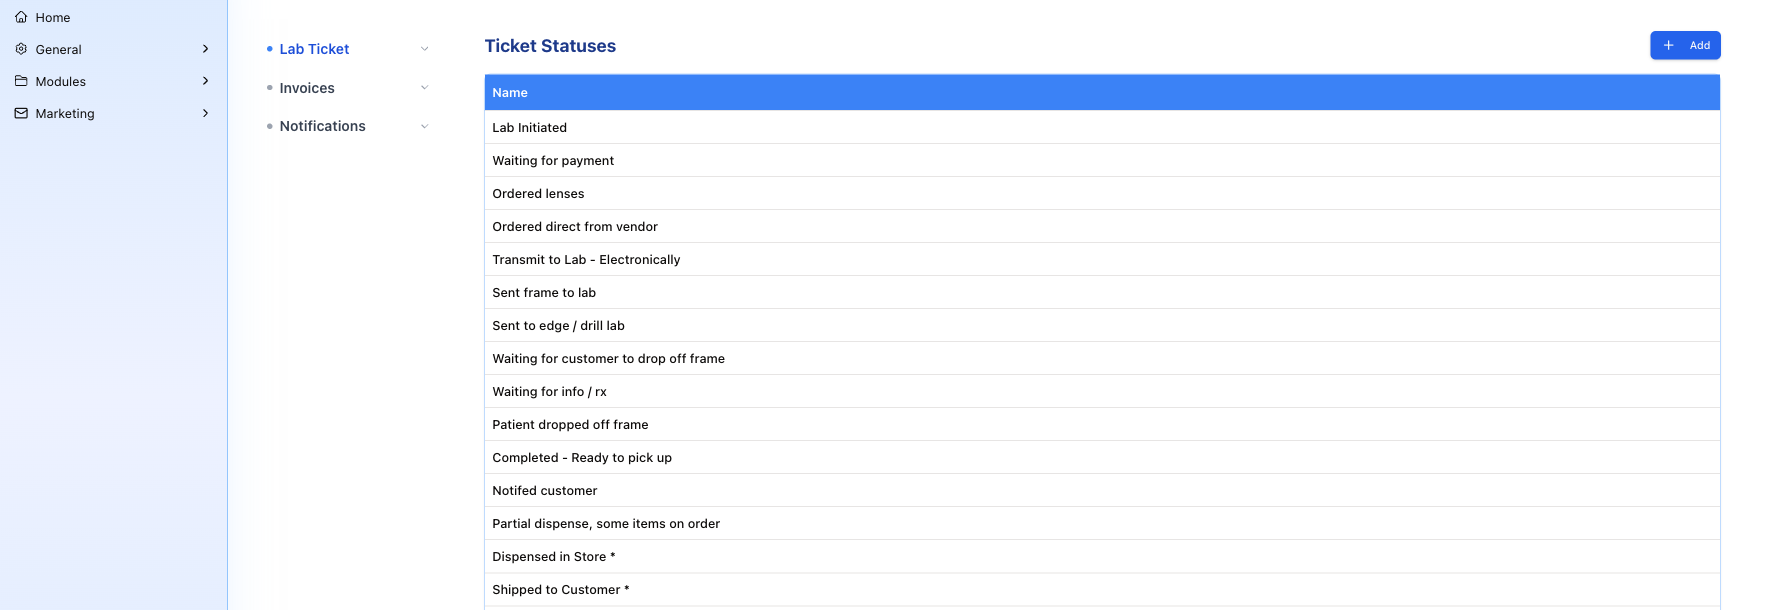
Lab Ticket → Ticket Statuses is the one worth knowing. It defines every state a job can be in — Lab Initiated, Waiting for payment, Ordered lenses, Sent frame to lab, Waiting for customer to drop off frame, Completed - Ready to pick up, Notifed customer, Dispensed in Store, Cancelled - job made — and that is the list the Status dropdown on a lab ticket offers, and what the status filter on the Orders screen offers.
So the statuses your practice actually uses are a decision made here, not a fixed feature.
The other modules
- Frames — frame shapes and frame materials.
- Prof Service and Additional Services — the service categories and extras that can go on an invoice.
- Insurance — insurance companies, coverage types, and how insurers settle.
- Inventory — the pricing formulas that turn cost into a shelf price.
- Employee — two sections: Job Titles (and which of them count as a doctor) and Discounts — the biggest discount each job title may give on an invoice, per type of item. A bigger discount has to be approved by a manager in Requests.
- Integrations — Payments (card terminals), VisionWeb, TriZetto, Payer Crosswalk and OptikamPad.
- Appointment — online booking, intake forms, appointment reasons and slot length.
- Security — one switch, Require two-factor sign-in for everyone (web), that makes two-factor sign-in compulsory for the whole organisation.
- Mailing — the mailbox the practice sends from, and the look of its letters.
Each module in full
| Page | What it covers |
|---|---|
| Appointment settings | Which locations accept online requests, intake forms, appointment reasons, slot length |
| Invoice settings | Ticket and lens statuses, notifications, payment methods, auto-transfer, SMS templates |
| Value lists | Optical, Frames, Insurance, Services, Job Titles, Discounts |
| Pricing formulas | Per-brand rules turning cost into a retail price |
| Integrations | Card terminals, VisionWeb, TriZetto, Payer Crosswalk, OptikamPad |
| Mailing | SMTP mailboxes and email designs |
| Security | Two-factor sign-in required for everyone on the web |
A word of caution
These lists are shared. Renaming a value renames it everywhere the name is shown, and deleting one takes the option away from every screen that offered it. Add freely; edit and delete with more care, and never delete something mid-season because a job in progress is using it.